
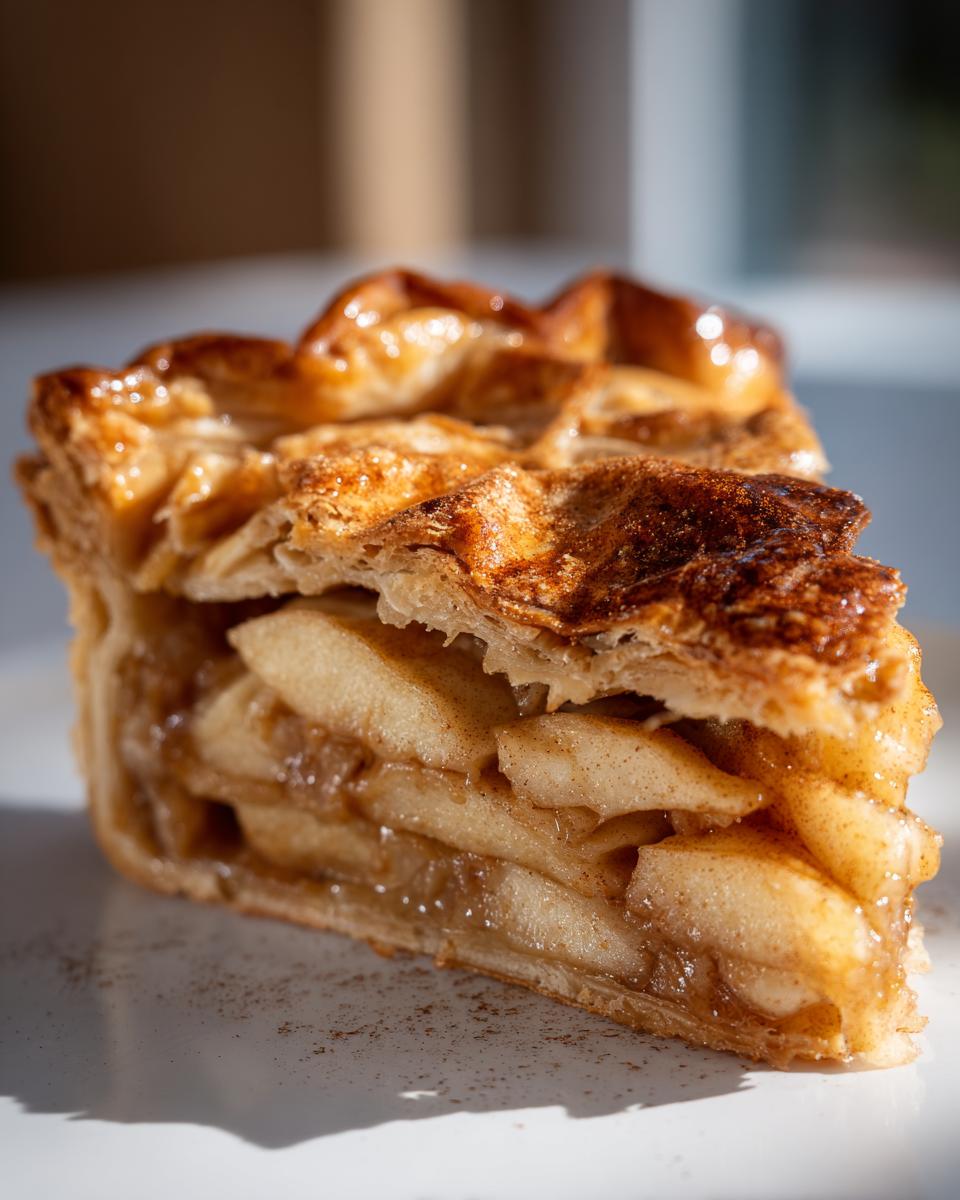
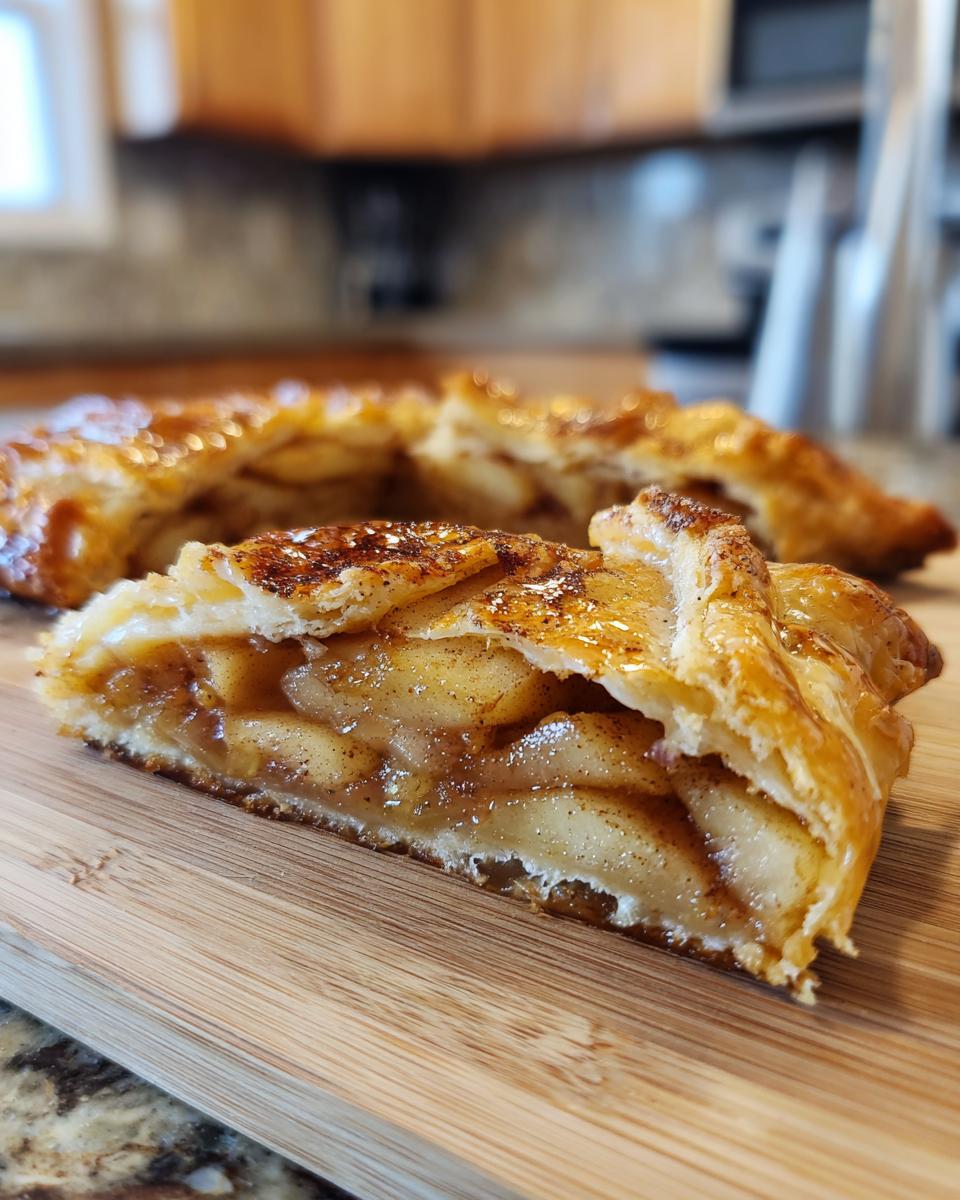
You know, sometimes you don’t want the fuss of a perfect pie. No fancy crimping, no double crust worries! That’s why I absolutely adore rustic desserts, and nothing beats a simple, free-form tart. This Honeycrisp Apple Galette is my go-to when I want something stunning on the table without spending hours fussing in the kitchen. The beauty of this recipe is the contrast: it gives you that incredibly flaky, buttery crust wrapped around sweet, tart Honeycrisp apples that just melt in your mouth.
It’s perfect for a casual weeknight treat or when friends drop by unexpectedly. Honestly, the uneven edges are my favorite part—it proves it was made with love, not factory precision! You just can’t beat the smell when this baked apple dessert comes out of the oven.

Why You Will Love This Honeycrisp Apple Galette
- It’s incredibly forgiving! If you can fold dough over edges, you can master this rustic tart.
- The crust is pure heaven—flaky layers guaranteed, thanks to keeping everything ice cold.
- Those Honeycrisp apples hold their shape beautifully while getting perfectly tender inside.
Flaky Pastry, Effortlessly Achieved
Listen, traditional pie crust scares people, but this galette crust? It’s my secret weapon. You don’t need pie plates or fancy crimping tools. We just work fast with the butter and water—keeping them frigid ensures those flaky layers form up while baking. It’s the flakiest dough you can make without breaking a sweat!
The Perfect Honeycrisp Apple Galette Filling
Honeycrisp apples are the star here. They are firm, so they don’t turn to mush, and they have that fabulous sweet-tart combination that screams autumn. Mixed with just a touch of cinnamon, it’s pure, unpretentious joy. It tastes like a fancy dessert, but it’s really just fruit and butter, you know?
Essential Ingredients for Your Honeycrisp Apple Galette
Gathering your ingredients is half the fun! For this recipe, we aren’t worried about specialty items, just good quality pantry staples. We need three main groups: the dough components, the simple filling, and that shiny topping. Remember, this crust relies on cold fat, so be ready to work fast! If you’re itching for another super simple kitchen helper, you might want to check out how to make simple syrup, though we don’t need it here!
For the Flaky Galette Dough
This is the foundation, so keep things chilly! You’ll need 1 1/2 cups of all-purpose flour and 1/2 teaspoon of salt to start. Then, the star: 1/2 cup of cold unsalted butter, cut into small cubes—trust me, if the butter looks soft, pop it back in the freezer for ten minutes! We finish the dough with 4 tablespoons of ice water. No substitutions on coldness here; that’s how we get the flakiness!
For the Honeycrisp Apple Filling
For the apples, grab 3 medium Honeycrisp apples. It’s crucial they are sliced very thinly—I mean almost paper-thin—so they bake evenly. Toss those slices with 2 tablespoons of granulated sugar, 1 tablespoon of lemon juice (this brightens the flavor and stops them from turning brown!), and 1 teaspoon of ground cinnamon. That combo is magic against the tartness of the apple.
For the Golden Finish
We only need two things to make the crust look gorgeous. First, one large egg, beaten well for the egg wash—this gives it that deep golden glow. Second, a sprinkle of 1 tablespoon of coarse sugar right over the edges. Those little crystals catch the light beautifully when they bake!
Step-by-Step Instructions for the Honeycrisp Apple Galette
Okay, this is where the real fun starts! We need to move efficiently, but don’t panic if you need a quick moment to wash your hands—it’s worth it. We’re going from bowl to oven in about an hour total, which is amazing for something that looks this impressive. If you’re looking for another exciting baked fruit treat, you have to check out this caramel apple pie recipe later!
Preparing the Rustic Pastry Dough
First things first: the dough. In a big bowl, whisk together your flour and salt. Now take that super cold, cubed butter and use a pastry blender or your fingers to work it into the flour. You are looking for a mixture that looks like coarse sand mixed with some small pea-sized lumps of butter—leave those lumps! Those are your flaky layers, so don’t overwork it.
Next, drizzle in the ice water, just one tablespoon at a time, mixing until the dough starts to hold itself together when you squeeze a bit. Form it into a disk—it won’t be perfect, and that’s fine. Wrap that beauty up tightly and let it chill in the fridge for at least 30 minutes. Patience pays off here, I promise!
Assembling the Honeycrisp Apple Filling
While the dough chills, get your apples ready. Take your thinly sliced Honeycrisp apples and toss them gently in a separate bowl with the granulated sugar, the cinnamon, and that tablespoon of lemon juice. That little bit of acid is brilliant because it keeps the apples from oxidizing and turning brown while they wait for the oven. Since they are sliced so thin, they absorb the spices beautifully.
Forming and Baking Your Honeycrisp Apple Galette
Time to roll! Dust your counter lightly and roll that chilled dough into a rough 12-inch circle. It doesn’t have to be round—rustic, remember? Carefully transfer this whole thing onto a baking sheet lined with parchment paper. Now, arrange your spiced apples right in the middle, making sure you leave a nice 2-inch border all around the edge.

Gently fold that dough border up and over the edges of the fruit. It’ll look messy and amazing! Brush that exposed crust with your beaten egg and then sprinkle it liberally with the coarse sugar. Pop this into a preheated oven at 400 degrees Fahrenheit—that’s 200 Celsius—and bake it for about 30 to 35 minutes until that crust is gloriously golden brown. Let it cool just a tiny bit before slicing it up!
Tips for the Best Honeycrisp Apple Galette Crust
Achieving that airy, shatteringly crisp crust is honestly the biggest win with this Honeycrisp Apple Galette. Since we aren’t using a pie pan to hold everything together, the structure relies completely on how well we treat the dough. Trust me, I learned this the hard way after one sad, tough batch!
Keeping Ingredients Cold is Key
If the butter isn’t cold—I mean bone-chillingly cold—it melts instantly when it hits the flour. When that happens, you just get a tough, cookie-like crust instead of flaky layers. Make sure your butter is cubed and if your kitchen is warm, even pop the flour bowl in the freezer for ten minutes before starting. The ice water absolutely cannot be substituted with room-temperature water!
Handling the Dough Gently
Once you start adding that ice water, your job is to just bring it together. Don’t knead it, don’t press it, don’t mush it! As soon as you don’t see loose flour anymore, stop mixing immediately and wrap it up. Overworking the dough develops the gluten too much, and that’s when your lovely, flaky pastry turns into something you could probably use as a doorstop. We want tender layers of butter, not strong gluten networks!
Ingredient Substitutions for Your Honeycrisp Apple Galette
Look, I’m a huge fan of Honeycrisp apples—they are unbeatable for that perfect tart-sweet crunch—but shopping can be tricky sometimes! If your recipe demands a Honeycrisp Apple Galette but the store only has Granny Smiths, don’t sweat it. For the apples, firm varieties like Fuji, Gala, or even that classic Granny Smith will totally work.
You might have to adjust the sugar slightly depending on how sweet the apples are naturally. If you use a tart apple like Granny Smith, maybe add an extra teaspoon of granulated sugar to the filling. Don’t skip the lemon juice, though, seriously!
Now, let’s talk about the crust, because sometimes that cold butter is just not cooperating. While I insist real unsalted butter gives you the best flavor and texture, if you are really in a pinch, you can substitute about half the butter with a good quality vegetable shortening. Shortening is higher in fat and keeps its temperature better, which honestly helps with flakiness sometimes, though the flavor won’t be quite as rich. Just try to keep whatever fat you use ridiculously cold!
Oh, and since we are talking about additions, sometimes I get nervous about the coarse sugar on top. If you don’t have any coarse sugar, you can absolutely just double up on the egg wash and let it brown on its own, or even use regular granulated sugar—it just won’t have that lovely, crunchy texture on the crust.
Serving Suggestions for This Honeycrisp Apple Galette
My favorite part about baking this Honeycrisp Apple Galette is that it’s fantastic all by itself, but serving it warm is what elevates it to a showstopper, you know?
The absolute classic, which my mother insists upon, is a big scoop of good quality vanilla ice cream melting right over the warm, spiced apples. That hot/cold contrast is just heavenly. I mean, who doesn’t love that combination? The creaminess cuts through the buttery pastry so nicely.
If you want something less melt-y, a drizzle of salted caramel sauce is just decadent. You don’t even need to make it from scratch; a jarred topping works wonders when you’re in a rush. It really complements the natural caramel notes of the baked Honeycrisp apples perfectly.
For those who prefer something slightly sharper, a dollop of crème fraîche or even just some plain, slightly sweetened whipped cream is wonderful. It keeps the dessert lighter while still giving you that necessary coolness. If you’re planning on having smoothies later in the week, check out this great recipe for a peanut butter banana smoothie—that’s a completely different kind of tasty treat!
Honestly, you can’t go wrong, but please, serve it slightly warm. Cold galette is polite; warm galette is an event!
Storage and Reheating Instructions for Leftover Honeycrisp Apple Galette
Now, I usually hope there aren’t any leftovers because this Honeycrisp Apple Galette disappears fast, but life happens, right? Storing this rustic tart is easy, which is another reason I love it over traditional pies that need elaborate care. It handles sitting out for a little while much better than some fussy desserts.
If you have any left, first let it cool completely on the counter. You want all that moisture to stabilize before you cover it up. For short-term storage—say, the very next day—leaving it loosely covered on the counter is totally fine. Just cover it loosely with plastic wrap or foil, just enough to keep dust off, but don’t seal it tight! We want to try and keep that crust from getting soggy.
Keeping it Fresh at Room Temperature
I find that if you plan to eat the rest within 24 hours, room temperature storage works best for the crust texture. The cold draws moisture into pastry, making it chewy, and we definitely don’t want that! Keep it somewhere cool, away from direct sunlight.
Refrigerating for Longer Storage
If you need to keep it for two or three days, then the fridge is where it needs to go. Wrap it up a bit more securely—maybe in plastic wrap, and then put that in a zip-top bag. This helps keep that apple filling safe, although you might notice the crust softens up a bit in the cold.
How to Bring Back the Crispness
This is the most important tip for leftovers: never use the microwave! Microwaves turn pastry into sad, rubbery blankets. To get that lovely, flaky texture back, you absolutely must use an oven or an air fryer. Preheat your toaster oven or standard oven to about 325 degrees Fahrenheit. Place a slice directly on the rack or on a piece of foil and heat it for about 7 to 10 minutes.
You’ll know it’s ready when the apples are warm again and the crust edges feel slightly crisp to the touch. It tastes almost freshly baked, I swear! If you decide you don’t want leftovers after all and are looking for something wonderfully cold and creamy instead, maybe check out my tips on making great iced tea to go alongside it!
Frequently Asked Questions About Making a Honeycrisp Apple Galette
It seems like every time I publish this recipe, people send me the same great questions! You probably have a few pop up while you’re getting ready to bake your own Honeycrisp version. Don’t worry, these small details are what separate a good baked apple dessert from a great one. Here are the things I hear most often!
Can I make the galette dough ahead of time?
Oh, absolutely! I often make the dough the night before, honestly. That chilling time is crucial anyway, and making it ahead just saves you time when you actually want to bake. Just wrap that disk up tightly in plastic wrap—make sure it’s sealed well—and keep it in the fridge for up to two days. If you let it sit much longer than that, it might get a little tired. Just remember, if it’s been sitting in the fridge for more than an hour, let it sit on the counter for just 5 or 10 minutes before rolling so it’s not rock hard, but it still needs to be cold!
What happens if my crust browns too quickly?
This is a super common issue with fruit tarts because the exposed edges get all that direct heat! If you notice the crust or the sugar topping is getting too dark before the apples look tender in the middle, don’t panic and pull the whole thing out. Just grab a small piece of aluminum foil—a square big enough to cover the perimeter of the crust—and loosely tent it over the edges. It shields the dough from burning while letting the middle finish cooking through. It’s a baker’s little white lie that works every time!
Do I need to peel the Honeycrisp apples for this rustic tart?
This is where personal preference really comes in for a rustic tart! For this particular Honeycrisp Apple Galette, my recommendation is that you don’t have to peel them. Since Honeycrisp skins are relatively thin and they soften up nicely during the 35-minute bake time, leaving the skins on adds a tiny bit of color variation and texture to the filling. Plus, you save about five or ten minutes of peeling time! If you really hate the texture of cooked apple skin, go ahead and peel them, but for that authentic, rough-and-ready look, keep the skins on!
Estimated Nutritional Information for This Honeycrisp Apple Galette
Okay, so we’ve baked up this amazing Honeycrisp Apple Galette, and now we have to talk about the boring stuff—the numbers! I always want to be upfront that these figures are just estimates based on how I portion it out. Remember, this recipe yields about 6 generous servings, so the information below is per slice.
You’re getting a decent amount of carbohydrates from the crust and apples, but look at that fat breakdown—a lot of that good, tasty fat coming from the butter in our flaky pastry! Please keep in mind this isn’t a low-fat dessert; it’s a treat. If you usually skip dessert posts, maybe put this one on your ‘splurge’ list!
- Serving Size: 1 slice
- Calories: 310
- Sugar: 18 grams
- Sodium: 150 mg
- Total Fat: 16 grams (9g Saturated Fat)
- Protein: 4 grams
- Fiber: 3 grams
- Cholesterol: 45 mg
It’s a lovely balance for a baked apple dessert, rich enough to satisfy without completely overloading you. Enjoy every single bite!
Print
Honeycrisp Apple Galette
- Total Time: 60 min
- Yield: 6 servings 1x
- Diet: Vegetarian
Description
A simple, rustic tart featuring thinly sliced Honeycrisp apples baked in a flaky crust.
Ingredients
- 1 1/2 cups all-purpose flour
- 1/2 teaspoon salt
- 1/2 cup (1 stick) cold unsalted butter, cut into cubes
- 4 tablespoons ice water
- 3 medium Honeycrisp apples, thinly sliced
- 2 tablespoons granulated sugar
- 1 tablespoon lemon juice
- 1 teaspoon ground cinnamon
- 1 large egg, beaten (for egg wash)
- 1 tablespoon coarse sugar (for sprinkling)
Instructions
- Combine flour and salt in a bowl. Cut in the cold butter using a pastry blender or your fingers until the mixture resembles coarse crumbs.
- Add ice water one tablespoon at a time, mixing until the dough just comes together. Form into a disk, wrap in plastic, and chill for at least 30 minutes.
- In a separate bowl, toss the apple slices with granulated sugar, lemon juice, and cinnamon.
- Preheat your oven to 400 degrees Fahrenheit (200 degrees Celsius). Line a baking sheet with parchment paper.
- On a lightly floured surface, roll the chilled dough into a rough 12-inch circle. Transfer the dough to the prepared baking sheet.
- Arrange the apple slices over the dough, leaving a 2-inch border around the edge.
- Fold the dough border up and over the edges of the apples to create a rustic crust.
- Brush the exposed crust with the beaten egg and sprinkle with coarse sugar.
- Bake for 30 to 35 minutes, or until the crust is golden brown and the apples are tender.
- Let cool slightly before slicing and serving.
Notes
- For a flakier crust, keep the butter and water very cold.
- You can substitute other firm apples if Honeycrisp apples are unavailable.
- Serve warm with vanilla ice cream if desired.
- Prep Time: 25 min
- Cook Time: 35 min
- Category: Dessert
- Method: Baking
- Cuisine: American
Nutrition
- Serving Size: 1 slice
- Calories: 310
- Sugar: 18
- Sodium: 150
- Fat: 16
- Saturated Fat: 9
- Unsaturated Fat: 7
- Trans Fat: 0
- Carbohydrates: 38
- Fiber: 3
- Protein: 4
- Cholesterol: 45
Keywords: apple galette, Honeycrisp apple, rustic tart, pastry, baked apple dessert