
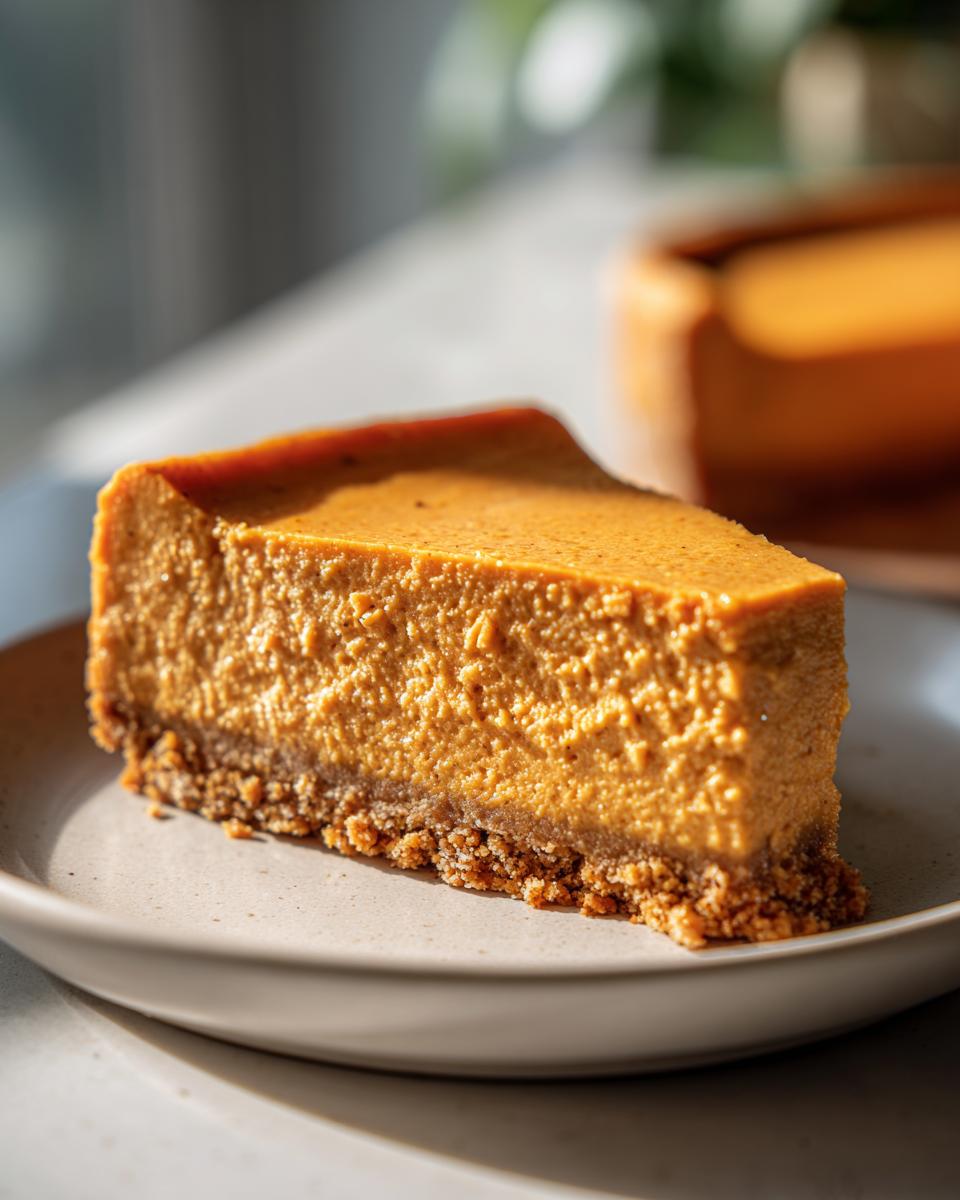
Oh, friend, when the air gets that crisp snap and you start craving warmth, nothing hits the spot quite like a slice of perfect, creamy dessert. Forget those complicated multi-layer tortes; if you want fall baking without the fuss, you need my recipe for the absolute **Pumpkin Cheesecake**. This isn’t some fancy bakery version—this is the straightforward, no-fail recipe I perfected after years of slightly burned crusts and cracked tops.
I remember the first time I tried making cheesecake for Thanksgiving; it was a disaster. All cracked and weeping! But I figured out the secret: keep it simple, and respect the water bath. My version uses that amazing graham cracker crust and a filling thick with real pumpkin and just the right amount of spice. Trust me, once you see how easy it is to get that velvety, melt-in-your-mouth texture, this creamy **Pumpkin Cheesecake** will be your annual fall tradition, too.

Why This Simple Pumpkin Cheesecake Recipe Works So Well
This recipe really cuts through all the unnecessary drama that sometimes surrounds cheesecake. You get that rich, intense pumpkin flavor and that incredibly smooth, dense texture without needing a culinary degree! When I first started adapting this, I realized the key was keeping the steps clear and respecting the heat.
- It’s surprisingly fast to mix together—the prep time is really short, so you can be chilling before you know it.
- The reliance on the water bath means you get a beautifully smooth, crack-free top that looks absolutely professional, even if you were rushing!
- The spices are spot on—not too much cinnamon hiding the pumpkin, just enough warmth to feel like autumn in a bite.
If you’re looking for a dessert that screams cozy holidays but doesn’t keep you hovering over the oven for hours, this is it. And hey, if you’re looking for another great pumpkin treat, I’ve got a silly smooth pumpkin pie smoothie you might enjoy for breakfast!
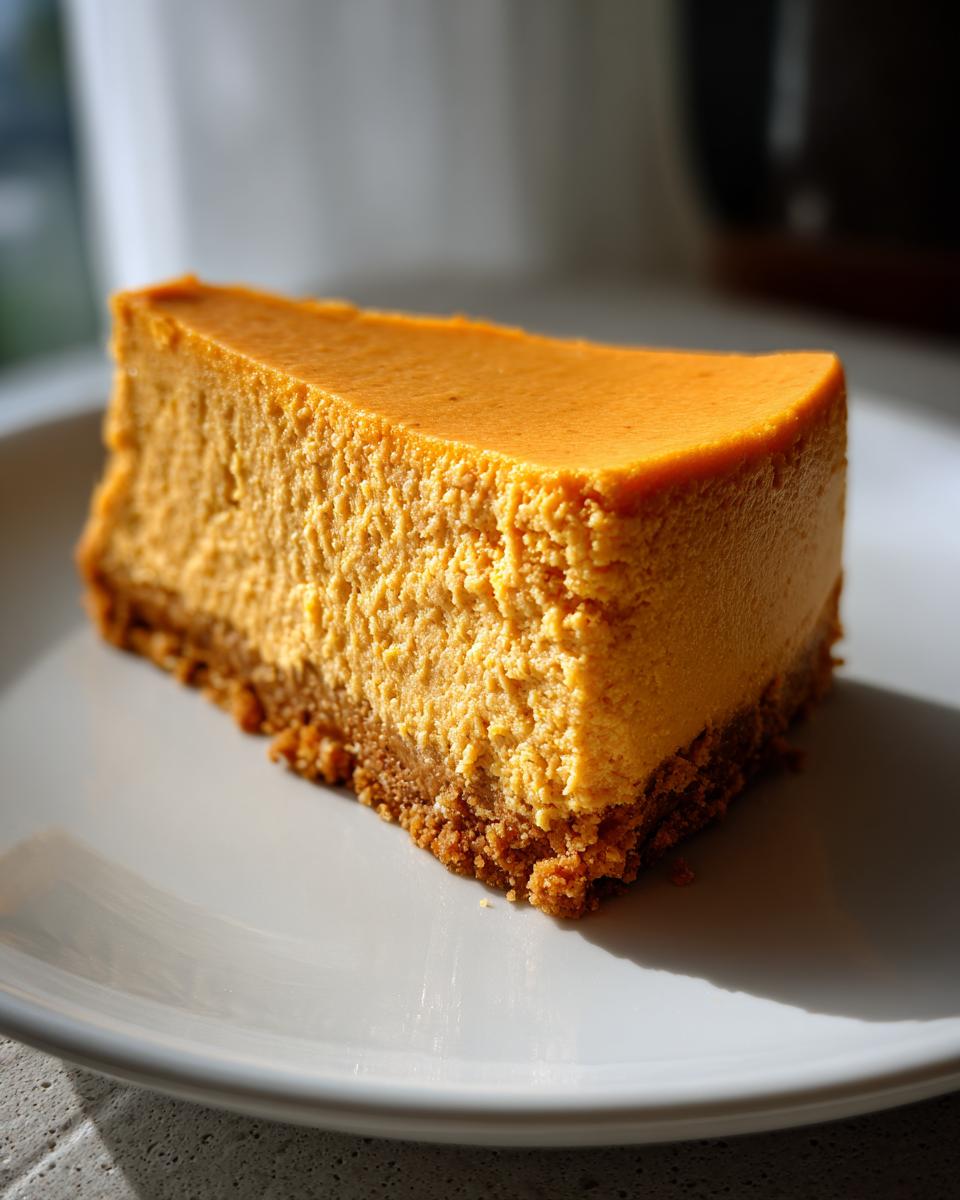
Achieving the Perfect Creamy Pumpkin Cheesecake Texture
Texture is everything with cheesecake, right? You want it tight, but never grainy. The water bath isn’t just fancy talk; it creates this gentle, steamy environment so the edges don’t bake faster than the center. That’s how you get those terrible cracks!
My biggest tip to keep it smooth? Don’t touch your mixer once those eggs are in! Seriously. Beat the cream cheese until it’s totally smooth with the sugar first. Once those eggs go in, just mix until you see *just* uniform color. Overmixing whips air in, and that air expands in the heat, causing your lovely **Pumpkin Cheesecake** to collapse or crack when it cools down. Let the oven do the heavy lifting!
The Flavor Balance of Our Spiced Pumpkin Cheesecake Filling
We aren’t messing around with a million spices here, just the holy trinity: cinnamon, ginger, and nutmeg. Those three together are pure magic with pumpkin. The cinnamon brings that familiar sweetness, but the ginger gives it a little necessary lift so it doesn’t taste flat.
It’s just enough spice to remind you it’s fall without tasting like you accidentally dumped the whole spice jar in. It complements the tangy cream cheese perfectly. Every bite is balanced—earthy pumpkin, slight tang, and warming spice.
Essential Ingredients for Your Pumpkin Cheesecake
Okay, getting the ingredient list right is where we secure that perfect texture and flavor. It seems simple, but cheaping out on a couple of key items can ruin a whole cheesecake, trust me! We’re aiming for top-notch creaminess here. Forget the shortcuts; quality ingredients make this **Pumpkin Cheesecake** taste like it came from a fancy bakery, but without any of the fuss or the giant price tag.
If you’re looking for another way to use up that lovely fall flavor inspiration, check out my recipe for a great pumpkin spice smoothie—it’s breakfast perfection!
For the Graham Cracker Crust of the Pumpkin Cheesecake
The base has to hold up to that heavy, creamy filling. Here’s what you need to secure that bottom layer:
- 1 1/2 cups graham cracker crumbs – make sure they’re fine!
- 1/4 cup granulated sugar – this helps it brown up nicely.
- 6 tablespoons unsalted butter, melted – gotta use the real stuff here for the best flavor.
Just mix those three things up until it looks like damp sand, and you’re good to press it down firmly. Don’t get shy; press it hard so it doesn’t crumble when you slice it later!
For the Creamy Pumpkin Cheesecake Filling
This is where the magic happens, and boy, do the temperatures of these ingredients matter! If your cream cheese is even a little cold, you’ll end up with lumps, and nobody wants a bumpy **Pumpkin Cheesecake**.
- 2 (8 ounce) packages cream cheese, softened – make sure they are fully at room temperature!
- 1 cup pumpkin puree (not pumpkin pie filling, please!) – this is crucial for pure pumpkin flavor.
- 3/4 cup granulated sugar – this sweetens it just right.
- 2 large eggs – your binder!
- 1 teaspoon vanilla extract
- 1 teaspoon ground cinnamon
- 1/2 teaspoon ground ginger
- 1/4 teaspoon ground nutmeg
The single most important note here is the cream cheese. Let it sit out for at least an hour. It needs to be totally soft so it whips up smooth like silk!
Step-by-Step Instructions for Perfect Pumpkin Cheesecake
This is it—the roadmap to turning those lovely ingredients into the best **Pumpkin Cheesecake** you’ve ever tasted! Don’t let the steps intimidate you; we’re just being methodical now so we can celebrate later. Remember, patience during the cooling phase is just as important as hitting the temperatures right!
Preparing and Pre-Baking the Crust
First things first: get your oven preheated to 350 degrees F (175 degrees C). Before we do anything else, take that 9-inch springform pan—this is important—and wrap the outside completely with two or three layers of heavy-duty aluminum foil. We don’t want *any* water sneaking into that crust! Mix your graham cracker crumbs, 1/4 cup of sugar, and melted butter until it’s all just damp. Press that mixture down into the bottom of your wrapped pan. You need it really firm! Pop it into the oven to pre-bake for just 10 minutes. When that’s done, pull it out, let it cool for a bit while you get the filling ready.
Mixing the Smooth Pumpkin Cheesecake Filling
Now we cool things down a bit! Before you mix the filling, reduce your oven temperature down to 325 degrees F (160 degrees C)—this gentle heat is key for a smooth bake. In a big bowl, beat that softened cream cheese until it looks absolutely lump-free. Add the 3/4 cup of sugar and beat that in too. Now, introduce the pumpkin puree, eggs, vanilla, and all your lovely spices—cinnamon, ginger, and nutmeg. Mix it slowly! I mean it, we aren’t whipping meringue here. Just mix until *just* combined. If you beat it too long, you’ll introduce too much air, and we know what that causes!
Baking the Pumpkin Cheesecake with a Water Bath
This step ensures total perfection! Take your springform pan (with the filling already poured over the crust) and place it inside a larger roasting pan. This is where the magic bath comes in! Carefully pour some hot water into that outer roasting pan until the water comes about halfway up the sides of your cheesecake pan. It creates humidity! Slide the whole setup gently into the oven.
Bake it for about 55 to 65 minutes. You are looking for that perfect moment where the edges of the **Pumpkin Cheesecake** look set and firm, but if you gently nudge the pan, the very center still has a tiny bit of movement, like thick jelly. Don’t cook it until the center is stiff, or it will crack when it cools!
Cooling and Chilling Your Finished Pumpkin Cheesecake
The cooling process deserves its own respect! When that time is up, turn the oven off completely. Don’t take the cheesecake out yet! Prop the oven door open just a tiny crack (maybe stick a wooden spoon in there) and let that cheesecake sit in the residual warmth for a full hour. This slow transition prevents harsh temperature shock. After an hour in the oven, take it out of the water bath, remove the foil, and let it cool completely on a wire rack on your counter.
Once it’s room temperature, cover it loosely and move it to the fridge. You *must* chill it for at least 6 hours, but honestly, overnight is the absolute best. That chilling time lets the flavors totally settle and firms up that creamy filling so you can slice it beautifully. We can chat about adding toppings after that long wait!
If you want some good ideas on what to sip alongside this stellar dessert, check out my review on pumpkin pie smoothie recipes for a fun pairing!
Tips for Success When Making Pumpkin Cheesecake
Honestly, making a truly great **Pumpkin Cheesecake** is about avoiding panic more than anything else! Follow these simple tips, and you’ll feel like a seasoned pro by the time you’re slicing into it. We want maximum smoothness and zero leaks, right?
We’re going to talk about getting that batter silky and keeping the water bath exactly where it should be.
Cream Cheese Temperature is Key for Smooth Pumpkin Cheesecake
I cannot stress this enough: if your cream cheese is even slightly cold, you are going to fight lumps the entire time you mix. And lumps mean an uneven bake, which means cracks! Pull that cream cheese out hours ahead of time. It needs to be totally soft—you should be able to press a finger into it easily without resistance. When it’s that soft, it incorporates the sugar perfectly, leading to that gorgeous, uniform texture we love in a creamy **Pumpkin Cheesecake**.
Water Bath Security for Your Pumpkin Cheesecake
If you’ve ever had water leak into your crust, you know the tragedy. That crust turns into soggy mush! To prevent this catastrophe, use heavy-duty aluminum foil—don’t skimp here! Tear off two long strips and cross them underneath your springform pan to make a strong ‘X.’ Then wrap that foil snugly up the sides. Think of it like a little boat protecting your treasure. If you only have regular foil, just use two layers. It’s worth the extra minute of wrapping to guarantee a dry, crisp crust!
If you need a nice fall drink to sip while you wait for this beauty to chill, maybe try a pumpkin spice smoothie on the side for good measure!
Serving Suggestions for Your Homemade Pumpkin Cheesecake
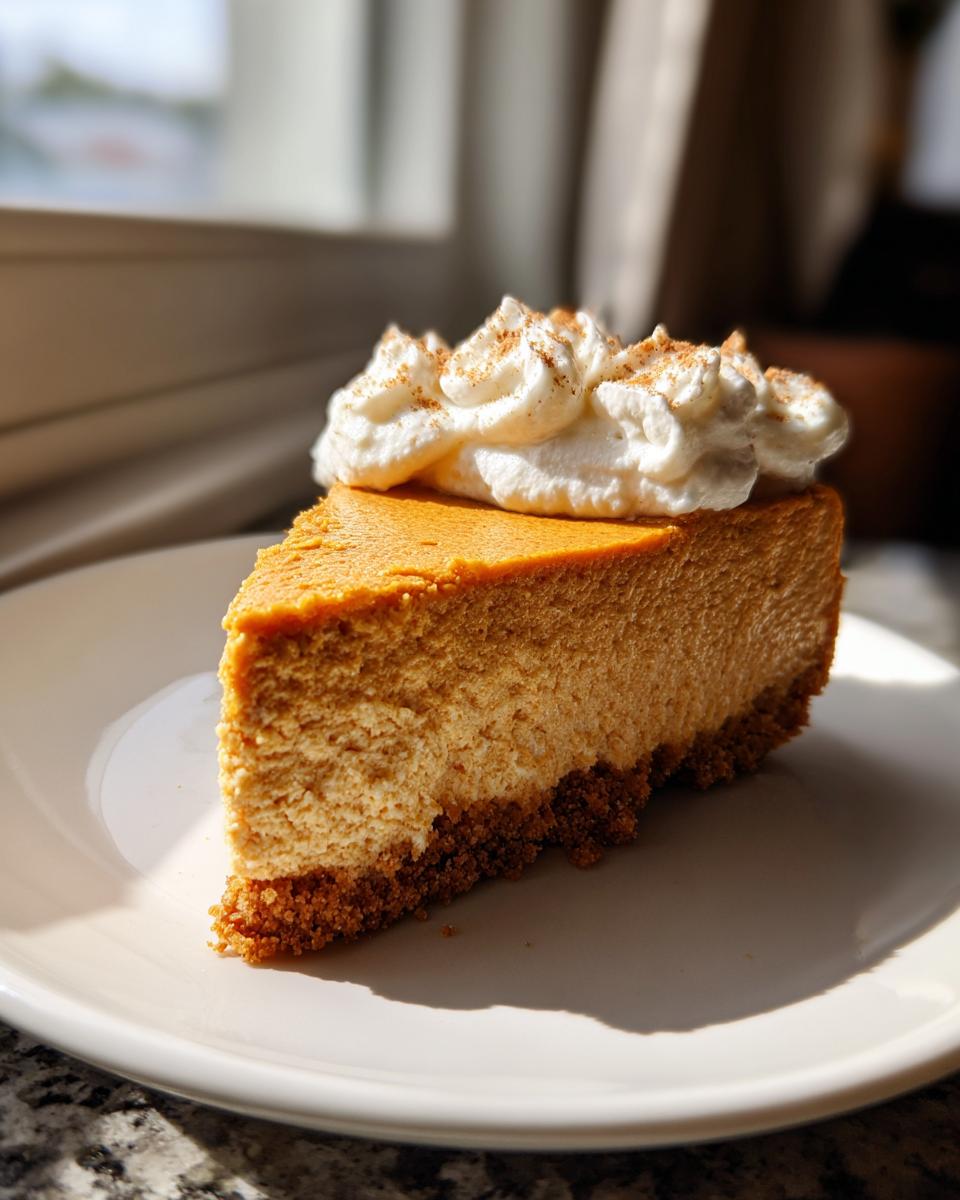
Isn’t it fun getting to the final step? Your **Pumpkin Cheesecake** is chilled, firm, and ready for its close-up! Since the filling is already perfectly spiced and rich, you don’t need to go overboard with toppings. A little something extra is sometimes all it takes to make it special.
My go-to is always a generous dollop of lightly sweetened whipped cream—it adds a nice fluffy contrast to the dense cake. A tiny sprinkle of extra cinnamon or maybe some chopped pecans if you’re feeling nutty works beautifully. For a real showstopper, a drizzle of salted caramel sauce is amazing, but honestly, this cheesecake shines all by itself. If you’re enjoying this around the same time you’re making a pumpkin pie smoothie, save some whipped cream for that, too!
Storing Leftover Pumpkin Cheesecake
Whew, what a masterpiece! If, by some miracle, you have any of this amazing **Pumpkin Cheesecake** left over, storing it is simple. Keep it covered tightly in the refrigerator—a good seal prevents it from drying out or absorbing any weird fridge smells. It stays wonderfully fresh and creamy for up to four days, easy.
If you need to store it longer, freezing is totally an option! Wrap that cooled, unsliced cheesecake securely in plastic wrap, then wrap it again in foil. It keeps beautifully in the freezer for about a month. Just remember to thaw it slowly overnight in the fridge before you slice into that autumn heaven!
Common Questions About Making Pumpkin Cheesecake
It’s funny how even with the simplest recipes, we all end up with little jitters before we hit ‘bake.’ Cheesecake, especially a beautiful fall dessert like this **Pumpkin Cheesecake**, can feel intimidating. So, let’s clear up any last little worries you might have before you wrap that pan in foil!
I’ve gathered the questions I always get asked about this recipe. If you’re worried about getting cracks or what exactly ‘pumpkin puree’ means, I’ve got you covered!
Can I skip the water bath when making Pumpkin Cheesecake?
I know, I know, the water bath seems like a hassle, right? But if you skip it, you are taking a huge risk with your beautiful **Pumpkin Cheesecake**. Without that steamy environment, the edges of your cake start cooking way faster than the middle does! This causes the edges to set hard while the middle is still too loose, leading to a big, sad crack right in the center when it cools down.
It’s the easiest way to guarantee that super smooth, dense texture. I promise, it’s worth the extra few minutes of setup time to protect your dessert from drying out!
What is the difference between pumpkin puree and pumpkin pie filling?
This is such an important distinction, especially for spiced fall desserts! You absolutely must use plain pumpkin puree for this **Pumpkin Cheesecake** recipe. Pumpkin pie filling is pre-sweetened and already loaded with spices like cinnamon and cloves.
If you use the pie filling, your cheesecake will be way too sweet, and the spice levels will be all wrong. We want to control the spice in the filling ourselves! Trust me on this one—read the can label carefully: it should just say 100% pumpkin.
How do I know when my Pumpkin Cheesecake is fully baked?
This is the trickiest part, but it’s also where you get that perfect texture! Forget just poking it with a toothpick. When the baking time, about 55 to 65 minutes, is up, you need to watch the movement.
The edges of the **Pumpkin Cheesecake** should look completely set—they won’t wobble at all when you gently shake the pan. But the very center, maybe a two-inch circle right in the middle, should still have a slight jiggle to it. It looks almost underdone, but I promise it’s not! That slight wobble means the residual heat will finish cooking it perfectly while it slowly cools down in the oven. That’s the secret to the moist, velvety bite.
If you feel like you need a little boost of spiced flavor in your day when you aren’t baking, you can always try my pumpkin spice smoothie recipe!
Estimated Nutritional Data for Pumpkin Cheesecake
Now, I’m not a nutritionist, so please take these numbers with a grain of salt! This data is just an estimate drawn from the standard ingredients for one slice of this rich **Pumpkin Cheesecake**. It’s a decadent treat, for sure, but knowing the basics helps when planning that holiday spread!
When I look at this, I know it’s a bigger slice of indulgence, so I usually plan for a lighter breakfast the next day—maybe keeping those pumpkin pie smoothie ingredients handy for a morning boost!
Based on standard calculations for a yield of 10 servings, here is what you can generally expect per slice:
- Calories: About 400
- Total Fat: Around 25 grams
- Carbohydrates: Approximately 38 grams
- Sugar: About 35 grams (that’s where the richness comes from!)
- Protein: Around 6 grams
Share Your Simple Pumpkin Cheesecake Experience
Wow, now that you’ve made this simple **Pumpkin Cheesecake**, I’m dying to know what you think! Baking is a communal thing, right? I really hope this recipe brought some cozy fall magic into your kitchen just like it does mine every year.
Please, don’t be shy! If you loved how smooth and easy this was, leave a quick star rating right below this text. That really helps other hesitant bakers decide to try it out. And if you made any little tweaks that you loved—maybe a pecan topping or a dash of extra nutmeg—shout it out in the comments below!
Seriously, if you snap a picture of your perfect, crack-free slice, tag me on social media! Seeing your gorgeous, creamy **Pumpkin Cheesecake** creations truly makes my day. Happy baking, everyone!
Print
Simple Pumpkin Cheesecake
- Total Time: 85 min
- Yield: 10 servings 1x
- Diet: Vegetarian
Description
A straightforward recipe for a creamy pumpkin cheesecake with a graham cracker crust.
Ingredients
- 1 1/2 cups graham cracker crumbs
- 1/4 cup granulated sugar (for crust)
- 6 tablespoons unsalted butter, melted
- 2 (8 ounce) packages cream cheese, softened
- 1 cup pumpkin puree (not pumpkin pie filling)
- 3/4 cup granulated sugar (for filling)
- 2 large eggs
- 1 teaspoon vanilla extract
- 1 teaspoon ground cinnamon
- 1/2 teaspoon ground ginger
- 1/4 teaspoon ground nutmeg
Instructions
- Preheat your oven to 350 degrees F (175 degrees C). Wrap the outside of a 9-inch springform pan with heavy-duty aluminum foil.
- Prepare the crust: Mix graham cracker crumbs, 1/4 cup sugar, and melted butter. Press the mixture firmly into the bottom of the prepared springform pan. Bake for 10 minutes. Remove from oven and let cool slightly.
- Reduce oven temperature to 325 degrees F (160 degrees C).
- Prepare the filling: Beat the softened cream cheese in a large bowl until smooth. Add 3/4 cup sugar and beat until combined.
- Mix in the pumpkin puree, eggs, vanilla extract, cinnamon, ginger, and nutmeg until the mixture is smooth. Do not overmix.
- Pour the filling over the cooled crust.
- Place the springform pan into a larger roasting pan. Carefully pour hot water into the roasting pan until the water reaches halfway up the sides of the springform pan (this is a water bath).
- Bake for 55 to 65 minutes, or until the edges are set but the center still jiggles slightly.
- Turn off the oven, prop the door open slightly, and let the cheesecake cool in the oven for 1 hour.
- Remove the cheesecake from the water bath and let it cool completely on a wire rack.
- Refrigerate for at least 6 hours, or preferably overnight, before serving.
Notes
- For the smoothest texture, ensure your cream cheese is fully at room temperature.
- If you do not have heavy-duty foil, use two layers to wrap the springform pan securely against water leakage.
- Prep Time: 20 min
- Cook Time: 65 min
- Category: Dessert
- Method: Baking
- Cuisine: American
Nutrition
- Serving Size: 1 slice
- Calories: 400
- Sugar: 35
- Sodium: 250
- Fat: 25
- Saturated Fat: 15
- Unsaturated Fat: 10
- Trans Fat: 0
- Carbohydrates: 38
- Fiber: 1
- Protein: 6
- Cholesterol: 100
Keywords: pumpkin, cheesecake, graham cracker crust, fall dessert, spiced