
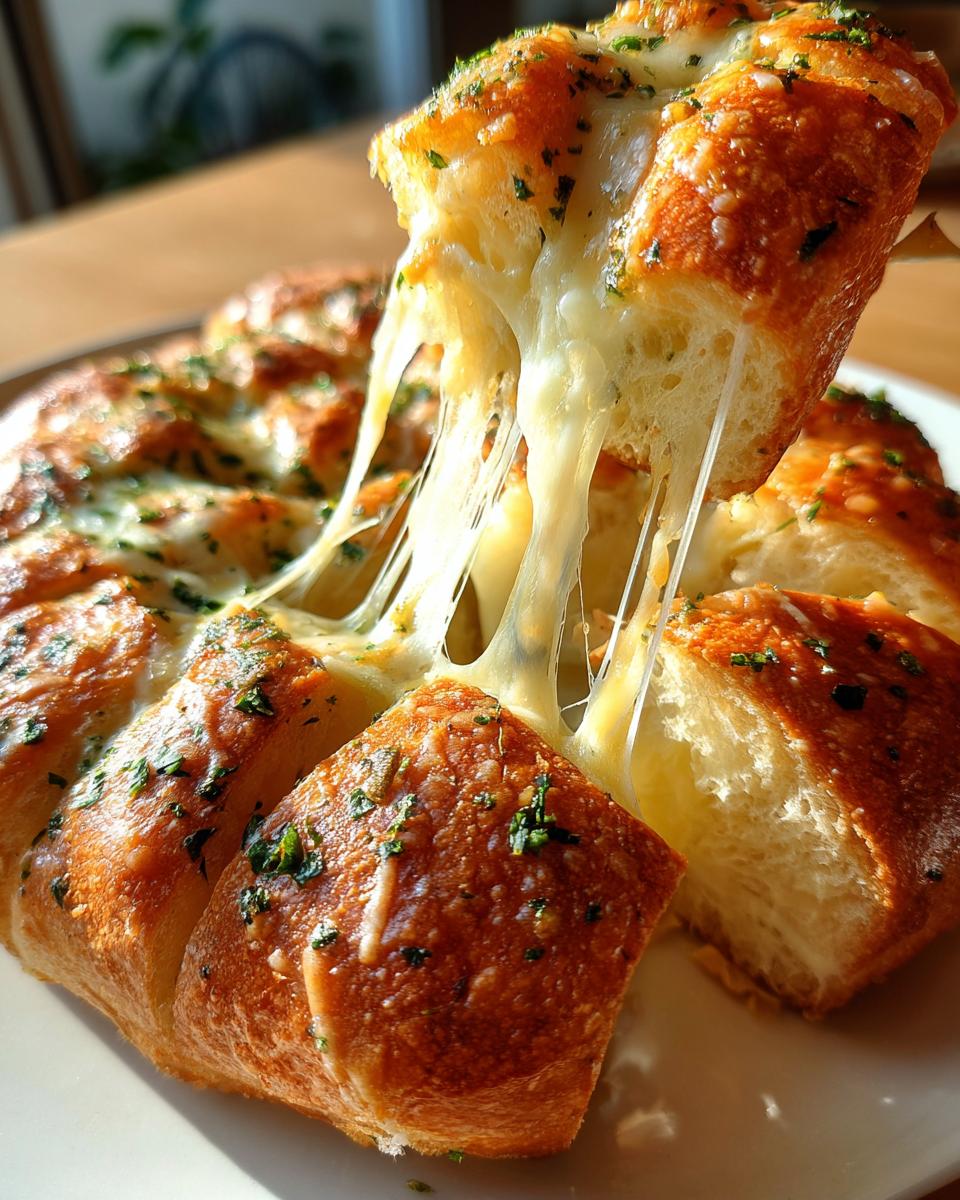
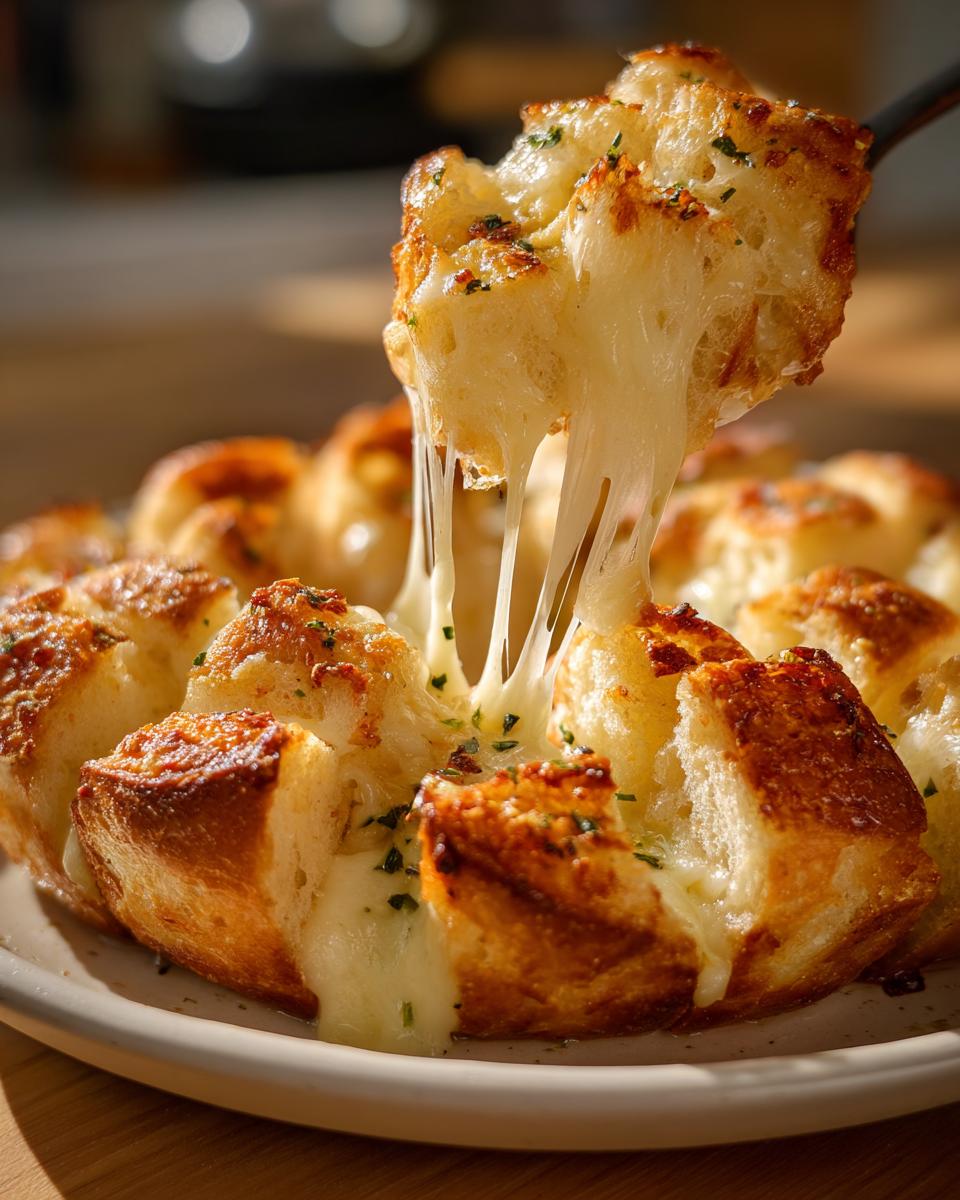
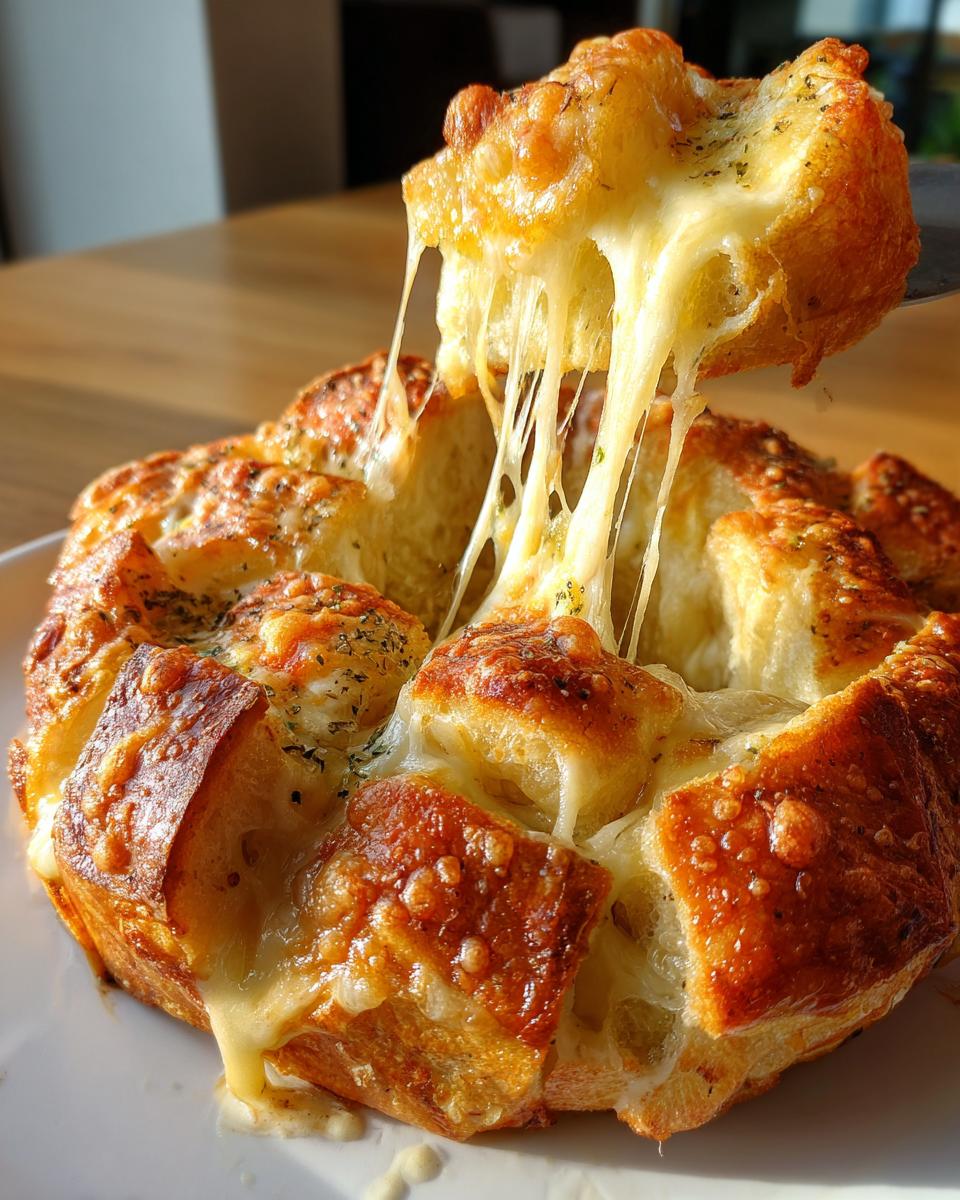
There’s just something about bread that screams comfort, right? And when you add a mountain of melted cheese and a heavy dose of garlic, well, you’ve hit the jackpot. Forget fussy homemade dough or spending forever chopping herbs; this recipe guarantees the absolute simplest, cheesiest Pull Apart Garlic Bread you will ever make. Seriously, it’s my secret weapon when I need a show-stopping side dish on a Tuesday night with almost zero effort. You just cube the dough, drench it in buttery garlic goodness, pile on the cheese, and let the oven do the rest. It comes out golden, gooey, and utterly irresistible!
Why This Pull Apart Garlic Bread Recipe Works So Well (EEAT)
You might think taking a shortcut with pre-made dough means sacrificing flavor, but trust me, that’s where the expert knowledge comes in here! We use pre-made dough because it lets us focus all our energy on crafting that incredible flavor coating. This recipe is built for speed without tasting like it. I promise, this is the best, easiest, go-to side dish around.
- We maximize flavor by saturating every little cube with real garlic butter. If you want a truly amazing result, check out my guide on homemade Texas Toast for deep flavor tips!
Quick Prep Time for Amazing Pull Apart Garlic Bread
We’re talking ten minutes of prep, tops! Honestly, cutting the dough and tossing it takes longer than the actual mixing. This minimal active time means you can whip this up right before dinner without stressing. It’s fast, flavorful, and unbelievably reliable—that’s how you build trust in a recipe!
The Perfect Cheesy Topping for Your Pull Apart Garlic Bread
I don’t mess around when it comes to cheese. The combination of stretchy mozzarella and sharp Parmesan is non-negotiable. The mozzarella gives you that glorious, gooey pull when you tear off a piece, and the Parmesan just ups the savory, salty flavor dimension. It melts down beautifully right into all those garlic butter pockets in your finished Pull Apart Garlic Bread.

Ingredients Needed for the Best Pull Apart Garlic Bread
Okay, this is the straightforward part, and honestly, that’s what I love most about this recipe. You probably have most of this stuff in your fridge or pantry already! No weird, exotic shopping trips required. We are keeping this incredibly simple so that cheesy, garlicky goodness can happen fast. If you ever want something similar but in stick form, you have to check out this guide for easy garlic Parmesan breadsticks!
Here’s what you need to gather up:
- The Dough Base: Grab one loaf (about 13 to 16 ounces) of dough. I usually use a pre-made pizza dough because it’s reliable, but whatever bread dough you have works wonderfully.
- The Butter Bath: You’ll need half a cup of unsalted butter, fully melted—that’s one whole stick. We mix that with four cloves of garlic that must be minced—don’t buy the jar stuff here, fresh is key!
- The Flavor Boosters: Two tablespoons of parsley, chopped fine, half a teaspoon of dried oregano, and just a half teaspoon of salt and pepper. Keep the measurements exact here for that perfect savory punch.
- The Cheesy Goodness: Get one cup of mozzarella shredded up, and half a cup of Parmesan cheese. That blend is what makes it so perfectly gooey and sharp.
Step-by-Step Instructions for Perfect Pull Apart Garlic Bread
Don’t let the simplicity fool you; the process here is what makes sure every single piece of bread tastes as amazing as the last. We need good coating, even distribution, and a patient hand when mixing. It’s all about building those flavor layers before it ever hits the heat!
Preparing the Dough and Oven for Pull Apart Garlic Bread
First things first: get that oven cranked up to 375 degrees Fahrenheit (that’s 190 Celsius if you’re using your metric settings). While it heats up, grab a standard 9×5 inch loaf pan and make sure it’s greased nicely. If you grabbed your dough straight from the fridge, you absolutely need to let it sit out on the counter until it reaches room temperature. Trying to cut rock-hard dough is going to make a mess and uneven pieces!
Creating the Flavorful Garlic Butter for Your Pull Apart Garlic Bread
Now for my favorite aroma! In a smaller bowl—keep it small so you don’t waste any garlic essence—melt your butter. Whisk in that minced fresh garlic, the parsley, the oregano, salt, and pepper. Once it’s all combined into a fragrant, gorgeous pool, pour this magic over your cubed dough pieces in the big bowl. You have to toss these gently! Seriously, you want every cube coated evenly, but if you squish them, you’ll lose all that lovely airy texture we want in the final Pull Apart Garlic Bread.
Baking and Serving Your Cheesy Pull Apart Garlic Bread
Once coated, transfer those cubes into your prepared loaf pan and now, generously sprinkle both the mozzarella and that salty Parmesan right over the top. It needs 20 to 25 minutes in the hot oven. You’re looking for the bread to be golden brown all over and the cheese should be totally melted and bubbly—watch carefully! The crucial final step? Let it sit for exactly five minutes once it comes out. Serve it warm so everyone can start pulling pieces right away!
Tips for Success When Making Pull Apart Garlic Bread
Even though this recipe is super simple, a couple of tiny details take it from good to OMG-I-need-another-slice territory. Building that expertise comes from making this thing a dozen times, trust me! My biggest tip, which I learned early on, involves the bowl. I find that using a big, clear glass bowl when tossing the dough helps me see exactly where the butter mixture is pooling. You want even coating, not a soggy corner!
Also, never, ever try to rush the dough. If it’s too cold, those cubes won’t soak up the garlic butter properly, and the inside ends up dry. If you do end up with some dough slightly sticking to the bottom corners after baking—and this happens—don’t panic! Just run a thin spatula around the edges right away before it cools down completely. That little bit of melted cheese on the bottom gets crispy, which is actually a bonus for some people!
Dough Handling for Optimal Pull Apart Garlic Bread Texture
When you’re tossing those 1-inch dough cubes in the butter, be gentle! I know you want every surface drenched, but if you’re aggressive, you’ll deflate all the air pockets you just created when you cut it. Use your hands and scoop from the bottom up, flipping the pieces gently until they look shiny and coated. Overworking the dough here just leads to a denser, tougher final product, and we want soft, fluffy bites!
Ingredient Notes and Substitutions for Pull Apart Garlic Bread
I always get asked about swapping ingredients, especially when people don’t have fresh herbs on hand! Don’t worry if you’re missing fresh parsley or oregano; this recipe rolls with the punches. You can swap that fresh stuff for dried herbs—just remember that dried herbs are more potent. The recipe notes say to use one teaspoon of dried parsley and a quarter teaspoon of dried oregano if you’re substituting.
Also, if you’re out of Parmesan but have some sharp Romano, go ahead and use that instead! It brings a slightly saltier edge to counterbalance the sweet mozzarella. Just try to stick to the amounts listed for the main cheeses; they are key to that perfect golden melt on top of your Pull Apart Garlic Bread.
Variations on Classic Pull Apart Garlic Bread
Okay, once you nail the basic cheesy garlic version, you absolutely have permission to start experimenting! This recipe is such a solid base that it begs for little tweaks to keep things exciting. I love having this recipe ready so I can throw in different flavors depending on what I’m serving that night. If you haven’t tried it yet, you should absolutely look into making a truly gourmet version like the cheesy kale garlic bread I made last month, but for a quick switch-up, these few ideas are perfect.
Here are my favorite easily achievable ways to transform this into a completely different, but still amazing, type of Pull Apart Garlic Bread:
- Spicy Kick: If you love a little heat, toss a pinch of red pepper flakes right into that melted butter mixture before coating the dough. It gives the bread a warm little burn on the finish that is incredible next to zesty marinara sauce. Don’t go overboard—just a tiny sprinkle goes a long way to wake up those sleepy garlic notes!
- Herb Swap: If you’re tired of oregano, try substituting it with fresh, finely chopped rosemary. Rosemary is earthy and pairs beautifully with beef recipes. You might want to cut the amount slightly, as rosemary is strong, but wow, it smells heavenly baking at 375 degrees.
- Savory Add-In: If you’re a meat lover, pre-cook some bits of crispy bacon or even crumbled Italian sausage. Toss the cooked bits in with the cheese layer before baking. It makes this the ultimate game-day snack, transforming it into a fully loaded, carb-heavy masterpiece. Just make sure any meat you add is already cooked and drained well so it doesn’t release grease into your beautiful golden loaf.
Serving Suggestions for Your Homemade Pull Apart Garlic Bread
So, you’ve got this glorious, steaming loaf of cheesy, garlicky perfection ready to go. Now what? This isn’t just a side dish; it’s the co-star of the show! Honestly, this bread is designed specifically for sopping up every last bit of sauce you can manage. Don’t hesitate to make a saucy main course because this Pull Apart Garlic Bread will handle it!
When I bring this to a potluck, I usually pair it with something Italian, obviously. If you’re looking for a great recipe to go alongside this, you have to try making a batch of my amazing garlic butter pasta—it’s carb heaven on carbs heaven, but you know you want to do it!
Here are the dishes that always disappear first when this bread is on the table:
- Hearty Red Sauce Dishes: Anything swimming in a rich marinara sauce begs for this bread. Think baked ziti, lasagna, or even just a simple bowl of spaghetti and meatballs. You need those cheesy, garlicky crevices to dive right into that tomato base.
- Creamy Soups or Stews: This is slightly unconventional, but if you make a thick, creamy tomato soup or a hearty chicken and vegetable stew, tearing off a warm piece of this cheesy bread and dipping it is pure magic. It’s richer than a standard grilled cheese dipper!
- Chicken Parmesan: The classic pairing! The crispy chicken, the melted mozzarella, the bright sauce—and then you have this soft, warm, herby bread right there to scoop up all the overflow flavor from your plate. You won’t need many other sides, believe me!
Storage and Reheating Instructions for Leftover Pull Apart Garlic Bread
If you somehow manage to have any of this cheesy deliciousness left over—which I seriously doubt—storage is simple! Keep it in an airtight container at room temperature for up to two days. Don’t try the fridge unless you have to; it’s not great for soft bread. To bring it back to life, you MUST use the oven.
Wrap the cooled bread loosely in foil and pop it back into a 350-degree oven for about 10 minutes. That foil traps the steam, making the inside soft again, and then you can unwrap it for the last two minutes to crisp up the cheese topping on your glorious Pull Apart Garlic Bread!
Frequently Asked Questions About Pull Apart Garlic Bread
I’ve answered almost everything about this recipe already, but I know when you’re getting ready to bake, a few little questions always pop up. These are the things I always wondered about when I was first making this Pull Apart Garlic Bread! Don’t hesitate to try this out because you’re worried about one ingredient—we can usually troubleshoot it!
Can I use pre-baked rolls instead of raw dough for this Pull Apart Garlic Bread?
Yes, you absolutely can, and this is a fantastic shortcut if you’re super short on time! If you use pre-baked rolls—like the refrigerated kind you bake separately—you’ll treat them the same way: cut them into cubes and toss them in the butter mixture. Because the rolls are already cooked, you won’t need the full 20–25 minutes of baking time. You’re mostly just heating them through and melting that gorgeous cheese. I’d start checking them after about 12 to 15 minutes, just until everything is hot and gooey.
What is the best pan size for making Pull Apart Garlic Bread?
For this recipe using one standard loaf of dough, I always, always recommend the 9×5 inch loaf pan. It gives the bread enough vertical space to rise up nicely, creating those perfect tall, fluffy cubes that are easy to grab. If you use a wider, shallower pan, like a 9-inch pie dish, the bread might spread out too much and become flatter, reducing that signature ‘pull apart’ height. If you double the recipe, then you’re moving into 9×13 territory, but for the single batch, stick to the loaf pan for the best results!
I also get asked if you can make this ahead of time. You can definitely cube the dough and mix the butter sauce, but only refrigerate the coated cubes for about an hour before topping with cheese and baking. The longer you let them sit coated, the more liquid the dough will absorb, and you start losing that lovely texture we aim for in this Pull Apart Garlic Bread.
Estimated Nutritional Information for Pull Apart Garlic Bread
Now, listen up, because this is pure indulgence we’re talking about! We all know this amazing, cheesy Pull Apart Garlic Bread isn’t exactly a salad, but knowing what’s in it is important. This information is just a ballpark figure, based on the ingredients I listed out, so your final numbers might shift a little bit depending on the brand of dough you buy or how much cheese you pile on (and I hope you pile it on!).
Based on those amounts, here is the estimated breakdown per serving size in my recipe:
- Serving Size: 1 slice equivalent
- Calories: 280
- Fat: 15g (with about 8g saturated fat—from that gorgeous butter and cheese!)
- Carbohydrates: 28g
- Protein: 10g
- Sodium: 450mg (Watch this one—the cheese contributes a lot!)
- Sugar: Only 2g (Thank goodness for savory!)
Just remember, these are estimates! If you use lower-fat cheese or less butter, the numbers change subtly. But when you’re enjoying that warm, gooey bite of Pull Apart Garlic Bread, are you really counting?
Share Your Experience Making This Pull Apart Garlic Bread
Well, we’ve made it to the end! I really, truly hope you give this recipe a try the next time you need a guaranteed crowd-pleaser that takes almost no effort. There’s nothing more satisfying than pulling apart those steaming, cheesy cubes right at the dinner table! It’s the easiest way to make people happy, I swear.
Now, I absolutely want to know how it turned out for you! Did you add those red pepper flakes I mentioned? Did the kids fight over the corner pieces (they always do in my house)? Leave me a rating below—five stars if it made your night easier, or tell me what you thought if you tweaked something. Every comment and rating helps other bakers feel confident trying out my favorite Pull Apart Garlic Bread recipe!
Don’t be shy; let’s celebrate all that melted cheese and garlic goodness together!
Print
Simple Pull Apart Garlic Bread
- Total Time: 35 min
- Yield: 6 servings 1x
- Diet: Vegetarian
Description
A straightforward recipe for soft, cheesy pull-apart bread flavored with garlic and herbs.
Ingredients
- 1 loaf (13-16 oz) pre-made pizza dough or bread dough
- 1/2 cup (1 stick) unsalted butter, melted
- 4 cloves garlic, minced
- 2 tablespoons fresh parsley, chopped
- 1/2 teaspoon dried oregano
- 1/4 teaspoon salt
- 1/4 teaspoon black pepper
- 1 cup shredded mozzarella cheese
- 1/2 cup shredded Parmesan cheese
Instructions
- Preheat your oven to 375 degrees Fahrenheit (190 degrees Celsius). Lightly grease a 9×5 inch loaf pan.
- If using pre-made dough, let it come to room temperature according to package directions.
- Cut the dough into 1-inch cubes. Place the cubes into a large bowl.
- In a small bowl, mix the melted butter, minced garlic, parsley, oregano, salt, and pepper.
- Pour the butter mixture over the dough cubes. Toss gently until all pieces are coated.
- Transfer the coated dough cubes to the prepared loaf pan.
- Sprinkle the mozzarella cheese and Parmesan cheese evenly over the dough cubes.
- Bake for 20 to 25 minutes, or until the bread is golden brown and the cheese is melted and bubbly.
- Let cool in the pan for 5 minutes before serving warm.
Notes
- You can substitute fresh herbs with 1 teaspoon of dried parsley and 1/4 teaspoon of dried oregano if fresh is unavailable.
- For extra flavor, add a pinch of red pepper flakes to the butter mixture.
- Prep Time: 10 min
- Cook Time: 25 min
- Category: Side Dish
- Method: Baking
- Cuisine: American
Nutrition
- Serving Size: 1 slice equivalent
- Calories: 280
- Sugar: 2
- Sodium: 450
- Fat: 15
- Saturated Fat: 8
- Unsaturated Fat: 7
- Trans Fat: 0
- Carbohydrates: 28
- Fiber: 1
- Protein: 10
- Cholesterol: 35
Keywords: pull apart bread, garlic bread, cheesy bread, easy side dish, baked bread