
There is honestly nothing better than a dessert that requires zero oven time, right? When you need something rich, decadent, and totally satisfying without turning on the blast furnace in the summer, call on the no-bake heroes! And when it comes to my absolute favorite version of that style, forget everything else—this is the recipe for the ultimate Peanut Butter Nanaimo Bars. Seriously, these are different from any traybake you’ve had before. I first made these messy, glorious bars for a potluck years ago, and folks were begging for the recipe. The classic Nanaimo bar is already amazing, but blending that creamy middle with peanut butter? Wow. Trust me, this easy three-layer treat is about to become your go-to party staple.
Why You Will Love These Peanut Butter Nanaimo Bars
- They are completely no-bake, making clean-up an absolute dream!
- The salty peanut butter middle balances perfectly against the sweet base and chocolate top.
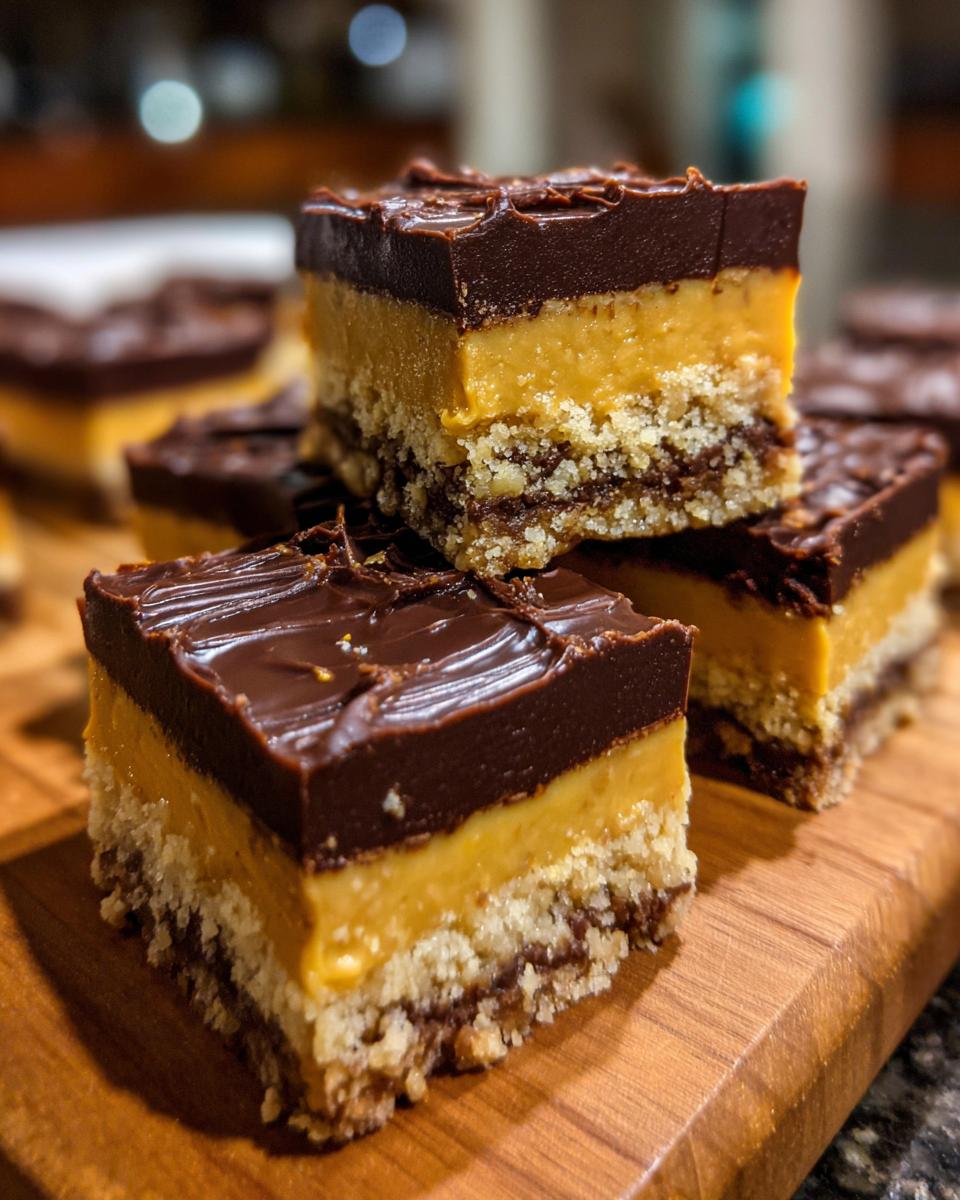
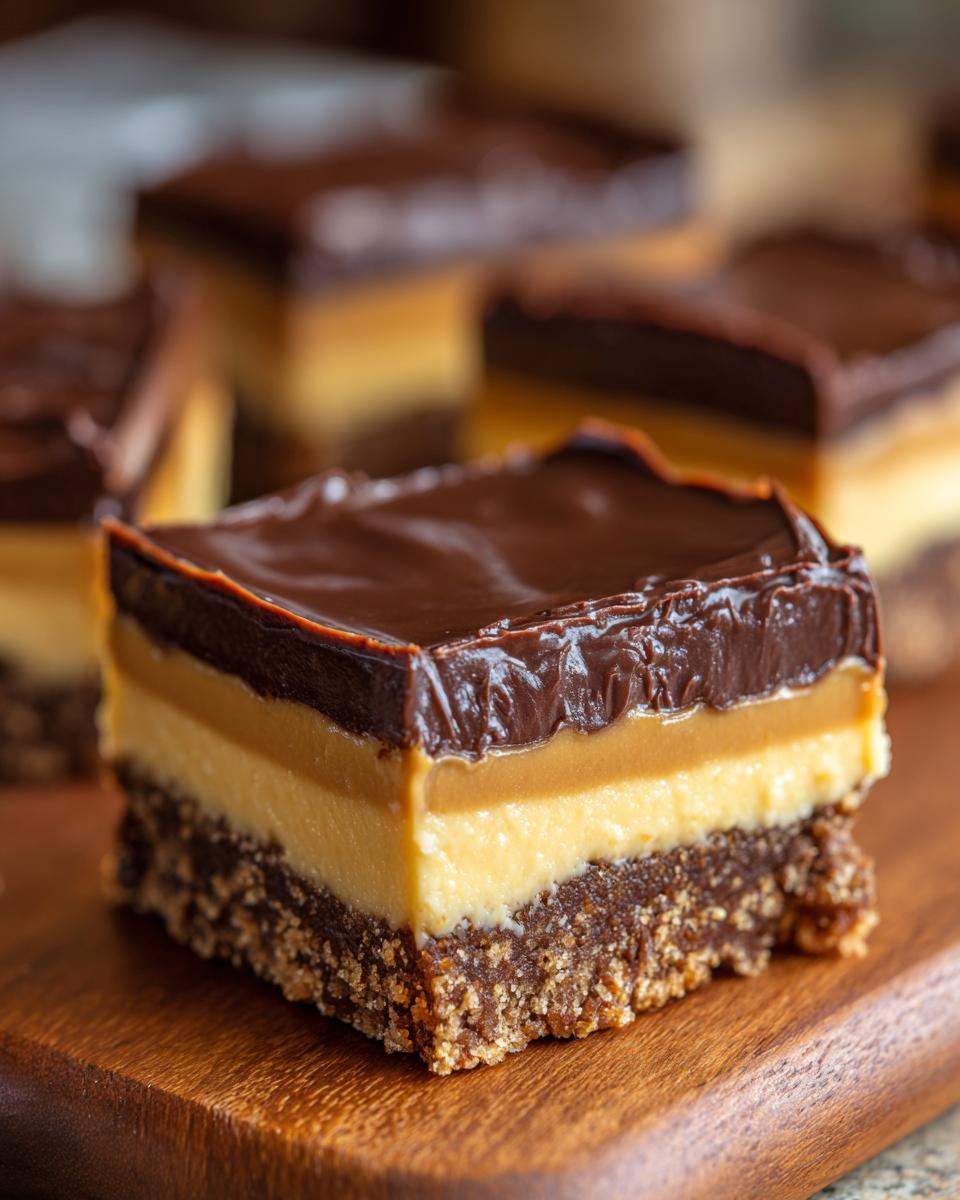
- The texture is unreal: crunchy crumbs, smooth cream, and firm chocolate.
- You only need one 8×8 pan, so they are great for small gatherings.
See? Easy decisions are the best decisions when you’re craving dessert now and not later!

Gathering Ingredients for Your Peanut Butter Nanaimo Bars
Okay, so since these bars are no-fuss, we don’t need fancy techniques, but we still need the right parts! It’s all about having your layers ready before you start smashing things together. Think of it like setting up your workshop. We definitely need specific measurements for that middle layer to stay perfectly soft, so grab your measuring cups!
You might want to check through your pantry now, maybe grab that simple simple syrup recipe book you have—wait, wrong kitchen project! Just focus on these few things. Don’t worry, this list isn’t scary long, even with three distinct layers!
For the No-Bake Crumb Base
- 1 cup graham cracker crumbs
- 1/2 cup unsalted butter, melted—make sure it’s fully liquid!
- 1/4 cup granulated sugar
- 2 tablespoons unsweetened cocoa powder
- 1/4 cup milk
For the Creamy Peanut Butter Filling
- 1 cup confectioners’ sugar (powdered sugar)
- 1/2 cup creamy peanut butter—the smooth kind works best here!
- 1/2 cup unsalted butter, softened—this needs to be nice and bendy
- 1 teaspoon vanilla extract
For the Chocolate Topping
- 2 cups semi-sweet chocolate chips
- 1/4 cup creamy peanut butter (this is our secret weapon for a fudgy top!)
Got everything? Good! Now we can move on and actually start mixing. This part comes together so fast!
Step-by-Step Instructions for Perfect Peanut Butter Nanaimo Bars
Alright, get ready because this is where the magic happens, truly. Since these are no-bake, the timing of your chilling is everything! If you rush the layers, they’ll all melt into one glorious, sticky mess, and we definitely don’t want that. We need those distinct stripes!
Preparing the Crumb Base Layer
First things first: line that 8×8 pan! Use parchment paper and make sure you leave some overhang on two sides, like little handles, so we can lift the whole thing out later without prying. In a bowl, toss in your graham crumbs, the melted butter—just measure that nicely melted stuff—sugar, cocoa powder, and milk. Mix it up until it looks like damp sand that sticks together when you squeeze it. Then, press that whole mixture firmly into the bottom of your lined pan. I mean firm! Use the bottom of a flat glass to really pack it down. Pop that pan into the fridge while you whip up the middle layer.
Creating the Peanut Butter Filling
Now for my favorite part! You need your softened butter for this—remember, not melted, just soft enough to squish. Beat that butter until it’s creamy. Then, slowly add your powdered sugar, followed by the peanut butter and that splash of vanilla. You want this mixture smooth as silk, with no lumps of sugar hiding anywhere. Once it looks uniform and dreamy, take your base layer out of the fridge and spread this peanut butter goodness over it evenly. Back into the cold it goes to firm up again! You can check out some other fun no-bake recipes while you wait, if you need inspiration!

Melting and Applying the Chocolate Topping
This chocolate topping is tricky if you overheat it, so be careful! Put your chocolate chips and that last little bit of peanut butter (the quarter cup) into a microwave-safe bowl. Heat it in short bursts—just 30 seconds at a time—and stir well between each one. You only want it melted, not scorched. When it’s shiny and smooth, pour it right over your chilled peanut butter layer. Spread it gently so you don’t disturb the layer underneath. Once that’s set, slide the whole pan into the refrigerator for at least two hours. That cooling time locks everything in structure, so don’t cheat it!
Expert Tips for Making the Best Peanut Butter Nanaimo Bars
Listen, because these tips are what separate a good bar from a great one! The filling is sticky, I’m not going to lie, but we have ways around that. My number one tip is to spray your spatula lightly with cooking spray before spreading that peanut butter filling. Just a tiny spritz keeps it from clinging to the rubber!
Second, for that chocolate topping, make sure it’s not too thin. If it looks runny, your bars will slide apart later. If you used good quality chips, it should set up nice and firm.
And finally, the slicing advice from the notes is a lifesaver: don’t cut these straight out of the fridge. Let them warm up on the counter for about ten minutes first. That slight softening lets your knife slide right through the hard chocolate cleanly. You’ll get gorgeous squares instead of crumbly messes—trust me on this one!
Peanut Butter Nanaimo Bars Substitutions and Variations
I love that this recipe is naturally built for a little tinkering, which is awesome since everyone’s pantry looks a little different! The beauty of a no-bake bar is its flexibility, especially in that bottom layer. If you don’t have graham crackers on hand—or maybe you just don’t love them as much as I do—you can totally swap them out.
The recipe notes mention that crushed vanilla wafers work brilliantly instead of the graham crumbs. They give the base a slightly different, sweeter flavor, but the texture stays firm. Just make sure you crunch them up small!
Switching Up the Chocolate
When it comes to the topping, yes, semi-sweet chips are the classic choice, but you can absolutely play around here. If you like a sweeter bar, go for milk chocolate chips—they melt beautifully! For those of us who like things intense, try using dark chocolate chips. The slight bitterness cuts right through the richness of the peanut butter middle layer, and honestly, I’m obsessed with that combo.
Another little thing I do sometimes? Sprinkle a tiny pinch of flaky sea salt right over the wet chocolate topping before it sets. It just makes the peanut butter flavor pop way more. Don’t skip that if you’re feeling adventurous!
Flavor Boosts for the Filling
The filling is where we get that real peanut butter punch, but what if you want more? If you’re using natural peanut butter (you know, the kind you have to stir?), the filling might be a little softer, so you’ll need to chill it extra well. But a great variation is adding a tablespoon of actual peanut butter whiskey if you happen to have some lying around—it adds depth that’s unbelievable! Only do that if you are making these for the grown-ups, of course.
Or, if you want a little background flavor, try adding just a drop or two of almond extract along with the vanilla. It’s subtle, but it really elevates the whole bar from just “peanut butter delicious” to “what *is* that amazing flavor?” Give it a try next time you’re making a batch!
Storage and Make-Ahead Guide for Peanut Butter Nanaimo Bars
The best part about these beauties? They get better with time, which means we can totally make them ahead of time! Honestly, I try to keep a batch hidden in the fridge at all times for snack emergencies. They are just the perfect make-ahead dessert because being no-bake means we don’t worry about things drying out like a cake does.
You must store these bars in an airtight container. If you stack them, put a tiny layer of wax paper or parchment in between each layer. If you skip this, that sticky peanut butter filling will try to bond with the chocolate top of the bar underneath it, and trust me, separating them is hard work—it ruins the pretty layers you worked so hard to create!
How Long Do They Last in the Fridge?
Stored correctly in the refrigerator, these bars will stay absolutely perfect for a good week, maybe even ten days if you resist the temptation to eat them all on day one! The cold helps keep that chocolate topping super firm and sliceable. If you’re looking for a place to stash your recipes for later, having a good cocktail recipe book nearby might remind you what else you can make ahead!
Yes, You Can Freeze Peanut Butter Nanaimo Bars!
If you need to make these weeks in advance, freezing is your friend! Wrap the cut or uncut slab tightly in plastic wrap first, then slip it into a heavy-duty freezer bag or an airtight container. They freeze wonderfully for up to three months. They hold their structure really well because they are so dense already.
The Crucial Tempering Step Before Serving
This is super important, so listen up! If you try to slice these straight from the deep chill of the fridge or freezer, the chocolate will crack, and the base will crumble under the knife. You need patience, I know, but it pays off! Always take your sealed container out of the freezer or fridge and let it sit on the counter at room temperature for about 10 to 15 minutes before you try to cut them. This little warm-up—we call it tempering—just softens the chocolate and filling enough so you get those clean, perfect squares we’re aiming for. Don’t skip this tiny step; it makes cutting so much easier!
Serving Suggestions for Your Peanut Butter Nanaimo Bars
Okay, now that you’ve mastered the assembly and the chill time, we have to talk about how to serve these amazing Peanut Butter Nanaimo Bars because they deserve the perfect partner!
Since these have so much rich peanut butter, cream, and chocolate packed into them, they don’t really need a whole lot added on top—they are stars all on their own. But pairing them with the right beverage just takes the whole experience up a notch. I always default immediately to coffee, because what is better than chocolate and coffee in a little handheld package?
If you’re looking for some great ideas for pairing with these rich bars, check out these thoughts. Maybe you’re having them after dinner, or perhaps just as a mid-afternoon treat that requires a little pick-me-up. You can find some fantastic ideas for a little afternoon boost here, like some great cold coffee drinks recipes to match that chocolate coolness.
Here are a few simple pairings I rely on:
- Classic Unsweetened Coffee: The slight bitterness is just the perfect foil for the sweetness of the filling and topping. A hot cup is lovely, but a cold brew is even better when the bars are fresh from the fridge!
- A Tall Glass of Cold Milk: This is a non-negotiable for true comfort dessert lovers. Skim, whole, oat, almond—honestly, any milk works with this kind of rich chocolate, it’s a foundational flavor combination.
- Simple Fresh Berries: If you feel like you need to balance the heavy richness just a tiny bit, serve a small spoonful of fresh raspberries or sliced strawberries on the plate beside the bar. The tartness really cleanses the palate between bites.
That’s really all you need! No fussing with sauces or extra sprinkles. Just let the layers of peanut butter, crumbs, and chocolate do the talking!
Frequently Asked Questions About Peanut Butter Nanaimo Bars
It’s totally normal to have questions when tackling a beloved classic like this—especially a no-bake one! I’ve answered the ones I get asked the most often when friends ask me for my secrets to perfect Peanut Butter Nanaimo Bars. Don’t worry if something seems tricky; we’ll sort it out!
Can I use crunchy peanut butter in these Peanut Butter Nanaimo Bars?
You absolutely *can*, but I have to tell you, the filling is going to have little surprises in it! I’m firmly in the creamy camp for this recipe because the smooth peanut butter blends seamlessly with the powdered sugar and butter, giving you that velvety texture that melts in your mouth. If you use crunchy, those little nut pieces will slightly change the structure of the filling, making it feel a bit rougher. It still tastes great, of course, but it won’t be quite as luxuriously smooth!
How long do Peanut Butter Nanaimo Bars need to chill?
This is the most important question for no-bake treats! You need the base firm, but the filling needs to truly set up before you pour that heavy chocolate on top. For the minimum chill on the base layer, aim for about 20 to 30 minutes in the fridge. The total time needed before slicing is crucial though: I always tell people to give the whole thing a solid two hours in the fridge—that makes the chocolate topping firm enough to slice cleanly. If you’re in a huge rush, you can put it in the freezer for about 45 minutes for a quick set, but don’t forget about it!
If you are looking for other quick treats that don’t need the oven, you might find some inspiration in this copycat pink drink recipe—just for fun!
Can you skip the chocolate? Sure, you *can*, but why would you? That chocolate layer is the third layer of perfection! It adds the final texture contrast and seals in all that creamy peanut butter goodness. If you must skip it, just dust the filling with powdered sugar instead, but it won’t be the same bar!
Nutritional Snapshot of Peanut Butter Nanaimo Bars
Now, let’s talk fuel! Because these are seriously decadent, they pack a bit of a punch in the energy department—we’re dealing with butter, sugar, and peanut butter here, after all! But knowing what’s in them is always part of responsible kitchen management, right?
I worked through the measurements for a standard 16-bar yield, so grab a single serving size—that’s one little square—and check out the estimates below. Remember, this is just an educated guess based on standard ingredient amounts, especially since brand differences in chocolate chips can change things!
Here is what you can generally expect in one of these perfect Peanut Butter Nanaimo Bars:
- Calories: Around 350
- Fat: About 22g (with 10g of that being saturated fat—butter alert!)
- Carbohydrates: Near 38g
- Sugar: Roughly 35g—definitely a treat!
- Protein: A nice little boost of 6g, thanks to all that peanut butter!
I always joke that this is why they are best served with a strong cup of coffee or a glass of milk—something to balance out all that wonderful sweet richness! Enjoy them responsibly, friends, because they are worth every single calorie!
Peanut Butter Nanaimo Bars
- Total Time: 2 hr 20 min
- Yield: 16 bars 1x
- Diet: Vegetarian
Description
A no-bake dessert bar featuring a crumb base, a creamy peanut butter filling, and a chocolate topping.
Ingredients
- 1 cup graham cracker crumbs
- 1/2 cup unsalted butter, melted
- 1/4 cup granulated sugar
- 2 tablespoons unsweetened cocoa powder
- 1/4 cup milk
- 1 cup confectioners’ sugar
- 1/2 cup creamy peanut butter
- 1/2 cup unsalted butter, softened
- 1 teaspoon vanilla extract
- 2 cups semi-sweet chocolate chips
- 1/4 cup creamy peanut butter (for topping)
Instructions
- Line an 8×8 inch baking pan with parchment paper, leaving an overhang on two sides.
- Combine graham cracker crumbs, 1/2 cup melted butter, granulated sugar, cocoa powder, and milk in a medium bowl. Mix until well combined.
- Press the crumb mixture evenly into the bottom of the prepared pan. Place in the refrigerator to set while you prepare the filling.
- Beat the 1/2 cup softened butter, confectioners’ sugar, 1/2 cup peanut butter, and vanilla extract in a bowl until smooth and creamy.
- Spread the peanut butter filling evenly over the chilled crumb base. Return the pan to the refrigerator.
- Melt the chocolate chips and the remaining 1/4 cup peanut butter together in a microwave-safe bowl in 30-second intervals, stirring between each, until smooth.
- Pour the melted chocolate mixture over the peanut butter layer and spread evenly.
- Refrigerate for at least 2 hours, or until the chocolate topping is firm.
- Lift the bars out of the pan using the parchment paper overhang. Cut into squares before serving.
Notes
- You can substitute graham cracker crumbs with crushed vanilla wafers for a different texture.
- For easier cutting, let the bars sit at room temperature for 10 minutes before slicing.
- Prep Time: 20 min
- Cook Time: 0 min
- Category: Dessert
- Method: No-Bake
- Cuisine: North American
Nutrition
- Serving Size: 1 bar
- Calories: 350
- Sugar: 35
- Sodium: 120
- Fat: 22
- Saturated Fat: 10
- Unsaturated Fat: 12
- Trans Fat: 0
- Carbohydrates: 38
- Fiber: 2
- Protein: 6
- Cholesterol: 30
Keywords: peanut butter, nanaimo bars, no-bake, chocolate, dessert, graham cracker