
Are you ever slammed with a massive sweet tooth right when you realize you have absolutely zero store-bought treats and no time for baking? Trust me, I live for those moments now because I finally mastered the holy grail of quick candy: **Maple Walnut Fudge**. You read that right! This isn’t complicated stovetop nonsense; this is the easiest, no-fail recipe you’ll ever find. Seriously, if you can stir, you can make this fudge. I used to think candy making was impossible, but ever since I nailed this simple formula, my kitchen always has some batch of rich, nutty **Maple Walnut Fudge** cooling on the counter. It’s pure magic, and it takes next to no effort!

Why This Maple Walnut Fudge Recipe Works So Well
I’ve tried every fancy candy recipe out there, but honestly, this one is the winner because it skips all the fuss. If you’re craving something sweet this second, this is the answer. You get that huge burst of authentic maple flavor mixed with crunchy nuts without having to follow a four-hour marathon recipe. It really just feels like cheating, it’s so simple!
Why do I keep coming back to this simple method? Well, I think you’ll agree once you try it:
Quick Prep Time for Maple Walnut Fudge
We are talking maybe ten minutes total for the active mixing. Ten minutes! That’s less time than it takes for my oven to preheat sometimes. Because the base uses sweetened condensed milk, you skip heating sugar syrups to a specific, nerve-wracking temperature. This means you can whip up a batch of incredible **Maple Walnut Fudge** faster than running to the closest store. It’s perfect for last-minute gifts or sudden sugar emergencies.
No Candy Thermometer Needed for Perfect Maple Walnut Fudge
Listen, I own a candy thermometer, but I rarely touch it for this recipe. That’s the best part for me! Dealing with temperatures like 234 degrees or worrying about hard-ball stages always gave me anxiety. Here, you just melt the chocolate, stir it in, and call it a day until it sets up. Trust me, you get that perfect, creamy, melt-in-your-mouth result every time you make this **walnut fudge** without stressing over a gadget. If you still want to learn syrup basics, you can check out the guide on making simple sugar syrup, but you won’t need it here!
Essential Ingredients for Rich Maple Walnut Fudge
The beauty of this recipe is how few ingredients it needs, which is brilliant. When you keep the list short, you really taste the quality of what you put in. This isn’t some watered-down, filler-heavy fudge; it’s concentrated goodness. I always keep these five things stocked because I know I can whip up a batch of **Maple Walnut Fudge** whenever the craving hits. It’s all about that sweet condensed milk doing most of the heavy lifting for you!
I’ve run through the ingredient list a thousand times, and I promise, don’t try to change the core four, especially the milk and the chocolate. They are the structure!
Ingredient Specifics and Notes
Let’s talk details, because even simple candy recipes need a little attention to make sure they set up just right. First, the chocolate chips need to be semi-sweet, not milk chocolate. The semi-sweet keeps the overall result from becoming overwhelmingly sugary once the maple hits it. It balances that sweetness beautifully.
For the nuts, walnuts are the classic choice here, and they give you that great earthy crunch against the creamy base. If you happen to have some raw walnuts lying around, I highly recommend tossing them into a dry pan on the stove for maybe three or four minutes until they start smelling fragrant. Toasting them like that really wakes up their flavor, and it makes your final **walnut fudge** taste much deeper. Don’t go overboard! Just a quick scent release is all you need.

And remember the salt? It sounds weird in fudge, but that tiny pinch is crucial. It cuts the richness so you can actually taste the maple instead of just feeling like you ate sugar straight from the bowl!
Step-by-Step Instructions for Making Maple Walnut Fudge
Now for the fun part—the actual making! I hope you have your parchment paper ready because once this starts melting, things move pretty quickly. We aren’t doing any complicated tempering here, which is why I love this recipe so much. It’s very straightforward, but precision matters when you’re melting chocolate and milk together, so pay attention to the heat level. You want creamy, not crispy!
Preparing Your Pan and Melting the Base
First things first: parchment paper is your best friend. Line that 8×8 pan so you have overhang tabs on the sides. Trust me on this; it’s the only way you’ll get the final block of **Maple Walnut Fudge** out without wrestling it out! Now, grab your saucepan and keep the heat low. Very low. We are combining the contents of that can of sweetened condensed milk with your chocolate chips. This is where you have to be physically present!
You need to stir constantly until everything melts into a beautiful, uniform puddle. I mean constant stirring—don’t walk away to answer a text! If you let it sit for even ten seconds too long, those sugars can scorch right onto the bottom of your pan, and you’ll end up with grainy fudge instead of smooth heaven. Seriously, **do not let this boil**. If you see bubbles vigorously forming, pull the pan off the heat immediately. We are just melting, not cooking!
Folding in Flavor and Setting the Maple Walnut Fudge
Once you have that slick, dark chocolate base, pull it off the heat completely. Now we bring in the flavor rockets: the vanilla extract and the salt. Stir those in until they disappear. Then, it’s time for those glorious chopped walnuts. I always fold them in last. Why last? Because if you stir them in while the chocolate is too hot and runny, they all sink right to the bottom of the pan while it cools. We want those crunchy pieces spread evenly throughout every single square!

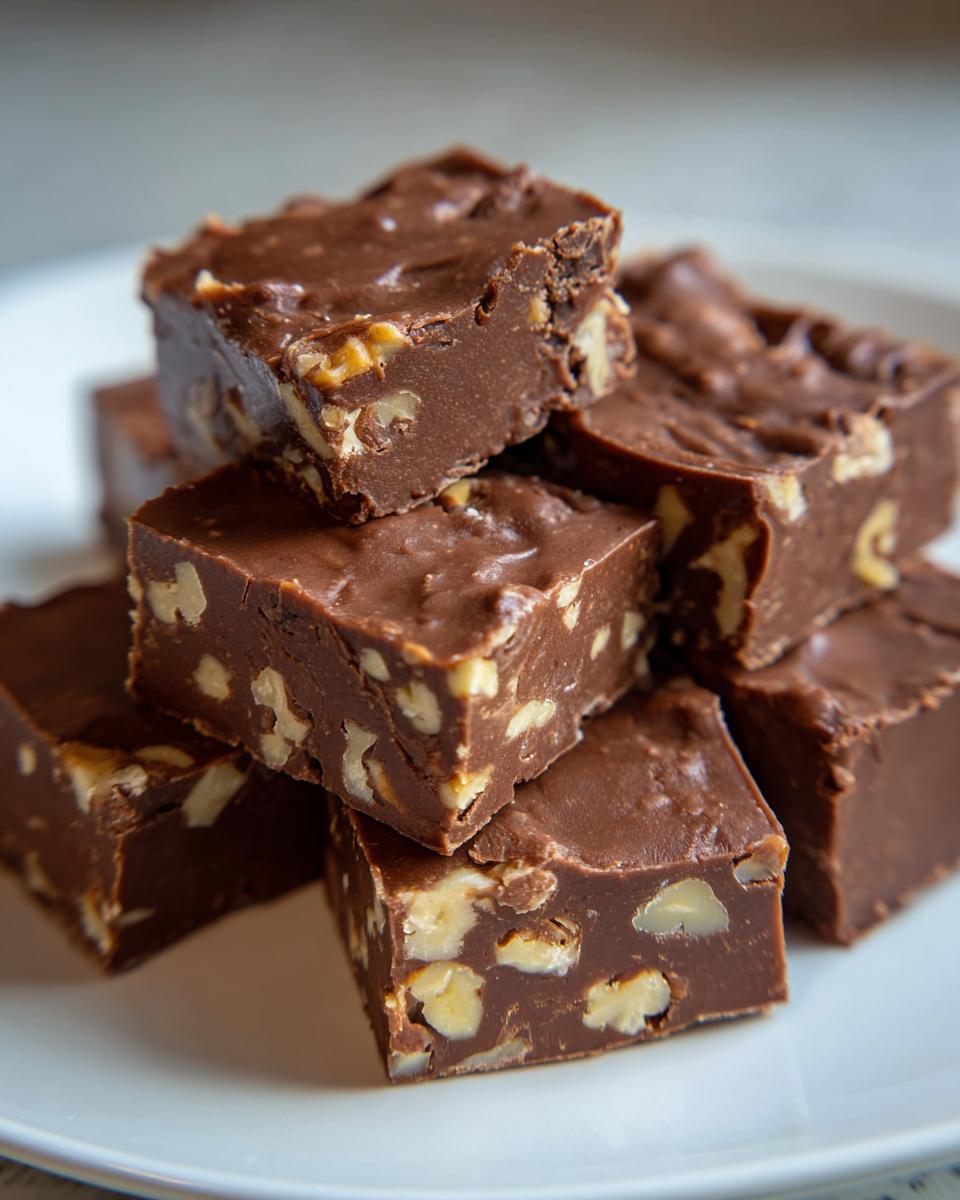
Gently fold everything together until the nuts are distributed. Then, quickly pour that glorious mixture into your prepared pan. Use a rubber spatula to spread it out evenly across the bottom. It will look thick, which is exactly what we want for a solid sliceable **walnut fudge**. Now, move it straight into the fridge for at least two hours to chill out and firm up completely. If you want more general tips on making great food, check out this piece on avoiding fatal mistakes in the kitchen!
Tips for Achieving the Best Maple Walnut Fudge Texture
Getting that perfect texture in fudge is usually reserved for master confectioners who spend hours hovering over boiling sugar, but thankfully, this recipe skips all that drama! The biggest texture win comes from what we already talked about: keeping the heat low when melting the chocolate and milk. If you manage to avoid boiling, you’ve already won 90% of the battle against grainy fudge. If your fudge turns out slightly grainy, it usually means the heat got too high and the sugar crystallized a tiny bit. Don’t panic; it still tastes great, but we want smooth!)
The other secret to texture? Patience during the cooling stage. You have to let the ingredients firm up properly before you rush to cut it. Trying to slice it while it’s even slightly soft just results in a huge, sticky mess, and nobody wants fudge that won’t hold its square shape.
Cooling and Cutting Your Maple Walnut Fudge
Once you’ve smoothed the mixture into your prepared pan, pop it into the refrigerator. Two hours is the minimum time I suggest. If you try to cheat and pull it out early, you’ll just end up with thick chocolate soup instead of satisfyingly firm **Maple Walnut Fudge**. Seriously, let it chill completely!
Now for the cutting trick. Once it’s rock solid from the fridge, you might think it’s ready to cut, but nope! I learned this the hard way. If you slice it ice-cold, the chocolate base is too brittle, and the knife drags, leaving rough edges. Instead, lift the whole slab out using those parchment paper overhangs and let it sit on your counter for maybe ten minutes. Just enough time for it to take the chill off. This lets the fudge relax slightly so you can get perfectly clean, professional-looking squares of **walnut fudge**.
Remember, leftover fudge should always go back into an airtight container in the fridge to keep that soft, dense texture fresh. If you ever have trouble getting things not to stick in the kitchen, even when making things like croutons, a little parchment paper goes a long way! Make homemade croutons? Use parchment!
Storage and Serving Suggestions for Your Maple Walnut Fudge
So, you’ve managed to cut some beautiful squares of **Maple Walnut Fudge**! Now, the big question is how to keep that buttery, maple goodness safe until you devour the whole batch. Good news: this fudge is quite hardy, especially compared to creamy frosting or perishable cakes. The best way to prevent it from going stale or absorbing fridge smells is to keep it sealed up tight. Get yourself a good airtight container—the kind with a solid snap-on lid works best.
It absolutely needs to live in the refrigerator, especially if your kitchen is warm. Fudge gets soft fast when it warms up! Just stack the squares with a little parchment paper between layers if you’re making a huge batch so they don’t stick together while chilling.
When it comes to serving, I find that **walnut fudge** is incredible all by itself, but it really shines when paired with something warm to cut through the sweetness. It goes divine with a cup of strong, black coffee or maybe even a lovely iced latte if it’s a warmer afternoon. If you’re looking for some fun iced drink inspiration to go alongside your rich candy, I found some great cold coffee drinks recipes that would be just perfect! Enjoy every single decadent bite!
Variations on Classic Maple Walnut Fudge
Okay, so once you master the basic **Maple Walnut Fudge**, you might get the itch to tinker, and I’m here for it! It’s easy to switch things up slightly without ruining that perfect, smooth base. Experimenting is half the fun, right? I’m not saying you *have* to change anything—this recipe is flawless as it is—but why stop at walnuts if you don’t want to? A little twist makes the fudges feel brand new.
I love adding a different type of extract just as much as swapping the crunch factor. Think about using almond extract instead of vanilla, or maybe adding just a tiny hint of cinnamon right at the end before the nuts go in. It changes the whole aromatic profile!
Swapping Nuts in Your Maple Walnut Fudge
If you aren’t a huge fan of walnuts, or if you just want a different texture contrast, swapping them out is a breeze. Pecans are my go-to substitution when I see pecans on sale. They offer a slightly sweeter, buttery flavor that pairs wonderfully with the maple syrup notes in the base. For almonds, I like to use sliced almonds instead of chunky halves because they disperse more evenly throughout the fudge.
Remember what I said about toasting? If you switch up the nut, you absolutely must toast the new nut! Pecans might need a minute or two longer than walnuts. Always toast them gently on the stovetop until they smell nutty and fragrant. This makes a huge difference in the final flavor profile of your **walnut fudge** variation. You can find inspiration for other festive holiday flavors if you look at how they handle nuts in recipes like mini sweet potato pecan pies—those baking principles translate!
Frequently Asked Questions About Maple Walnut Fudge
You know I am a firm believer that there are totally valid questions when you are working with candy for the first time! Don’t worry if you’ve run into a snag or have a dietary question; we’ve all been there. I’ve gathered up the questions I get asked most often about keeping this **maple fudge** pure perfection.
Can I substitute the chocolate chips in this maple fudge?
Yes, you absolutely can play with the chocolate! If you prefer milk chocolate, go for it, but know that the final flavor will be much sweeter because you are losing that lovely bitterness from the semi-sweet chips. Some people even use white chocolate chips in a separate batch to make a really intense maple flavor profile. Just follow the melting directions exactly—heat is still your enemy here, no matter the chocolate type!
Why is my walnut fudge grainy?
Ah, the dreaded grain! It nearly always comes down to overheating during the melting stage. Remember how I stressed over and over not to let that mixture boil? If the heat gets too high, those sugar crystals in the condensed milk start to change structure, and that’s what gives you that sandy, gritty texture instead of that smooth, decadent melt. Keep the heat low, stir constantly, and pull it off the burner the second it’s mixed. It’s the only way to guarantee that silky **walnut fudge** texture!
Estimated Nutritional Data for Maple Walnut Fudge
I know that when we are indulging in something this rich and delicious, we aren’t really thinking about the numbers, but it’s fun to know what we’re working with! Since this **Maple Walnut Fudge** recipe is so straightforward, calculating the nutrition is actually pretty easy based on the ingredients we use—the condensed milk, the chocolate chips, and the walnuts. I always preach transparency in the kitchen, even with the sweet stuff, because you should know what you’re sharing with your family.
Please keep in mind that these numbers are based on standard calculations for the ingredients used in the recipe, portioned out into about 36 small squares. If you cut them bigger (which I totally don’t judge!), the per-piece calories and sugar will obviously go up. Don’t treat this as medical advice, treat it as good-to-know info for your indulgence schedule!
Here’s a quick breakdown of what we’re looking at per square:
- Serving Size: 1 square
- Calories: Approximately 120
- Sugar: 15g (Yep, it’s fudge!)
- Sodium: 30mg
- Fat: 6g (That’s where the richness comes from!)
- Saturated Fat: 3g
- Protein: 2g
See? Not terrible for a decadent treat! It’s the perfect little bite to have with your coffee, maybe alongside one of those fancy cold coffee drinks we were talking about earlier. It hits that sweet spot without feeling like you need a nap immediately afterward. Just remember, this is an estimate, so take it with a grain of salt and enjoy the maple!
Share Your Maple Walnut Fudge Creations
Alright, I’ve basically handed over all my secrets now for making the absolute best, fool-proof **Maple Walnut Fudge** right on your stovetop. But the fun doesn’t stop here! Food is meant to be shared, and I absolutely live to hear about your kitchen successes—or even your hilarious kitchen mishaps!
I truly want to know how your batch turned out. Did you try toasting the walnuts? Did you find the perfect time in the fridge for clean slicing? Now is the time to tell me!
Please drop a comment below and let me know how you liked this quick candy recipe. If you feel generous, give it a rating so other home cooks know it’s worth trying. And if you took a picture of your gorgeous, nutty squares, I would love to see them! It makes my day to see my family favorites making their way into your homes. If you have any lingering questions or just want to chat about the perfect consistency, don’t hesitate to hit the contact page right here: Get in touch. Happy fudging, everyone!
Print
Simple Maple Walnut Fudge
- Total Time: 135 min
- Yield: About 36 small pieces 1x
- Diet: Vegetarian
Description
A straightforward recipe for rich maple fudge studded with walnuts.
Ingredients
- 1 (14 ounce) can sweetened condensed milk
- 1 (12 ounce) package semi-sweet chocolate chips
- 1 cup chopped walnuts
- 1 teaspoon vanilla extract
- 1/4 teaspoon salt
Instructions
- Line an 8×8 inch pan with parchment paper, leaving an overhang on the sides.
- In a medium saucepan over low heat, combine the sweetened condensed milk and chocolate chips. Stir constantly until the chocolate is completely melted and the mixture is smooth. Do not let it boil.
- Remove the pan from the heat. Stir in the vanilla extract and salt.
- Fold in the chopped walnuts.
- Pour the fudge mixture into the prepared pan and spread evenly.
- Refrigerate for at least 2 hours, or until firm.
- Lift the fudge out of the pan using the parchment paper overhang. Cut into small squares before serving.
Notes
- For easier cutting, allow the fudge to sit at room temperature for about 10 minutes before slicing.
- Store leftovers in an airtight container in the refrigerator.
- Prep Time: 10 min
- Cook Time: 5 min
- Category: Dessert
- Method: No-Bake/Stovetop
- Cuisine: American
Nutrition
- Serving Size: 1 square
- Calories: 120
- Sugar: 15g
- Sodium: 30mg
- Fat: 6g
- Saturated Fat: 3g
- Unsaturated Fat: 3g
- Trans Fat: 0g
- Carbohydrates: 16g
- Fiber: 0g
- Protein: 2g
- Cholesterol: 10mg
Keywords: maple fudge, walnut fudge, chocolate fudge, easy candy, sweet treat