
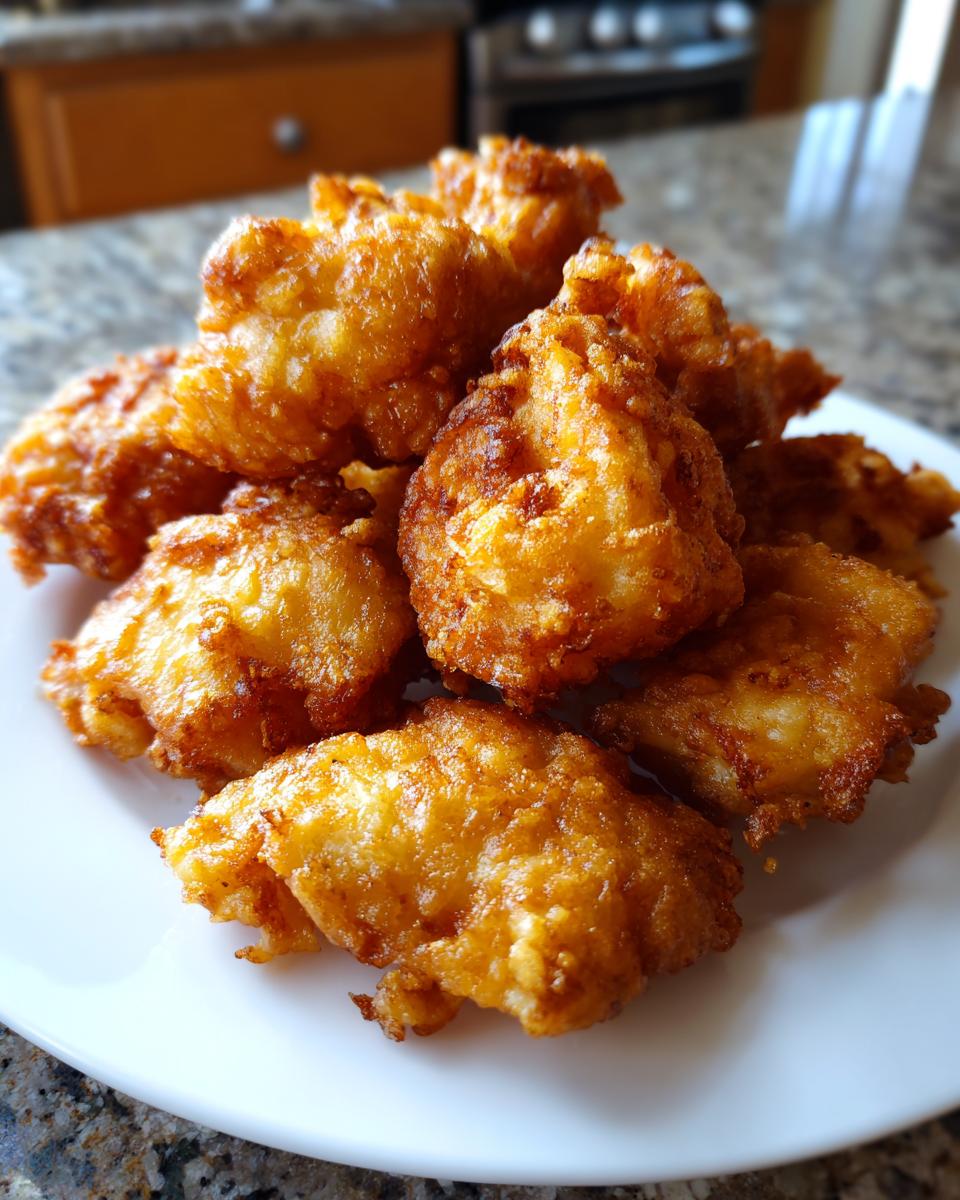
Oh, how I love Japanese food, but let’s be honest—so many takeout versions leave you feeling heavy and oily. You know what I mean? That perfect, airy crunch that just shatters when you bite into it? That was my Everest for years! I’m so excited to finally share my secrets for making truly **Light Crispy Japanese Chicken Tempura** right in your own kitchen. Forget that greasy coating you sometimes get; this technique guarantees that delicate, lacy texture every single time.
The magic isn’t in the chicken, surprisingly enough, but entirely in how you manage the batter temperature and mixing—I spent ages testing different flours and icy liquids until I cracked the code. Trust me, once you nail this, you’ll feel like a pro! We are going for feather-light and perfectly golden brown here, not dense, heavy armor.
Why This Recipe Makes the Best Light Crispy Japanese Chicken Tempura
So, what makes this particular recipe stand out from all those dense, bready fried chicken attempts? It all comes down to science and texture, baby! We aren’t trying to build a crust here; we are making a delicate shell. That airy, shattering crisp is what we’re after.
- The coating stays incredibly light, so you taste chicken, not batter!
- It achieves that authentic, lacy coating you see at the best Tokyo restaurants.
- We avoid that heavy, oil-logged feeling thanks to strict temperature control.
- Keeping ingredients frigid is the secret weapon for that characteristic shattering sound.
The Secret to Light Crispy Japanese Chicken Tempura Batter
This is where the magic happens, and you have to treat this batter like glass. You mix it just enough to bring the flour and liquids together—seriously, stop stirring when you still see lumps! Lumps mean you haven’t developed the gluten network that makes things tough and chewy later.
We rely on mixing cold flour, cornstarch, and baking powder with an icy egg and even colder sparkling water. That massive temperature contrast when the batter hits the hot oil creates steam instantly, puffing up the batter into those gorgeous, thin, tiny shards of crispiness. Don’t you dare stir it smooth; embrace the lumps for the best **Light Crispy Japanese Chicken Tempura**!
Essential Ingredients for Light Crispy Japanese Chicken Tempura
Okay, time to talk supplies! For real tempura, you can’t just throw random things in the bowl. We need specific components to achieve that signature lightweight feel. I like to keep the chicken seasoning SUPER simple here because the batter is the star, right?
We’re using boneless, skinless chicken—I prefer thigh because it stays juicier, but breast works too if you’re watching fat content. The dry mix absolutely requires that cornstarch; that’s what gives you the glass-like crispness instead of that bready coating some places use. Make sure everything for the batter is coming straight from the fridge!
Chicken Preparation for Light Crispy Japanese Chicken Tempura
Grab about a pound of chicken, and cut it into nice, manageable, bite-sized pieces. Don’t make them too huge, or they won’t cook evenly before the coating burns. I don’t usually bother adding salt or pepper before dipping. Why? Because we want that pure, delicate flavor of the light batter to shine through! If you must season it, do it *after* it comes out of the oil.
Crafting the Light Tempura Batter
Remember what I said about lumps? This is the team that makes it happen. We need the flour, the cornstarch (don’t skip it!), baking powder for just a tiny lift, and salt for the dry side. Then, that egg needs to be lightly beaten, and the water? It must be ice-cold sparkling water. The bubbles and the coldness together ensure maximum crispness when it hits the heat for your **Light Crispy Japanese Chicken Tempura**.
Tentsuyu Dipping Sauce Components
While the oil heats, you can whip up the sauce. It’s simple stuff, really, but crucial for flavor contrast. You need dashi stock—that’s your savory base—then soy sauce for depth, and just a touch of mirin for balancing sweetness. Heat it gently until it simmers, and it’s ready to go. Keep it warm next to your frying station!
Step-by-Step Instructions for Perfect Light Crispy Japanese Chicken Tempura
Alright, the setup is everything here. Get your chicken ready, make sure your sparkling water is chilling hard, and your oil is waiting patiently. We are moving fast once the frying starts, so prep work is key to getting that gorgeous, non-soggy result. Follow these phases, and you won’t even sweat!
- First thing: whisk together all your dry ingredients—that’s the flour, cornstarch, baking powder, and salt—in a medium bowl. Get that totally combined so the leavening agents are spread out.
- In a tiny separate dish, give that egg a quick, light whisk. Not frothy, just broken up.
- Now for the critical part: Combine the just-beaten egg with the dry mix. Quickly pour in that ice-cold sparkling water. Mix this *maybe* three times with a fork or chopsticks, just until the white streaks disappear. Do not, I repeat, do not try to make it smooth!
Mixing the Light Crispy Japanese Chicken Tempura Batter Correctly
See how I stressed not overmixing? That’s the biggest mistake people make when trying for true **Light Crispy Japanese Chicken Tempura**. If you develop the gluten in the flour by mixing too much, your coating turns into thick, rubbery armor, and we want a delicate veil of crispness! Lumps are your friends here. They break down into pockets of air when they hit the fryer, giving you that airy crunch. Don’t force it smooth, or you ruin the texture before you even start frying. This takes real confidence!
Achieving the Correct Oil Temperature for Light Crispy Japanese Chicken Tempura
Time to heat the oil. You need a deep pot—at least two inches of vegetable oil—and you must have a thermometer handy. Seriously, don’t guess! We need that oil locked in at exactly 340°F (170°C). If the oil is too cool, the batter soaks it up like a sponge and becomes heavy. If it’s too hot, the outside burns before the chicken cooks. Temperature consistency is the golden rule for great **Light Crispy Japanese Chicken Tempura**.
The Frying Technique for Light Crispy Japanese Chicken Tempura
Once that oil is singing at 340°F, take your battered chicken pieces and let the extra batter drip off gently back into the bowl. Remember, much like when you are chilling your drinks and make the mistake of not using cold water, heat management is everything here! Carefully lay them into the hot oil. Work in small batches! Seriously, just a few pieces at a time. Overcrowding drops that oil temperature immediately, and boom—soggy chicken.
Let them fry for about 3 to 4 minutes. Turn them gently once or twice just to brown evenly. When they look lightly golden—not deep brown, light gold is perfect—pull them out with a slotted spoon and set them straight onto a wire rack lined with paper towels. This lets air circulate and drains the excess oil beautifully. Serve them right away with that warm dipping sauce we talked about. That contrast is everything!

Tips for Success with Light Crispy Japanese Chicken Tempura
You’ve managed the temperature and mixed that fragile batter perfectly—don’t let all that hard work go to waste in the draining stage! My biggest tip, learned the hard way, is that draining on a flat paper towel invites sogginess. You must use a wire rack set over paper towels. This allows air to move underneath your beautiful **Light Crispy Japanese Chicken Tempura**, keeping all the bottoms crisp.
Also, eat immediately! Tempura waits for no one. That beautiful texture starts fading the moment it leaves the oil. If you have a large crowd, try staggering your batches instead of trying to fry everything at once. Keep the cooked pieces warm on a baking sheet in a very low oven (about 200°F), but honestly, the best way is just to have everyone ready at the table when the first batch comes out!
Ingredient Notes and Substitutions for Light Crispy Japanese Chicken Tempura
I get asked all the time if they can use substitutes, and the answer is: maybe, but it changes the game! If you are chasing that ultra-delicate, shattered crispness that screams authentic **Light Crispy Japanese Chicken Tempura**, I strongly recommend sticking to the list. But hey, we all improvise in the kitchen, so let’s talk trade-offs.
For the chicken, if you’re worried about fat, use breast, but be warned—it dries out faster. Thigh meat has that little bit of fat running through it, which helps it stay super tender even when bathing in hot oil for those few minutes. If you use breast, pull it slightly earlier!
Using Sparkling Water Alternatives
That ice-cold sparkling water is non-negotiable for me, seriously. It introduces gas bubbles right before mixing, which helps create that lacy coating when it hits the heat. If you absolutely don’t have sparkling water, you *could* use plain ice water, but you must add a tiny pinch more baking powder to try and compensate for the lost carbonation. It won’t be quite as light, though, so keep that expectation managed.
Flour and Starch Ratios
The ratio of all-purpose flour to cornstarch is key for keeping this **Light Crispy Japanese Chicken Tempura** light. If you try to use all flour, you’ll end up with something thick and bready, more like standard American fried chicken than tempura. The cornstarch is what keeps that coating thin and almost translucent. If you run out of cornstarch, you can try using potato starch instead—it often yields an even crispier result, though the flavor profile changes subtly!
Rethinking the Dipping Sauce Substitutions
The Tentsuyu sauce relies on dashi for that specific umami baseline. If you’re stuck? You can make a quick cheat dashi using water and a tiny bit of instant dashi powder, but avoid using straight chicken broth, as the flavor profile gets too heavy and savory for the light tempura.
Storage and Reheating Instructions for Light Crispy Japanese Chicken Tempura
Here’s the hard truth about this glorious **Light Crispy Japanese Chicken Tempura**: it’s best consumed within about five minutes of leaving the fryer. That perfect crispness starts dissolving the moment steam hits the coating, so leftovers are always a trade-off. Don’t even think about the microwave; that’s just a recipe for sadness and soggy regret!
If you must save some for later—maybe you’re meal-prepping for a very short window—you need a game plan. Once the chicken is completely cooled to room temperature (this is important; storing it warm traps steam!), put it in an airtight container. You can sprinkle a tiny bit of dry flour or cornstarch over the pieces before sealing, which sometimes helps absorb residual moisture, though it’s a long shot.
Storing the Dipping Sauce Separately
Please, nobody put the Tentsuyu sauce in the same container as the chicken! The moisture from the sauce will destroy the crust instantly, even if the chicken is cold. Keep the sauce in a small, tightly sealed jar in the fridge. Since it’s mostly dashi, soy, and mirin, it lasts a few days just fine. When you are ready to eat the leftovers, reheat the sauce gently on the stovetop until warm.
The Only Way to Reheat Light Crispy Japanese Chicken Tempura
If you want to bring back even a shadow of that original crunch, you must use dry heat. Forget the microwave—it steams everything and ruins that wonderful light batter. The best appliance for this job is an air fryer or a regular oven.
If using the oven, preheat it high, like 400°F (200°C). Lay the chicken pieces in a single layer on a wire rack placed over a baking sheet. Pop them in for about 6 to 8 minutes. You’re not cooking them again; you’re just using the high heat to aggressively drive out residual oil and refresh the crispness. The air fryer is even better—crank it to 375°F for 4 to 5 minutes. It works so fast to dry out the exterior. After that little refresh, serve immediately with that warm sauce!

Serving Suggestions to Complement Your Light Crispy Japanese Chicken Tempura
Okay, you’ve made the most beautifully light and crispy chicken tempura imaginable. Now you can’t just dump it on a plate and call it a day, right? The way you serve this makes such a difference in the whole experience! Because the batter is so subtle, you want sides that balance it without overpowering that delicate crunch.
Traditionally, tempura is all about clean flavors. The dipping sauce (Tentsuyu) is essential, obviously, but pairing it with some fresh elements cuts through the richness of the frying process perfectly. It makes the whole dish feel lighter!
The Must-Have Classic Garnishes
You absolutely need grated daikon radish (daikon oroshi) on the side. Seriously, don’t skip this little mound of white radish. You mix just a tiny bit of the daikon right into your warm dipping sauce before you dunk the chicken. It sounds simple, but that earthy, slightly sharp flavor cuts through the oiliness flawlessly. It’s like a built-in palate cleanser between every bite of your **Light Crispy Japanese Chicken Tempura**.
Also, have some freshly grated ginger ready. A tiny dab of that sharp ginger grated into the sauce brings a wonderful warmth and spice. My family also always insists on a little bowl of thinly sliced green onions sprinkled over the top right before serving. That little bit of color and fresh onion bite completes the authentic look!
Pairing with a Refreshing Beverage
Since this is lighter fare, you want a drink that feels refreshing, too—something that won’t weigh down your palate after enjoying that fantastic texture. If you’re taking a break from alcohol or just want something bright, I highly recommend looking into a good mocktail. They offer all the flavor complexity without the heaviness.
I recently tried this amazing Cucumber Mint Cooler mocktail, and let me tell you, the cool, slightly vegetal notes of cucumber were the perfect counterpart to the savory fried chicken. It’s so crisp and refreshing, it almost tastes like it contributes to the crunch!
Making it a Full Meal
If you’re turning this chicken tempura into a proper dinner, serving it over a bowl of hot short-grain white rice is traditional. You can arrange the tempura artfully over the rice and drizzle a touch of the Tentsuyu lightly over the rice, avoiding drenching the tempura itself, of course! A simple side of lightly dressed cabbage slaw or maybe some pickled vegetables rounds everything out nicely for a balanced, delicious meal.
Frequently Asked Questions About Light Crispy Japanese Chicken Tempura
I always get so many questions after people try frying for the first time—it’s nerve-wracking, I know! But mastering that initial fear of hot oil is what gets you to that perfect, airy texture. Here are some of the things I hear most often when folks are attempting their first batch of truly **Light Crispy Japanese Chicken Tempura**.
Can I make the Light Crispy Japanese Chicken Tempura batter ahead of time?
Oh, absolutely not! And this is probably the most important rule after maintaining that oil temperature. You need that intense temperature shock between the ice-cold batter and the hot oil to create those beautiful airy pockets of crispness. If you mix the batter ahead of time, it warms up, the carbonation in the sparkling water goes flat, and the flour starts absorbing moisture. You end up with a heavy, flat coating instead of your desired **light batter**. Mix it literally seconds before you start dipping, and make sure your egg and water are literally icy!
What is the best oil to use for authentic Japanese fried chicken tempura?
When you’re deep-frying, especially something delicate like tempura, the type of oil matters way more than you think. You need an oil with a high smoke point so it doesn’t break down and give your chicken a funky taste before the chicken even cooks through. I always stick to neutral oils.
My top picks for achieving that authentic **Japanese fried chicken tempura** flavor are canola oil or, if I’m feeling fancy, rice bran oil. Peanut oil also works great because it handles high heat like a champ. Whatever you choose, make sure the oil is clean and fresh for the best, lightest results. Avoid olive oil or butter—they break down too quickly!
If you enjoy a nice, crisp pairing, sometimes you need a crisp drink alongside that fried chicken! Maybe check out how to make the perfect Gin and Tonic to wash it down!
Estimated Nutritional Data for Light Crispy Japanese Chicken Tempura
Now, I’m not one for counting every single calorie when I’m cooking something glorious like this **Light Crispy Japanese Chicken Tempura**, because honestly, the joy is in the eating! But for those of you who like to keep track, I took a look at the recipe breakdown. Remember, this is just an estimate, and since a lot of the wonderful, light batter doesn’t actually stick to the final product (it falls off into the oil), the actual numbers on your plate might be a little lower!
These figures are based on the whole recipe divided into four servings, using chicken breast since it’s the leaner option. If you use thigh meat, the fat content will naturally be a tiny bit higher, but trust me, the flavor payoff is worth it sometimes!
Here’s the basic snapshot:
- Serving Size: 1/4 of recipe
- Calories: 350
- Protein: 30g
- Fat: 15g (Mostly unsaturated)
- Carbohydrates: 25g
- Sugar: 5g
- Sodium: 650mg
Since we aren’t soaking these in a heavy sauce, the sugar stays reasonably low, and the frying method helps keep the saturated fat down because we are draining them properly on a wire rack. The high protein count comes naturally from all that chicken! It really is a surprisingly balanced take on **Japanese fried chicken** when you look at it this way.

Light Crispy Japanese Chicken Tempura
- Total Time: 35 min
- Yield: 4 servings 1x
- Diet: Low Fat
Description
A recipe for making light and crispy chicken tempura, a popular Japanese fried dish.
Ingredients
- 1 pound boneless, skinless chicken breast or thigh, cut into bite-sized pieces
- 1 cup all-purpose flour
- 1/2 cup cornstarch
- 1 teaspoon baking powder
- 1/2 teaspoon salt
- 1 large egg, lightly beaten
- 1 cup ice-cold sparkling water
- Vegetable oil, for deep frying
- Dipping sauce (Tentsuyu) ingredients: 1/2 cup dashi stock, 1/4 cup soy sauce, 2 tablespoons mirin
Instructions
- In a medium bowl, whisk together the flour, cornstarch, baking powder, and salt for the batter.
- In a separate small bowl, lightly beat the egg.
- Add the beaten egg to the dry ingredients. Pour in the ice-cold sparkling water. Mix briefly with chopsticks or a fork until just combined; do not overmix. Lumps are acceptable.
- Pour about 2 inches of vegetable oil into a deep, heavy-bottomed pot or deep fryer. Heat the oil to 340°F (170°C).
- Dip the chicken pieces into the batter, allowing excess to drip off.
- Carefully place the battered chicken into the hot oil, working in small batches to avoid overcrowding the pot.
- Fry for 3 to 4 minutes, turning occasionally, until light golden brown and cooked through.
- Remove the tempura with a slotted spoon and place on a wire rack set over a paper towel-lined baking sheet to drain excess oil.
- To make the dipping sauce, combine dashi stock, soy sauce, and mirin in a small saucepan. Heat gently until simmering, then remove from heat.
- Serve the chicken tempura immediately with the warm dipping sauce.
Notes
- Keep the batter cold; the temperature difference between the batter and the hot oil creates the crispiness.
- Do not stir the batter once mixed.
- Maintain the oil temperature; if it drops too low, the tempura will absorb too much oil and become soggy.
- Prep Time: 20 min
- Cook Time: 15 min
- Category: Main Course
- Method: Deep Frying
- Cuisine: Japanese
Nutrition
- Serving Size: 1/4 of recipe
- Calories: 350
- Sugar: 5
- Sodium: 650
- Fat: 15
- Saturated Fat: 3
- Unsaturated Fat: 12
- Trans Fat: 0
- Carbohydrates: 25
- Fiber: 1
- Protein: 30
- Cholesterol: 90
Keywords: chicken tempura, Japanese fried chicken, light batter, crispy chicken, deep fry