
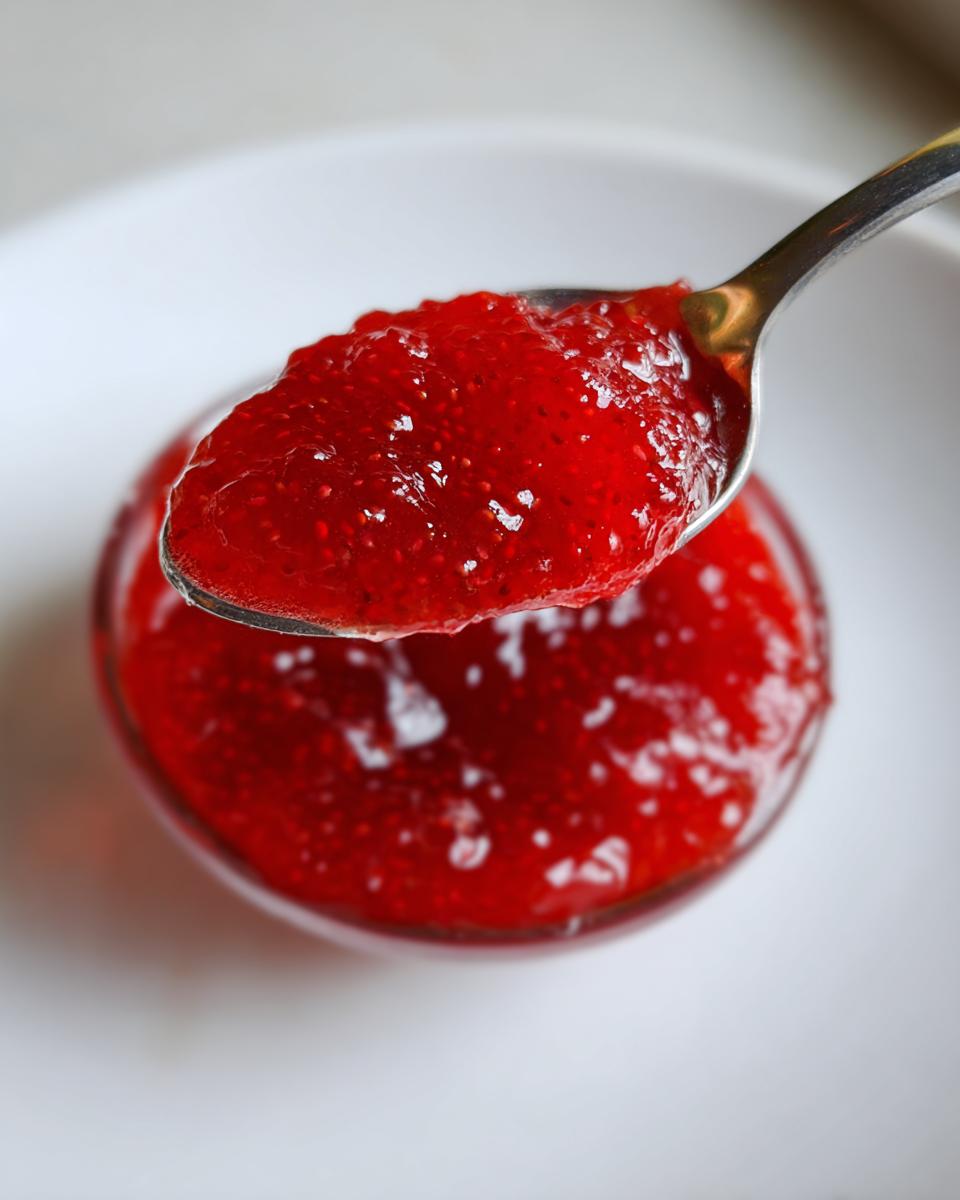
There is just nothing—and I mean *nothing*—like that first taste of homemade jam you made yourself. The scent of sun-ripened strawberries simmering away on the stovetop? It beats anything you find on a grocery shelf, hands down. I’ve tried every fancy method out there, but I keep coming back to this one because it’s the easiest way to get the absolute best **Homemade Strawberry Jam** possible. We’re talking about pure, vibrant strawberry flavor without weird additives or stiff, waxy textures. Because I use only fresh berries, real sugar, and that little bit of lemon juice for balance, I know exactly what’s going onto my morning toast. Trust me, once you try this simple technique, you’ll never buy a jar again!
Why This Homemade Strawberry Jam Recipe is Essential
This recipe isn’t fancy, but that’s why it works so beautifully. When you make your own jam, you are in total control! Forget that overly thick, nearly flavorless stuff that comes in jars from the store. You gain so much more than just a spread; you get that bright, sunny taste of actual strawberries.

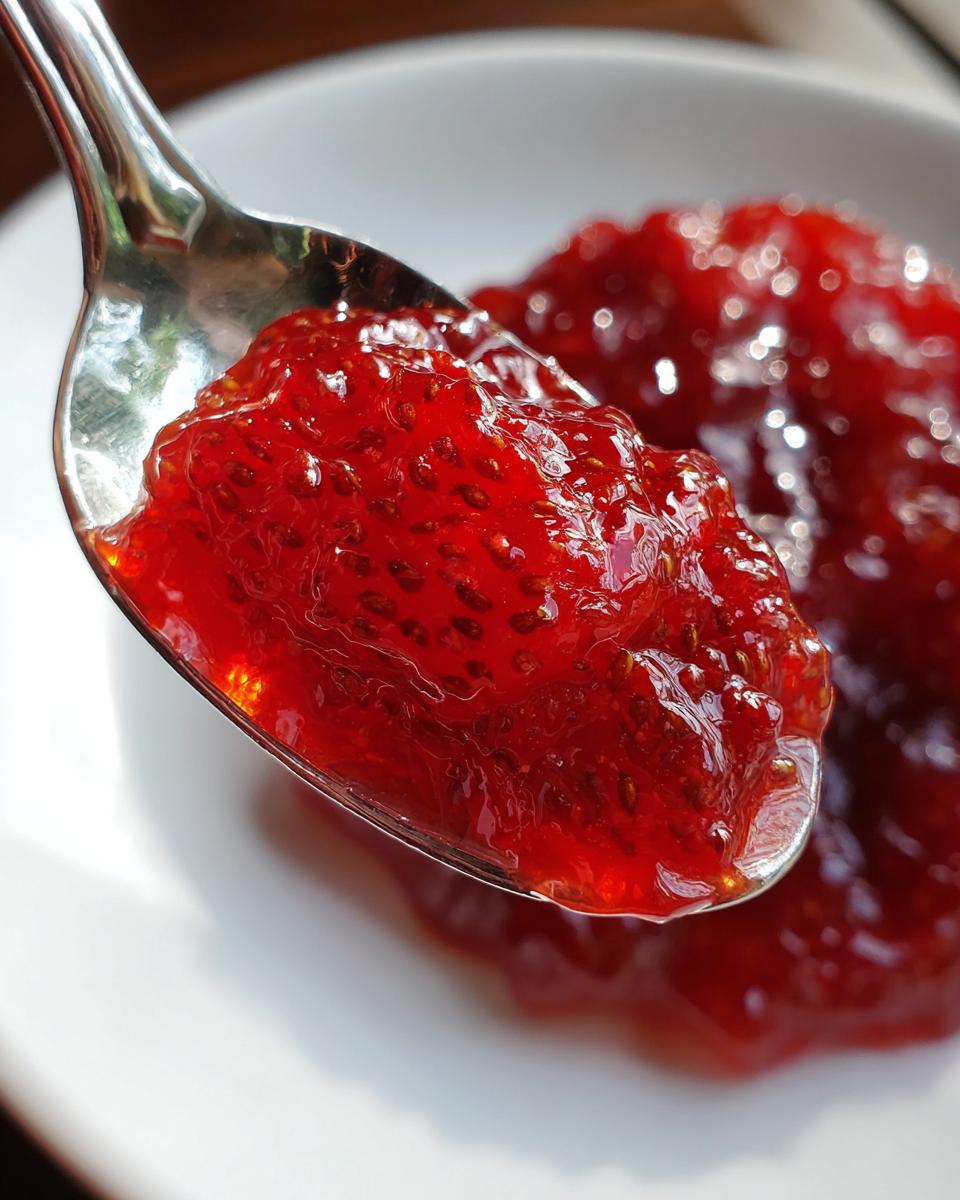
- The texture is just right—soft, luscious, and perfect for spooning.
- You get to use only whole, fresh fruit.
If you’re looking for other ways to use those beautiful berries, you should check out my recipe for strawberry sauce too! It’s incredible over ice cream.
Superior Flavor Over Store-Bought
Store-bought **Homemade Strawberry Jam** is often cooked down for days to last forever on the shelf. That process destroys the fresh, sweet-tart flavor we love. My method keeps the berries tasting vibrant and fresh, like summer sunshine trapped in a jar.
Simple Ingredient List for Homemade Strawberry Jam
What I love most here is what’s *not* in it. We truly only need strawberries, sugar, and lemon juice. That simplicity is the secret handshake that lets the fruit shine through in this perfect **Homemade Strawberry Jam**.
Gathering Ingredients for Your Homemade Strawberry Jam
Okay, let’s talk about the stars of the show! Getting your ingredients prepped is half the battle, but with this jam, the list is delightfully short. You want to use firm, ripe strawberries—no mushy ones allowed, or your jam will turn into soup, seriously! We need exactly 2 pounds of those gorgeous berries. Make sure you hull them all and then cut them down—halves or quarters, depending on how big they are when you start.
Next up is the sugar. We use 4 cups of granulated sugar. Don’t be tempted to use less, because that sugar does more than just sweeten; it helps the jam set up properly. And finally, that little splash of liquid gold: 1/4 cup of fresh lemon juice. If you’re interested in making a quick syrup for drinks sometime, check out this simple syrup guide!
Ingredient Notes and Substitutions for Homemade Strawberry Jam
When picking strawberries, think deep red, but still firm to the touch. If they are too soft, they just break down into liquid too fast when we start cooking. The lemon juice is non-negotiable, folks! It provides the acid needed to activate the natural pectin in the berries, which is how we get that lovely set without adding any packaged pectin bombs. It’s the key to truly great **Homemade Strawberry Jam**.
As for the sugar, stick exactly to those 4 cups. If you try to swap in something like honey or maple syrup, you change the chemistry, and you might end up with sticky syrup instead of jam. This recipe relies on that specific sugar ratio to reach that perfect set point every time!
Essential Equipment for Perfect Homemade Strawberry Jam
Forget fancy gadgets; we keep this super simple, but there is one tool you absolutely cannot skip if you want reliable results for your **Homemade Strawberry Jam**. First, you need a really large, heavy-bottomed pot. You’ll thank me later when the jam simmers and doesn’t stick or scorch the bottom!
The real MVP here is the candy thermometer. Seriously, ditch the guesswork. This thermometer takes all the stress out of knowing when your jam is done cooking. You just clip it on and watch for that crucial 220 degrees Fahrenheit mark. Grab a wooden spoon for stirring and some sterilized jars ready to hold your glorious finished product!
Step-by-Step Instructions for Making Homemade Strawberry Jam
Alright, here’s where the magic happens! We start easy. First, get those gorgeous strawberries washed up, hulled, and cut into smaller pieces. Don’t stress about perfect uniformity here; we want a rustic look for our **Homemade Strawberry Jam**.
Next, take your biggest, best pot. Toss in all those chopped berries and pour in every speck of that 4 cups of sugar. Give it a good stir just to combine, then step away! This part is critical: you need to let this mixture just hang out for at least one hour. Seriously! If you rush this, you won’t get the best texture.
After an hour, you’ll see the berries have wept all kinds of lovely juice. Now, stir in that 1/4 cup of lemon juice. Place the pot over very high heat. We need a rolling, furious boil—the kind that bubbles up vigorously even when you stir it. Keep stirring often so the sugar doesn’t burn on the bottom. This takes about 15 to 25 minutes after it hits that rolling boil.
Keep an eye on that thermometer! We are aiming squarely for 220 degrees Fahrenheit. If you don’t have a thermometer, you can check the sheet test—grab a cold plate from the freezer and drop a tiny bit of jam on it. If it wrinkles when you push it, bingo! You’ve hit the sweet spot. If you’re looking for other tips on timing things in the kitchen, I wrote a whole breakdown on avoiding the fatal mistake when making iced tea that might help you keep track of time!
Maceration: The Key to Flavor in Homemade Strawberry Jam
That hour where the sugar sits with the strawberries? That’s called maceration, and it’s your best friend. The sugar literally pulls all the moisture and the intense flavor right out of the fruit before we even turn on the heat. If you skip this step, you’re just boiling water and sugar, and that is NOT how you make quality **Homemade Strawberry Jam**. This slow, hands-off start is why ours tastes so much better than store brands!
Achieving the Right Set Point for Your Homemade Strawberry Jam
Listen, I know those candy thermometers look fiddly, but they are lifesavers for jam making. You must hit 220°F. This temperature signals that enough water has cooked off so that the sugar concentration is high enough to gel things up when it cools. If you miss it and pull the jam off too early, it stays liquidy sludge. If you cook it too long, it becomes rock candy! Always confirm the temperature with the cold plate wrinkle test for the best **Homemade Strawberry Jam** consistency.
Tips for Success When Making Homemade Strawberry Jam
Making jam is fun, but sometimes those last few minutes on the stove can feel like forever. You want perfect set, right? I’ve got two simple tricks that guarantee you won’t end up with a runny mess in your jars of **Homemade Strawberry Jam**.
First, the plate trick! Before you even turn the heat on, grab a small, shallow plate—the saucer from an old coffee cup works perfectly—and pop it in the freezer. You need that plate to be ice cold because it acts as a mini-freezer for testing your jam’s set point. When you think you are getting close to 220 degrees, take the pot off the heat and drop a tiny teaspoon of the hot jam onto that frozen plate. Pop it back into the freezer for just 60 seconds.
When you pull it out, gently nudge the jam or push it with your finger. If it wrinkles up nicely, you’re done! If it just slides around like syrup, it needs another five minutes of boiling, and then you test again. That test is your secret weapon against runny jam.

My personal tip, gained from years of burning my fingers, is about skimming the foam. When you pull the jam off the heat, a cloudy foam almost always floats to the top. If you want that crystal-clear, beautiful look for your **Homemade Strawberry Jam**, just take two spoons and skim that foam right off. It doesn’t affect the taste, but it makes your finished jars look professionally made!
Storage and Reheating Instructions for Homemade Strawberry Jam
Now you have jars of glorious, glistening **Homemade Strawberry Jam**! The big question is, how do you keep this sunshine fresh? You have two paths here, depending on how long you want it to last and how much time you want to spend on it right now.
If you plan to eat this jam quickly—say, within three weeks—you can just ladle the hot jam into clean jars, leave about a quarter-inch of space at the top (that’s headspace, folks!), wipe those rims spotless, and pop them right into the fridge. It’s super easy and quick!
But if you’re serious about keeping your **Homemade Strawberry Jam** safe and shelf-stable for months and months, you need to do the water bath canning part. This makes sure you have gifts ready for holidays or just a pantry full of goodies for the winter.
After filling those sterilized jars and wiping those rims clean, place them carefully into a boiling water bath canner. Make sure the water covers the lids by at least an inch. Let them boil hard, covered, for exactly 10 minutes. Once that timer goes off, turn off the heat, take the lid off, and let them sit for five minutes before pulling the jars out to cool on a towel on the counter. You’ll hear that satisfying *pop* as they seal!
If you’re looking for something equally satisfying to bake for the holidays, check out the wonderful recipe I found for caramel apple pie—it pairs perfectly with a dollop of this jam!
If you choose not to can, remember, the refrigerated jam needs to be eaten within a month or so. But honestly, with how good this **Homemade Strawberry Jam** tastes, I doubt it lasts that long anyway!
Serving Suggestions for Your Homemade Strawberry Jam
So, you’ve got jars of glistening, perfect **Homemade Strawberry Jam**! Now what? Well, the obvious answer is toast, right? Slather it on some good sourdough or a warm English muffin. But don’t stop there!
This jam is fantastic swirled into plain Greek yogurt or cottage cheese for a bright morning snack. If you are feeling ambitious, use a spoonful to thin out and create an instant, tart glaze for grilling chicken or pork chops. It adds such a lovely shine!
And for dessert? Skip store-bought toppings altogether. This jam goes absolutely perfectly over my recipe for easy no-bake cheesecake. It just brings everything together beautifully. Enjoy every single scoop!
Frequently Asked Questions About Homemade Strawberry Jam
I get so many questions once folks try making their first batch of **Homemade Strawberry Jam**! It’s normal to have a few wobbles when you’re dealing with sugar thermometers and boiling jars. Here are the things I hear asked most often, hopefully, this helps clear up any confusion!
Can I make Homemade Strawberry Jam without pectin?
Oh, absolutely you can! That’s the beauty of this method. You shouldn’t need to buy any extra commercial pectin. The acid provided by the fresh lemon juice stirs up the natural pectin that’s already hiding inside those strawberries. Cook it down correctly to that 220°F mark, and that pectin does all the work for you. It’s nature doing the heavy lifting!
What is the shelf life of this homemade jam?
This depends entirely on how you store it! If you take the time to do the full water bath canning—which I highly recommend—your properly sealed **Homemade Strawberry Jam** can sit happily in a cool, dark pantry for a full year, sometimes even longer. Jars that you just put in the fridge right away, without the canning process, need to be enjoyed within about three weeks. They won’t last long anyway, trust me!
Why is my strawberry jam too runny?
Nine times out of ten, if your jam finished cooking and it’s still running like syrup, it just needed more time on the heat. We have to boil off enough water so the sugar concentration is high enough to set when it cools. Next time, trust the thermometer and keep boiling after that rolling boil starts. If you’re looking around for other things to cook, these apple hand pies are perfect, too!
Estimated Nutritional Data for Homemade Strawberry Jam
Now, I’m not a nutritionist, so take these numbers with a big grain of salt—or maybe a big dollop of jam on a scone! These values are just an estimate based on the ingredients list for the **Homemade Strawberry Jam** recipe, and like all homemade things, your exact results might look a little different depending on how ripe those berries were or the exact brand of sugar you used.
But just so you have an idea, here’s what we are looking at per serving size, which I think is about two tablespoons:
- Serving Size: 2 tablespoons
- Calories: 100
- Sugar: 25g (Yes, jam has sugar, that’s how it works!)
- Sodium: 1mg
- Fat: 0g
- Protein: 0g
- Cholesterol: 0mg
See? No fat, no cholesterol, just that lovely fruit sweetness. It’s a perfect treat when spread thinly on your morning bread. Just remember, this is a rough guide; use it to keep track, but don’t stress over the decimal points. Enjoy the jam!
Print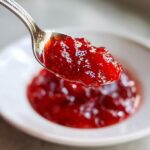
Simple Homemade Strawberry Jam
- Total Time: 45 min
- Yield: About 4 half-pint jars 1x
- Diet: Vegetarian
Description
A basic recipe for making sweet strawberry jam at home.
Ingredients
- 2 pounds fresh strawberries
- 4 cups granulated sugar
- 1/4 cup lemon juice
Instructions
- Wash and hull the strawberries. Cut them into halves or quarters, depending on size.
- Combine the strawberries and sugar in a large, heavy-bottomed pot. Let this mixture sit for at least 1 hour, or until the sugar dissolves and the berries release juice.
- Stir in the lemon juice.
- Place the pot over high heat and bring the mixture to a rolling boil, stirring often to prevent sticking.
- Continue to boil rapidly, stirring frequently, until the jam reaches 220 degrees Fahrenheit on a candy thermometer, or until it sheets from a cold spoon. This usually takes about 15 to 25 minutes after reaching a boil.
- Remove the pot from the heat. Skim off any foam that forms on the surface.
- Ladle the hot jam into sterilized jars, leaving 1/4 inch headspace. Wipe the rims clean.
- Process the jars in a boiling water bath for 10 minutes to seal, or store in the refrigerator for immediate use.
Notes
- For best results, use firm, ripe strawberries.
- Test the set by placing a small plate in the freezer before you start cooking; drop a teaspoon of jam onto the cold plate and return it to the freezer for 1 minute. If the jam wrinkles when pushed, it is set.
- Prep Time: 15 min
- Cook Time: 30 min
- Category: Dessert
- Method: Stovetop Cooking
- Cuisine: American
Nutrition
- Serving Size: 2 tablespoons
- Calories: 100
- Sugar: 25g
- Sodium: 1mg
- Fat: 0g
- Saturated Fat: 0g
- Unsaturated Fat: 0g
- Trans Fat: 0g
- Carbohydrates: 26g
- Fiber: 0g
- Protein: 0g
- Cholesterol: 0mg
Keywords: strawberry jam, homemade jam, preserved fruit, strawberry preserves, canning