
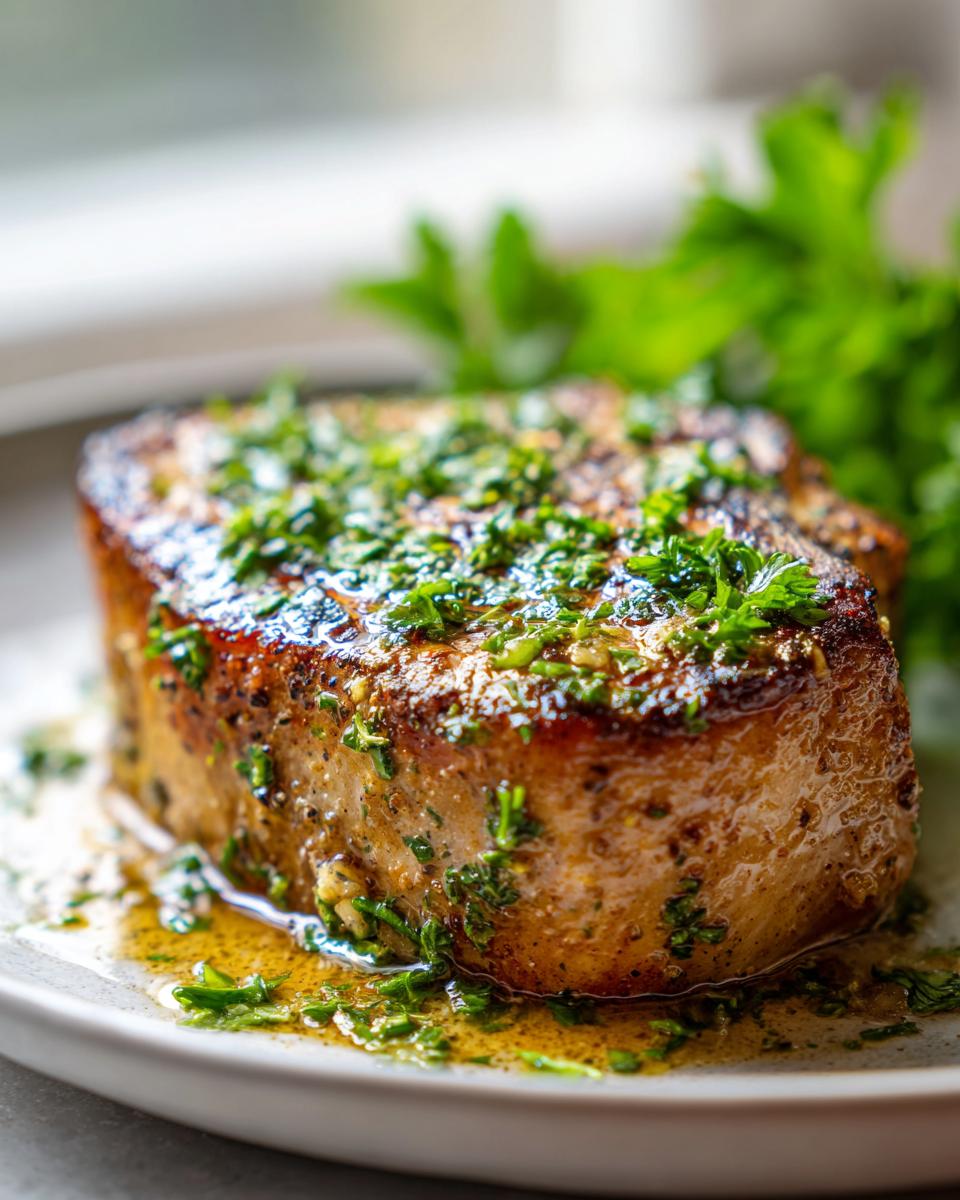
Listen, I know the feeling. It’s 5:30 PM, I’m staring into the fridge, and I desperately need a dinner that tastes like I spent way more time on it than I actually have. That’s where my absolute favorite weeknight hero comes in: Garlic Butter Pan Seared Pork Chops. Honestly, these are magic. We’re talking thick, juicy chops that practically melt in your mouth, bathing in this unbelievably fragrant sauce of sizzling butter and roasted garlic.

This isn’t some fancy, complicated recipe, either. It’s the kind of cooking I do when I want maximum flavor payoff with minimum fuss. I probably make this twice a month because the cleanup is easy and my family never stops raving about the texture. If you’ve ever ended up with dry, sad pork chops, trust me, this simple sear-and-baste technique fixes everything.
Why You’ll Love These Garlic Butter Pan Seared Pork Chops
- It’s seriously lightning fast—ready in about 15 minutes total!
- The garlic butter basting guarantees incredible, savory flavor in every single bite.
- Cleanup is a breeze since everything happens right in one skillet.
- Resulting chops are always succulent and perfectly tender.
Honestly, if you need a high-impact dinner without the hassle, this is your recipe. You won’t be disappointed!
Ingredients for Perfect Garlic Butter Pan Seared Pork Chops
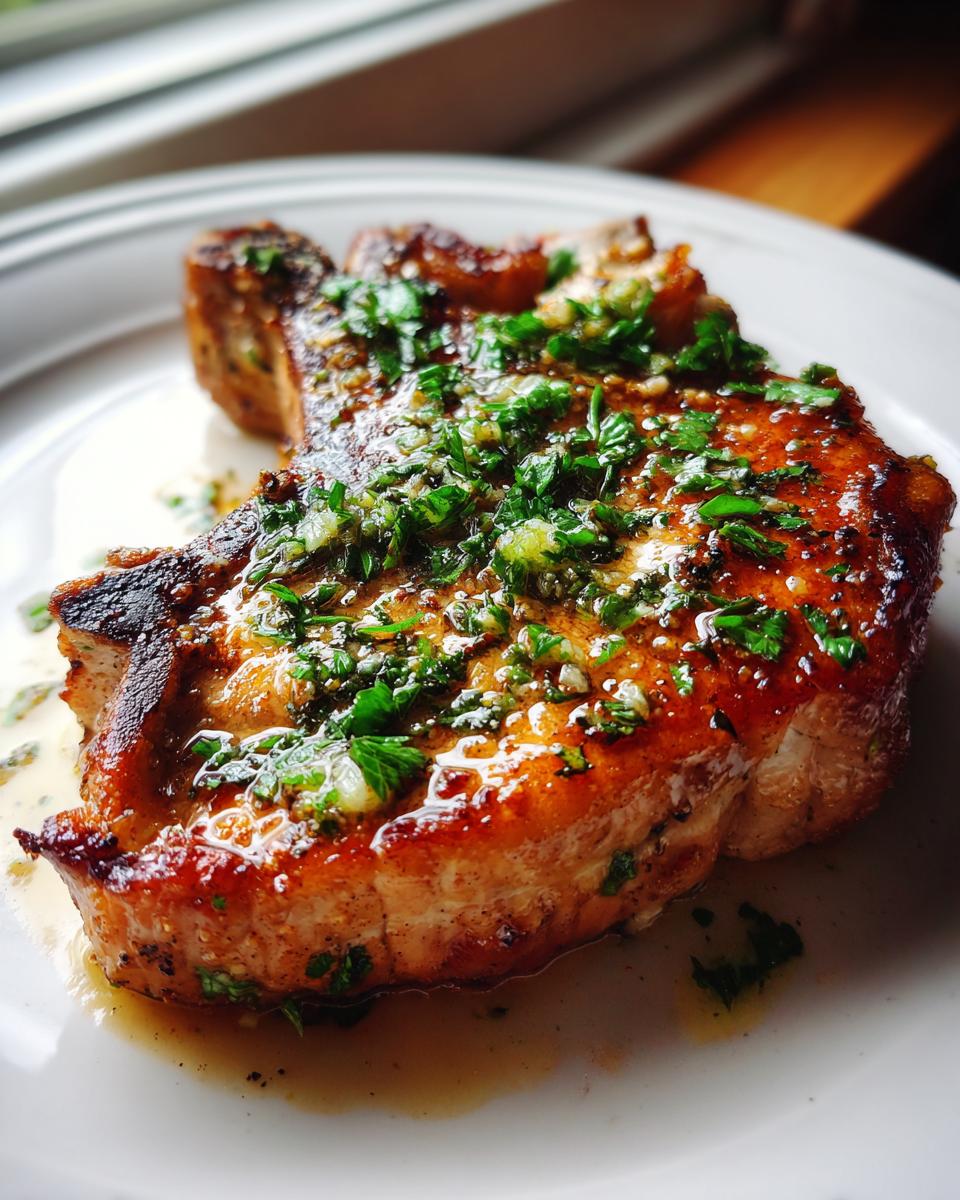
Okay, if you look at this ingredient list, you might just laugh because it’s so short! That’s the beauty of simple cooking, right? But don’t let the short list fool you; the quality of these few items makes a huge difference. You absolutely need two nice, thick-cut pork chops—seriously, aim for at least one inch thick, maybe even thicker if you can find them. That thickness gives us time to build that beautiful crust without drying out the middle.
The supporting cast is classic but crucial. We use olive oil just to get the pan nice and hot for the initial sear—that oil has a higher smoke point, so it’s perfect for preheating. Then comes the star: four tablespoons of unsalted butter. Butter is non-negotiable here; we need that rich, nutty flavor when we start the baste! And that garlic? You’re mincing four whole cloves. Don’t trust pre-minced stuff here, please! Fresh, bright garlic is going to infuse that butter perfectly. Don’t forget the tried-and-true thyme, salt, and pepper to finish the seasoning job.
Essential Equipment for Pan Seared Pork Chops
So, you don’t need a fancy setup for these, thank goodness! But there are a few tools I simply cannot cook these without. Having the right pan makes all the difference in achieving that perfect crust.
- A Great Large Skillet: You really need a skillet—and I mean *large*. If you try to cram two chops into a small pan, they steam instead of sear. I prefer cast iron, but any heavy-bottomed pan works wonders here.
- Sturdy Tongs: You need to be able to flip those hot chops easily and confidently. I hate chasing a bouncing pork chop around the pan!
- A Spoon for Basting: This is key to the flavor delivery system we use later. Grab a regular spoon—nothing fancy—just something you can use to scoop up that glorious garlic butter and drizzle it right over the tops repeatedly.
- Paper Towels: Don’t skip the drying step! You need plenty of paper towels right by your station.
That’s it! Four simple things, and we are ready to turn those raw chops into something incredible.
Step-by-Step Instructions for Garlic Butter Pan Seared Pork Chops
Alright, here is where the magic happens! Remember, even though this whole process takes less than 15 minutes (including resting!), the steps need to flow perfectly. Think of this as a quick dance between the stove and your cutting board. If you’re learning to cook pork chops for the first time, I always suggest pulling them out of the fridge about 20 minutes before you intend to cook. A slightly warmer chop cooks more evenly, which means less chance of a raw middle!
Preparing and Seasoning the Garlic Butter Pan Seared Pork Chops
First things first: get those chops bone-dry! Grab your paper towels and really press down on the top and bottom of each pork chop. I can’t stress this enough—moisture is the enemy of a good sear. Water creates steam, and steam prevents that gorgeous golden crust we’re aiming for. Once they are dry as a bone, season generously on both sides. Don’t be shy with the salt and pepper; that’s the first layer of flavor we’re building up.
Searing the Pork Chops to Golden Perfection
Next step is heat. Put your large skillet over medium-high heat and add your tablespoon of olive oil. Wait until you see that oil start to shimmer just a little bit—that’s how you know it’s ready to take the meat. Gently place your seasoned chops into the hot pan. Resist the urge to move them! You need to let them lay there and develop that deep brown color for a solid 3 to 4 minutes per side. If you’re worried about trying different cooking methods, you can always check out how they handle it in the oven sometime, like with these oven-baked bone-in pork chops, but for this recipe, we stay right on the stovetop!
Creating the Garlic Butter Baste for Your Garlic Butter Pan Seared Pork Chops
Once both sides have a nice color going, drop the heat down to medium-low. Now, toss in those four tablespoons of butter. Watch it melt and start bubbling! As soon as it’s mostly melted—and you’ll smell that aroma instantly—toss in your four cloves of minced garlic and that teaspoon of dried thyme. Tilt the pan slightly toward you so the butter pools on one side, and use your spoon to continuously scoop that fragrant, garlicky butter up and pour it right over the top of the chops. Do this nonstop for about a minute until the garlic is fragrant but definitely not burnt. Keep basting for just one more minute to let that thyme infuse everything.
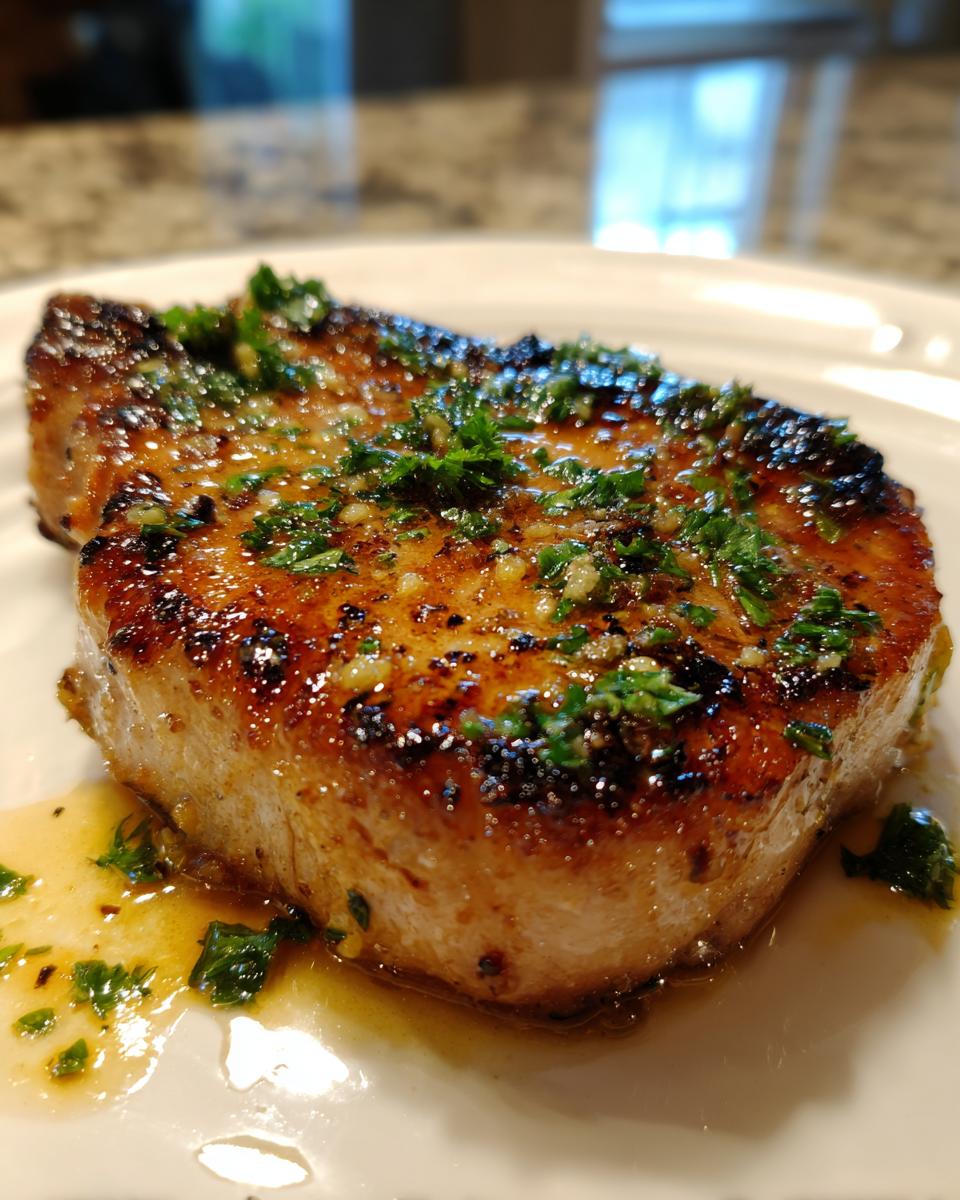
Resting and Serving Your Garlic Butter Pan Seared Pork Chops
Pork chops want a moment to themselves after all that excitement! Carefully remove the chops from the skillet and place them on a clean cutting board. You *must* let them rest for five full minutes. If you cut into them immediately, all those beautiful juices we worked so hard to keep inside will rush out onto the board! After resting, slice (if you want) or serve them whole, then sprinkle that chopped fresh parsley right over the top for a pop of green color before you take them to the table.
Tips for Achieving the Best Garlic Butter Pan Seared Pork Chops
Even though this recipe is super fast, there are a few little habits I’ve picked up over the years that guarantee success every single time. I learned some of these the hard way, believe me! If you want chops that are juicy, beautiful, and rich with that garlic butter flavor, focus on these three things.
First, let’s talk thickness. I mentioned this before, but it bears repeating: thickness is your friend! If you buy those thin chops—you know, the ones that look like they could tear easily—they cook through in about two minutes flat, and they dry out before the butter even has a chance to brown properly. I always tell the butcher I need at least an inch, preferably an inch and a quarter. That extra size buys us time to build that dark, delicious crust during the sear without overcooking the inside.
Next up is the classic skillet crowding mistake. Oh man, I did this once when I was in a huge rush trying to feed unexpected guests. I crammed four chops into a pan that could really only comfortably hold two. What happened? Instant sadness! Instead of that beautiful, loud sizzle you want, the pan cooled down rapidly, the chops started sweating steam, and I ended up with pale, rubbery meat instead of a proper sear. You need to give them space! Keep those chops separated so the heat stays high and dry.
Finally, you need a little temperature check, even if you trust your visual cues. Some people rely only on time, but ovens and stoves vary wildly, right? I always grab my instant-read thermometer if I’m unsure. For pork chops, once they hit about 140°F internally, you can pull them out immediately because they will keep cooking while resting; that’s called carryover cooking. If you wait until they hit 145°F in the pan, they might be overdone by the time you slice into them. That little bit of science keeps them perfectly tender!
Need a great drink to go with your perfectly seared chops? I highly recommend checking out this guide to the best cocktail recipes – something bright cuts through all that rich garlic butter beautifully!
Storage and Reheating Instructions for Leftover Garlic Butter Pan Seared Pork Chops
Look, these are so good you probably won’t have many leftovers, but if you do, we definitely need to treat them right! Day-old pork chops can be temptingly dry if you just throw them in the microwave, and nobody wants a sad, chewy reheated chop flavor, right?
When you’re done eating, let that leftover pork chop cool down completely on the counter first. Then, you want to store it in an airtight container. I always put a paper towel underneath it first, almost like a little moisture sock, to absorb any condensation that might build up. They’re perfectly good in the fridge for up to three days—but honestly, I try to eat them within two.
Reheating is where you need to pay attention. Forget the microwave unless you are in a real hurry and only have 30 seconds. My favorite way to bring these back to life is on the stovetop. Seriously. I take my skillet—the same one you cooked them in, washed out, of course—and put it over very low heat. Add just a tiny splash of water or maybe some chicken broth, just a teaspoon or two. You want just enough liquid to create a hint of steam.
Place the chop right on top of that little bit of liquid, cover the pan with a lid, and let it warm up slowly for maybe six or seven minutes. The residual garlic butter and that hint of moisture help it steam just enough to heat through without firming up. It comes out tasting almost as tender as when it was freshly made. If you must use the microwave, do it in 20-second bursts on 50% power, turning it each time. It’s not the best, but it’s better than drying it out completely!
Serving Suggestions to Complement Your Garlic Butter Pan Seared Pork Chops
When you have a main dish this rich and flavorful, you want sides that either soak up that amazing garlic butter sauce or offer a bright, palate-cleansing contrast. You don’t need anything complicated; these chops are the star of the show!
My first, non-negotiable recommendation when I make these is always something starchy for scooping. Nothing beats creamy mashed potatoes for this job. You boil your potatoes, mash them up fluffy—I use heavy cream and a pat of butter, naturally—and then, here is the fun bit, you spoon a little bit of the leftover garlic butter sauce right into the middle of the mound. It melts right in, and honestly, it’s dinner perfection right there.
If you want green on the plate, you have to go with roasted asparagus. Asparagus has that slight bitterness that beautifully balances the fattiness of the pork and butter. But don’t just roast them plain! Toss them lightly with some olive oil, salt, and pepper, and when they come out of the oven, immediately drizzle them with a touch of the leftover sauce from your pan. It wakes up the flavor immensely. If you’re sick of standard vegetables, I found this amazing recipe for a roasted broccoli Caesar salad that would be totally fantastic alongside the pork chop, too.
Finally, sometimes you just want something fresh and zesty. Don’t underestimate a simple, crisp green salad. Forget heavy dressings. Toss some mixed greens with maybe a squeeze of lemon juice, a drizzle of good quality olive oil, and a tiny pinch of salt and pepper. It cleanses your palate beautifully between bites of that rich pork chop. It’s the perfect light counterpoint to all that glorious garlic!
Frequently Asked Questions About Garlic Butter Pan Seared Pork Chops
I always get the same questions rolling in about this recipe because everyone wants that perfect, restaurant-quality chop at home. It’s easy to get tripped up on details like timing or temperature, so let’s clear up the most common things people ask.
What is the best internal temperature for these pork chops?
This is such an important question, especially since we are talking about pork! If you want juicy, tender meat that is absolutely safe, you should pull those chops out of the pan when an instant-read thermometer inserted into the thickest part reads 140°F. That’s right, you take them out *before* they hit the safe temperature. Remember what I said in the tips section? They keep cooking while they rest! That final five minutes of resting will carry them right up to the USDA recommended 145°F minimum, leaving you with juicy results, not dry ones.
Can I use boneless pork chops for this garlic butter pan seared recipe?
Yes, you totally can use boneless chops, but you have to adjust your thinking a little bit! Boneless chops are usually thinner than the thick-cut bone-in ones I recommend, and they cook way faster. If you’re using boneless cuts that are maybe only half an inch thick, you should plan on skipping the basting step entirely, or they will be overcooked before the butter even melts! Cut the initial sear time down to maybe 2 minutes per side, then immediately reduce the heat and baste very quickly, maybe for just 30 seconds total. You really need that thickness to handle the heat properly.
How do I prevent my garlic from burning while basting?
This is a tiny thing that makes a huge visual and flavor difference! If you add the minced garlic when the butter is still too hot—like, if it’s still sputtering wildly—the garlic burns to a bitter crisp in about ten seconds. We want golden, fragrant garlic, not black shards! The trick is timing: wait until you have already seared both sides of the chop and you have *reduced* the heat down to medium-low. Let the butter melt fully and subside a little bit—it should be gently sizzling when you add the garlic and thyme. That gentler heat allows the garlic to gently infuse the fat without charring. Trust me, timing the temperature drop is the key to that gorgeous garlic butter finish.
Nutritional Estimates for Garlic Butter Pan Seared Pork Chops
Now, I’m honestly not a nutritionist or anything—I just cook what tastes good! But for those of you keeping rough track, here’s what the label suggests for one serving of these amazing pork chops. Please remember this is just an estimate based on my ingredient amounts and doesn’t account for any slight variations in your chopping or basting technique!
- Estimated Calories: 450
- Total Fat (mostly great fats!): 30g
- Protein Powerhouse: 40g
- Carbohydrates: Just 1g!
See? High on the protein, low on the carbs—hello quick, satisfying dinner! It’s worth every single glorious bite of that melted garlic butter.
Share Your Success with This Garlic Butter Pan Seared Pork Chops Recipe
So, that’s it! That’s the whole rundown on how I make my favorite weeknight savior, the Garlic Butter Pan Seared Pork Chops. I really hope you give these a try soon because they are seriously foolproof once you master that initial dry-and-sear technique. I want to know what you think!
Did you try the basting method? Did you melt that garlic butter all over some mashed potatoes? Tell me everything in the comments below! Seriously, hit that star rating button if you loved how fast and juicy these came out. And hey, snap a quick picture if you made them and tag me on social media! Seeing your beautiful, buttery chops makes my day. Happy cooking, friends—go get that perfect sear!
Print
Garlic Butter Pan Seared Pork Chops
- Total Time: 15 min
- Yield: 2 servings 1x
- Diet: Low Fat
Description
Simple recipe for pan-seared pork chops cooked in garlic butter.
Ingredients
- 2 thick-cut pork chops
- 1 tablespoon olive oil
- 4 tablespoons unsalted butter
- 4 cloves garlic, minced
- 1 teaspoon dried thyme
- 1/2 teaspoon salt
- 1/4 teaspoon black pepper
- 1 tablespoon fresh parsley, chopped (for garnish)
Instructions
- Pat the pork chops dry with paper towels and season both sides with salt and pepper.
- Heat the olive oil in a large skillet over medium-high heat until shimmering.
- Place the pork chops in the hot skillet and sear for 3-4 minutes per side until golden brown.
- Reduce the heat to medium-low. Add the butter and minced garlic to the skillet.
- As the butter melts, tilt the skillet and use a spoon to baste the pork chops with the melted garlic butter for about 1 minute.
- Add the dried thyme to the butter mixture and continue basting for another minute.
- Remove the pork chops from the skillet and let them rest on a cutting board for 5 minutes.
- Garnish with fresh parsley before serving.
Notes
- For best results, use pork chops that are at least 1 inch thick.
- If your chops are thinner, reduce the searing time to prevent overcooking.
- Prep Time: 5 min
- Cook Time: 10 min
- Category: Main Course
- Method: Pan Frying
- Cuisine: American
Nutrition
- Serving Size: 1 chop
- Calories: 450
- Sugar: 1
- Sodium: 400
- Fat: 30
- Saturated Fat: 15
- Unsaturated Fat: 15
- Trans Fat: 0
- Carbohydrates: 1
- Fiber: 0
- Protein: 40
- Cholesterol: 120
Keywords: pork chops, garlic butter, pan seared, quick dinner, easy pork recipe