
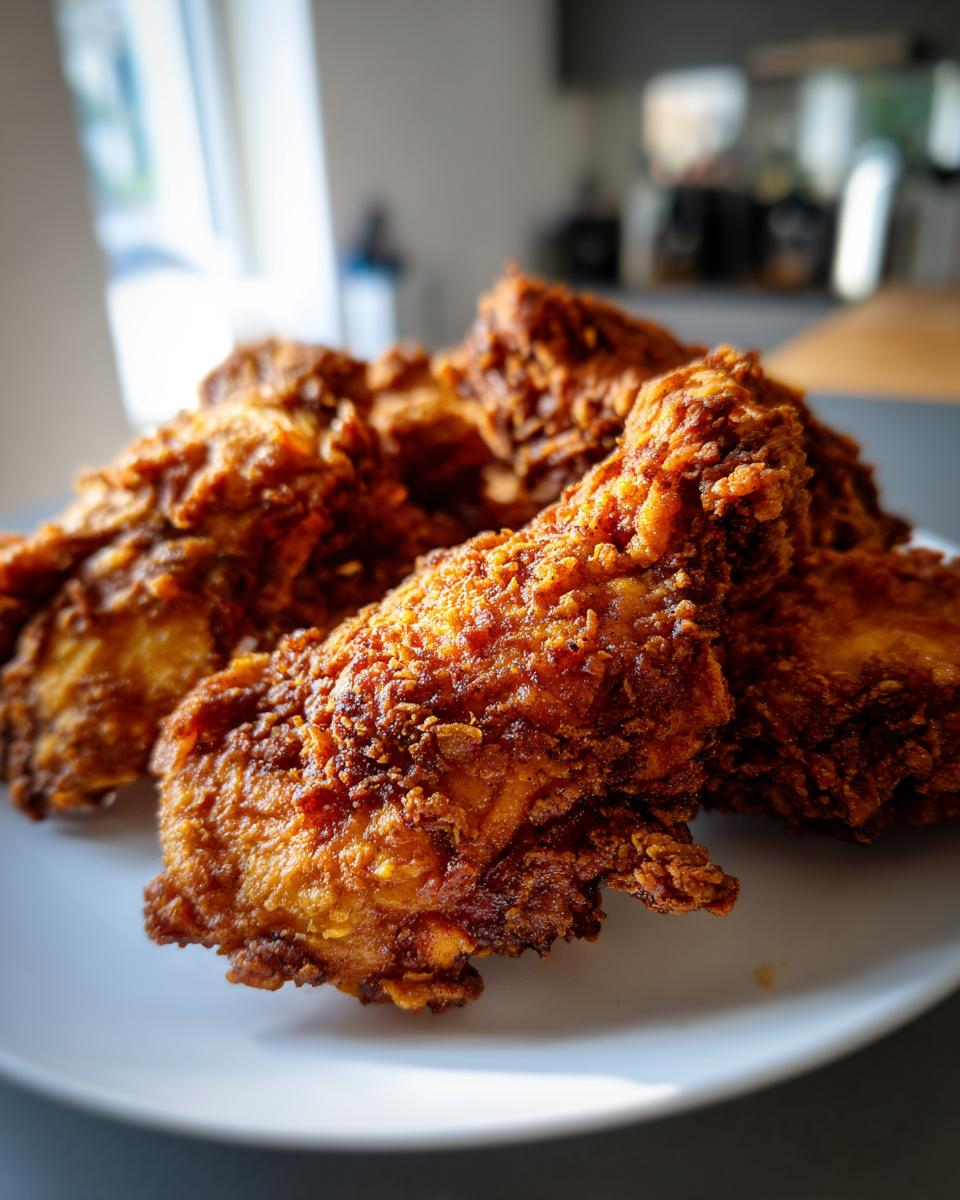
I get it. You want that satisfying, crunchy, salty bite of fried chicken, but the thought of a vat of bubbling oil soaking into your kitchen is just too much drama for a weeknight. Trust me, I’ve been there! For years, I played around, trying different shakes and sprays, just trying to fool my taste buds into thinking they were eating the deep-fried kind. Well, I finally nailed it! This recipe creates genuinely Crispy Oven Fried Chicken that shocks everyone who tries it. It’s all about layering ingredients and heat, not deep dunking. After testing this thing dozens of times, I promise you; this technique works. Pull out whatever chicken pieces you have—this method loves them all!
Why This Crispy Oven Fried Chicken Recipe Works So Well
The secret to getting that crunch in the oven isn’t magic, it’s physics! We aren’t trying to drown the chicken in oil; we are making the coating do all the heavy lifting. When you see the results, you’ll understand why I don’t deep fry anymore. If you’re looking for other great baked chicken ideas, check out my guide on perfectly juicy baked chicken.

The Importance of Cornstarch in Your Crispy Oven Fried Chicken Coating
You can’t just use flour here, folks! Flour is great for binding, but cornstarch is what makes things light and crackly when baked. It prevents that heavy, bready texture you sometimes get with oven coatings. It basically acts like a tiny crunch amplifier in our spice mix.
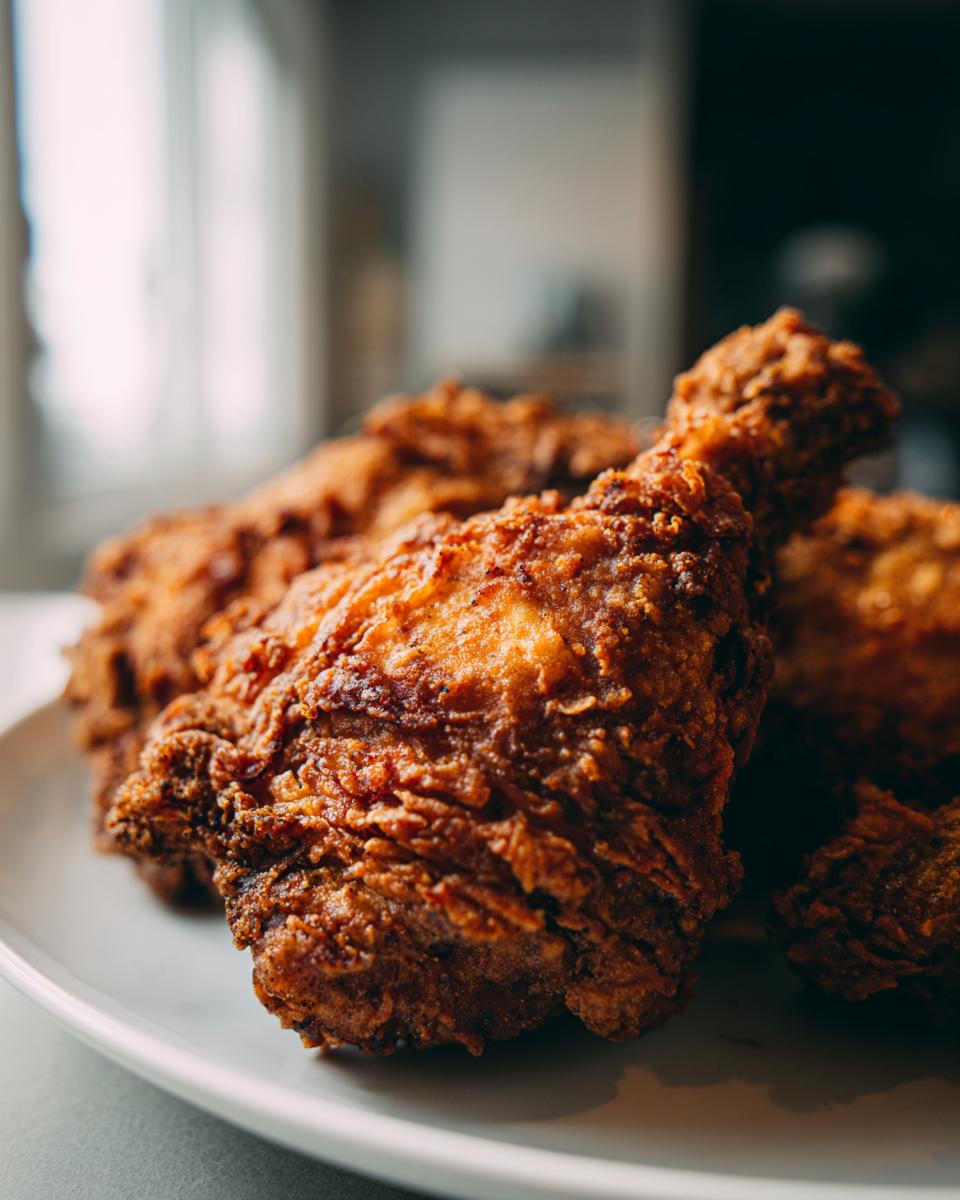
Achieving Maximum Crispiness with a Wire Rack for Crispy Oven Fried Chicken
This is non-negotiable for great Crispy Oven Fried Chicken. If you lay the chicken directly on the pan, the bottom steams and gets soggy—no thank you! Placing it on a wire rack lets that hot air circulate all the way underneath. That way, every single surface gets that beautiful golden, crisp texture.
Ingredients for Perfect Crispy Oven Fried Chicken
Gathering your supplies is half the fun, honestly. Once everything is set out, putting this chicken together goes lightning fast. You’ll need about 2 pounds of chicken pieces—whatever combo you love works great here. Make sure you have your two shallow dishes ready for the dredging process!
Coating and Seasoning Mix Components
- 1 cup all-purpose flour
- 1/2 cup cornstarch (See? That cornstarch is key!)
- 1 tablespoon paprika
- 1 teaspoon garlic powder
- 1 teaspoon onion powder
- 1 teaspoon salt
- 1/2 teaspoon black pepper
- 1/2 teaspoon cayenne pepper (only if you like a little kick!)
Wet Batter and Finishing Oil
This is a quick dip setup to make sure the coating really grabs hold.
- 2 large eggs
- 1/4 cup milk
- Cooking spray or 2 tablespoons vegetable oil (for that final spritz!)
Step-by-Step Instructions for Crispy Oven Fried Chicken
Alright, let’s get cooking! This process is fast once you have your dishes set up, but precision timing in the oven is what makes the difference between baked chicken and actual Crispy Oven Fried Chicken. When you’re ready to get baking, you might also want to whip up some simple syrup for sweetening drinks later! Pay close attention to the prep work; it sets you up for success.
Preparing the Oven and Rack for Crispy Oven Fried Chicken
First things first: blast that oven up to 425 degrees Fahrenheit—that’s 220 Celsius. We need serious heat to mimic that crispiness! Line a baking sheet with parchment paper for easy cleanup (you know I love that!). Then, set your trusty wire rack right on top of that sheet. Once the rack is installed, give it a good, light spray with cooking spray. This prevents your beautiful coating from sticking to the metal.
Mixing the Dry Coating and Wet Dip
You need two separate, shallow dishes for the dredge. In the first one, whisk together all your flour, cornstarch, and seasonings until they are totally mixed. No clumps of paprika allowed! In the second dish, just beat those two eggs with the milk until they are well combined. That’s your wet station, simple as that.
The Double Dredge Technique for Crispy Oven Fried Chicken
This is where you build the crust! Take your chicken pieces and pat them down really, really dry with paper towels. I can’t stress this enough—wet chicken means a soft coating! Then, dunk a piece completely into the egg mixture, letting the extra drip off. Next, move it straight into the flour mix. Here’s the crucial bit: press that flour coating firmly onto every inch of the chicken. You want that coating to really adhere so it doesn’t vanish mid-bake. This pressing step is key for that great Crispy Oven Fried Chicken texture!
Baking Times and Flipping for Even Browning
Place all your coated pieces onto the prepared, oiled rack, making sure nothing is touching. Now, give the tops a light misting of cooking spray or a tiny drizzle of oil—this helps those spices brown up beautifully. Pop them into that hot oven for exactly 20 minutes. When time is up, carefully flip every single piece. Spray or drizzle the bottom side lightly too, then bake for another 20 to 25 minutes. You’re aiming for the chicken to measure 165 degrees Fahrenheit inside before you pull them out. Let them rest for five minutes when they come out; they’ll continue to firm up!
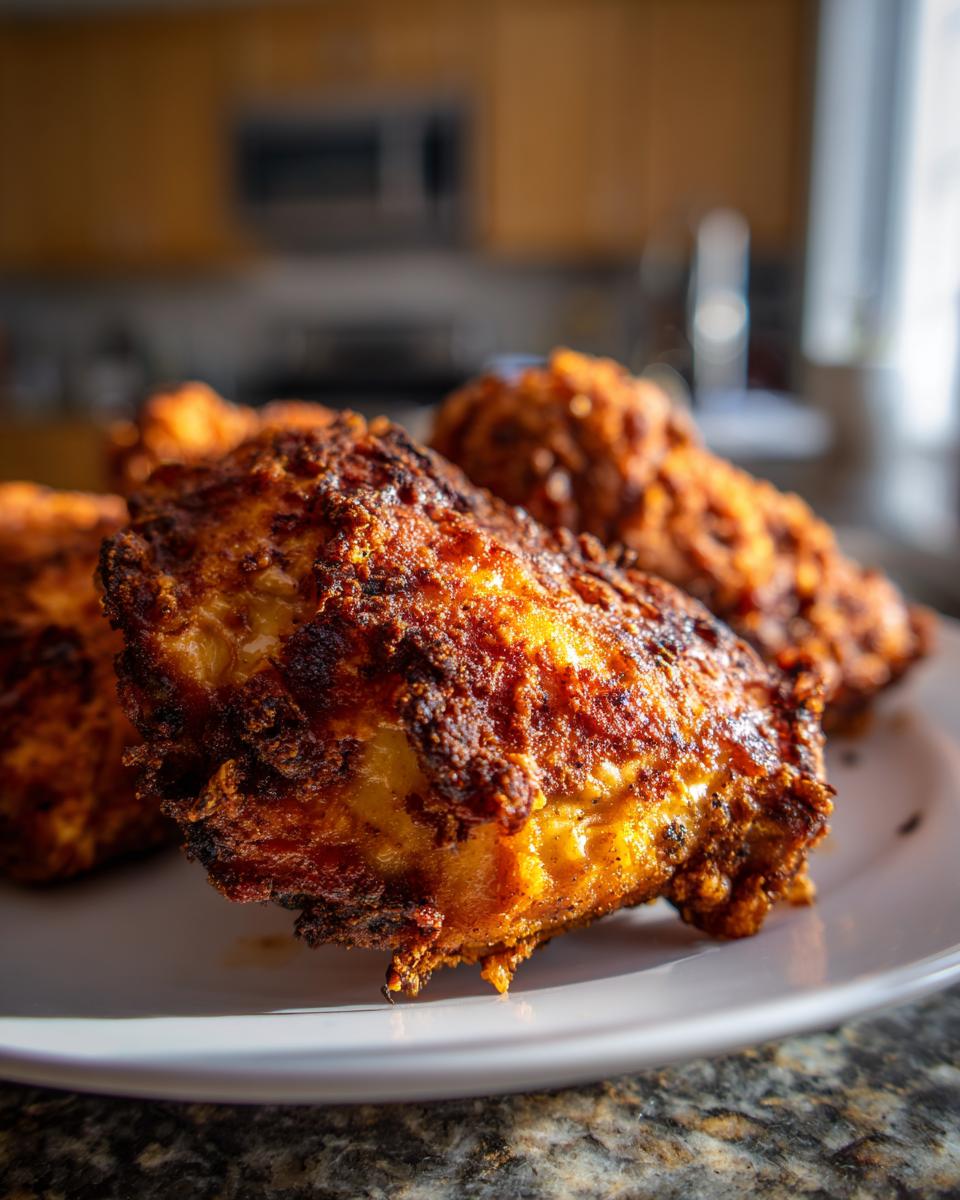
Expert Tips for the Best Crispy Oven Fried Chicken Texture
Okay, you’ve followed the steps, but if you really want to trick people into thinking you actually used a deep fryer, you need these pro-level tricks. I didn’t just stumble upon this recipe; I spent way too much time perfecting the crunch factor. If you want to get serious about baked crunch—maybe for some crispy baked onion rings later—these tips are essential for nailing that texture every single time with your Crispy Oven Fried Chicken.
The Chill Factor: A Secret to Ultra Crispy Oven Fried Chicken
This is the one step most people skip, and honestly, it’s why their oven chicken ends up just slightly less amazing. After you’ve dredged and pressed that coating onto your chicken pieces in Step 4 of the main recipe, don’t bake them immediately! Throw those coated pieces right back onto that prepared wire rack and pop the whole sheet tray into the fridge for about 30 minutes. Chilling does two amazing things: first, the moisture in the coating starts to firm up, and second, the coating adheres to the skin like superglue. When it hits that 425-degree oven, you get that instant, crackly shell that defines amazing Crispy Oven Fried Chicken. Don’t skip the chill, trust me on this one!
Storage and Reheating Instructions
Nobody ever has leftovers of this chicken, but if you manage to squirrel a few pieces away, you want them to stay crunchy when you reheat them!
The golden rule for storing any crispy baked item is airflow. Never, ever seal them up airtight in plastic when they are warm. That traps steam, and steam is the mortal enemy of crispiness—it will turn your coating soft in about five minutes flat.
Once the baked chicken is completely cool, put the pieces in a large container, but don’t seal the lid tight. Leave it slightly ajar, or line the container with a paper towel first to absorb any residual moisture. They should last maybe three or four days happily in the fridge this way.
For reheating? The microwave is strictly forbidden unless you enjoy rubbery chicken! You need dry heat to wake up that coating. The absolute best way is back in the oven. Set your oven to about 375 degrees Fahrenheit. Lay the cold chicken right onto a clean wire rack (yes, another one!) set on a baking sheet. Give them about 8 to 10 minutes. You’ll be amazed how those spices and the crunch return! If you’re in a major rush, an air fryer works wonders too, just for about 4 minutes.
Serving Suggestions for Your Crispy Oven Fried Chicken Meal
Wow, that chicken smells incredible, right? Now comes my favorite part: figuring out what to put next to it on the plate! You can’t have amazing crunchy chicken hanging out all by itself; it needs strong supporting players.
When I serve this up, I always stick to the comfort food classics. You need something creamy to complement that sharp, salty crunch of the coating. My go-to side dish rotation is usually pretty simple, but always a crowd-pleaser.
First up, you absolutely have to have mashed potatoes. Not just any mashed potatoes, but seriously rich, buttery ones. I love using a recipe that gets extra decadent, like my cheesy ranch potatoes if I’m going for full comfort overload, but good old fluffy ones that soak up the chicken juices work just as well!
Next, you need something bright to cut through the richness. A homemade, slightly tangy coleslaw is perfect. The cool crispness of the raw cabbage contrasts beautifully with the hot, savory chicken. It’s necessary for balance—trust me on this one!
And finally, green beans are always on my menu. Steamed lightly with just a little bit of butter and maybe some slivered almonds sprinkled on top, they add the right amount of fresh green color so the plate doesn’t just look brown and yellow!
Frequently Asked Questions About Crispy Oven Fried Chicken
It’s funny how raising the heat in the oven can lead to so many questions! People often worry about dry spots or soggy bottoms when they try to go the baking route instead of frying. I know I did when I was first figuring this out. If you have tried this recipe and you’re loving it, I have some great no-bake cheesecake recipes you might want to try next!
How do I prevent the coating from falling off my Crispy Oven Fried Chicken?
Oh, that frustrating naked chicken look! That happens when the coating doesn’t have a good surface to stick to. You need to start by making sure your chicken pieces are bone dry—I mean, really pat them down with paper towels until they feel almost pebbly. Then, when you dredge them in that seasoned flour mix, you have to press! Don’t just gently dip them; use your fingers to really push that crust onto the chicken flesh. A firm, gentle massage helps it adhere, so it stays put when it hits that hot oven air.
What is the best way to ensure the chicken cooks through without burning the outside?
This is where we rely on temperature, not just time. Since we are baking at a pretty high heat (425°F!) to force the crisp, you absolutely must use a meat thermometer. Don’t guess, especially on thicker cuts like breasts! You are looking for 165 degrees Fahrenheit internally. If you find your coating is looking perfectly golden brown but it’s only at 150 degrees inside, just pull the pan out, flip everything, and put it back for just 5 or 10 more minutes. That way, you don’t scorch that beautiful outside while waiting for the inside to finish cooking—it’s the perfect way to guarantee moist, safe, Crispy Oven Fried Chicken!
Nutritional Estimates for Crispy Oven Fried Chicken
Now, nobody is eating this beautiful chicken thinking about their macros, right? Because honestly, it tastes too good to worry too much! But just so you have a rough idea of what’s in a serving, I’ve pulled together the estimates based on the ingredients we used.
Keep in mind these numbers are just a guide. If you use a fattier cut of chicken or a different brand of flour, things might shift around a little. These estimates are calculated assuming one piece per serving.
- Serving Size: 1 piece
- Calories: 350
- Fat: 18g (with 4g saturated fat)
- Carbohydrates: 15g
- Protein: 32g
- Sodium: 450mg
- Cholesterol: 110mg
See that protein count? That’s great! You’re getting a decent meal packed with flavor without drowning it in oil. The sodium is a bit higher, of course, because we love seasoning, so keep that in mind if you are serving this alongside salty mashed potatoes!
Share Your Crispy Oven Fried Chicken Success
This is the moment of truth! I put all my frantic testing into this recipe so you wouldn’t have to suffer through soft, sad chicken skins. Now that you’ve pulled that golden, crunchy perfection out of the oven, I really want to know what you thought.
Did you use the chiller trick? Did your family even notice it wasn’t actually deep-fried? Please don’t keep your amazing results to yourself! Head down to the comments section and give this recipe a star rating based on how incredibly Crispy Oven Fried Chicken it turned out for you.
If you snapped a picture of that beautiful rack of golden chicken—and I really hope you did!—please share it on social media and tag me. Seeing your successes is seriously the best part of doing this blog. It makes all those hours of splatter guarding worth it!
If you have any specific questions about timing or substitutes that weren’t covered above, shoot me a note through the contact page. I’m always happy to troubleshoot! Happy eating!
Print
Crispy Oven Fried Chicken
- Total Time: 60 min
- Yield: 4 servings 1x
- Diet: None
Description
A recipe for making crispy chicken in the oven without deep frying.
Ingredients
- 2 pounds chicken pieces (legs, thighs, breasts)
- 1 cup all-purpose flour
- 1/2 cup cornstarch
- 1 tablespoon paprika
- 1 teaspoon garlic powder
- 1 teaspoon onion powder
- 1 teaspoon salt
- 1/2 teaspoon black pepper
- 1/2 teaspoon cayenne pepper (optional)
- 2 large eggs
- 1/4 cup milk
- Cooking spray or 2 tablespoons vegetable oil
Instructions
- Preheat your oven to 425 degrees Fahrenheit (220 degrees Celsius). Line a baking sheet with parchment paper and place a wire rack on top. Lightly spray the rack with cooking spray.
- In a shallow dish, whisk together the flour, cornstarch, paprika, garlic powder, onion powder, salt, black pepper, and cayenne pepper if using.
- In a second shallow dish, whisk the eggs and milk together until combined.
- Pat the chicken pieces dry with paper towels. This helps the coating stick better.
- Dip each piece of chicken first into the egg mixture, letting any excess drip off.
- Next, dredge the chicken thoroughly in the flour mixture, pressing the coating onto the chicken to make it adhere well.
- Place the coated chicken pieces on the prepared wire rack, ensuring they do not touch.
- Lightly spray the tops of the coated chicken with cooking spray or drizzle with oil.
- Bake for 20 minutes.
- Flip the chicken pieces over. Spray or drizzle the other side lightly with cooking spray or oil.
- Bake for another 20 to 25 minutes, or until the internal temperature reaches 165 degrees Fahrenheit (74 degrees Celsius) and the coating is golden brown and crispy.
- Let the chicken rest for 5 minutes before serving.
Notes
- For extra crispiness, you can chill the coated chicken on the rack for 30 minutes before baking.
- Use a meat thermometer to confirm the chicken is fully cooked.
- Prep Time: 15 min
- Cook Time: 45 min
- Category: Main Course
- Method: Baking
- Cuisine: American
Nutrition
- Serving Size: 1 piece
- Calories: 350
- Sugar: 1
- Sodium: 450
- Fat: 18
- Saturated Fat: 4
- Unsaturated Fat: 14
- Trans Fat: 0
- Carbohydrates: 15
- Fiber: 1
- Protein: 32
- Cholesterol: 110
Keywords: oven fried chicken, crispy chicken, baked chicken, healthy fried chicken alternative, coated chicken