
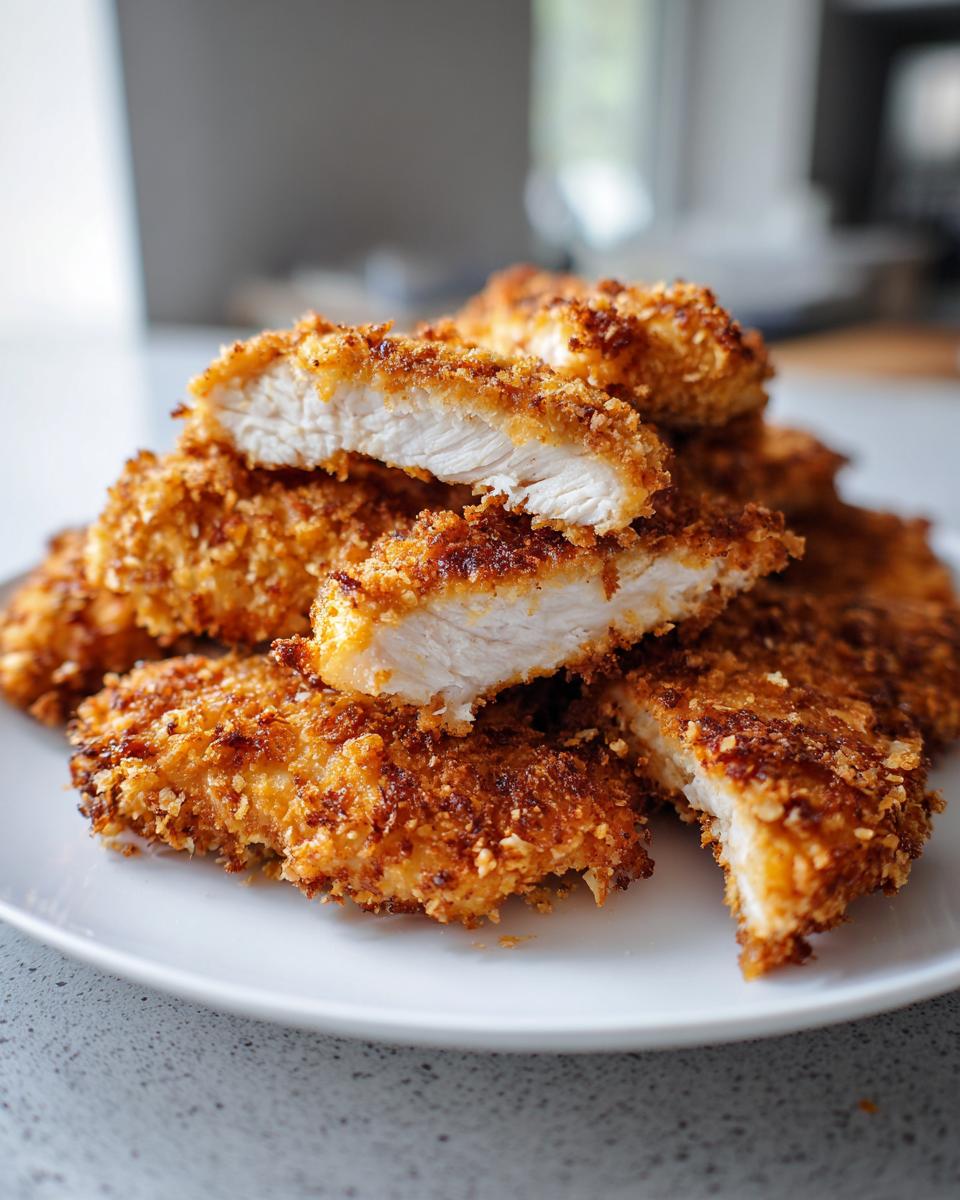
Okay, you know those nights? You’re absolutely craving that deep-fried crunch, that golden-brown magic, but the thought of the oil mess has you reaching for cereal instead. Don’t let that happen! I spent way too many weekends cleaning up deep-fryer disasters before I finally perfected this recipe. Trust me when I tell you, you can get incredible texture with zero guilt. We’re talking about the absolute best Crispy Baked Chicken Tenders that somehow taste totally indulgent but are actually good for you. They come together so fast—seriously, 15 minutes of work max! This method ensures they stay juicy inside while the panko outside shatters perfectly. Get ready for your weeknight dinner rotation to get a serious upgrade.

Why This Recipe for Crispy Baked Chicken Tenders Works So Well
I know what you’re thinking: baked chicken is never truly crispy. That was my thinking for years, too! But this method changes everything. We are mimicking the dredging process that the pros use, only we’re skipping the heavy oil bath. The magic is really in the layering and the high heat, which dries out the crust perfectly without drying out the meat inside.
This recipe is your weeknight secret weapon because it’s fast, simple, and completely kid-approved. Even if you aren’t usually a baker, you can nail these tenders. If you struggle with drying out your chicken, check out my guide on getting perfectly juicy baked chicken every time.
- It truly gets shatteringly crisp without a drop of deep-fry oil.
- The three-step breading station ensures maximum crunchy coverage.
- It’s done faster than ordering takeout!
- It’s low-fat, making it a healthier choice for the whole family.
Essential Equipment for Perfect Crispy Baked Chicken Tenders
You don’t need fancy gadgets, honestly. Just three shallow dishes are the key to keeping your hands clean while breading! You’ll want a sturdy baking sheet, of course. Parchment paper is non-negotiable for easy cleanup—don’t skip that part!
If you want that commercial-style crispiness all around the tender, grab a wire rack that fits inside your baking sheet. It lets the hot air circulate underneath, which is a game-changer. Every piece of equipment here just makes our lives easier!
Ingredients Needed for Crispy Baked Chicken Tenders
Okay, let’s look at what you need to pull these tenders together. Remember, we need enough chicken for about four hungry folks, so grab around an pound and a half of boneless, skinless breasts. The cuts have to be pretty even so they all cook at the same speed—aim for uniform strips about one inch thick.
For the crunch, we stick to Panko breadcrumbs; trust me, regular crumbs won’t give you the same satisfying sound when you bite in. Then you just need your standard flour, two eggs, a dash of water for the perfect egg wash, and our simple seasoning blend: salt, pepper, garlic powder, and a little paprika for color. Don’t forget the cooking spray; that’s vital for reaching that perfect golden finish!
Step-by-Step Instructions for Crispy Baked Chicken Tenders
Alright, this is where the real fun begins! We need to get that oven roaring hot before we even touch the chicken. Preheat everything to 400°F (200°C). While it’s heating up, prep your sheet pan—I always line mine with parchment paper, and then I give it a quick, light spritz of cooking spray. No one likes scrubbing burnt breadcrumbs off a pan!
Next, slice up your chicken breasts into those even, bite-sized strips. Uniformity is key here, or you’ll end up with some tenders that are perfect and others that are sadly dry. Once they are cut, we move straight to setting up our assembly line.
Setting Up Your Breading Station for Crispy Baked Chicken Tenders
You need three shallow dishes lined up in this exact order: Dish one gets the plain flour. Dish two gets your egg wash—just whisk those two eggs with one tablespoon of water until they are mostly combined. Dish three is the crunch zone; mix those amazing panko breadcrumbs with all your salt, pepper, garlic powder, and that beautiful paprika. This seasoning mix is what wakes up the flavor!
Now, work one tender at a time through the line. First, dredge it well in the flour—make sure you shake off the excess, we don’t want clumps! Then, dip it quickly into the egg wash, letting any drips fall away. Finally, press it firmly into the Panko mix. You have to press a little bit to make sure that crust really sticks on there. If you’re interested in a fun side, check out my thoughts on avoiding the biggest mistake people make with iced tea.
Baking Tips for Maximum Crispiness in Your Crispy Baked Chicken Tenders
Lay those beauties out on your prepared baking sheet in a single layer. Remember, no crowding! If they touch, they steam, and we want crisp, not steamy! Give the top crusts one last, gentle spray with cooking spray—this helps them brown evenly. Bake them for about 18 to 22 minutes total.
The absolute most important thing is flipping them halfway through their bake time. This ensures both sides get that golden, crunchy finish. You are looking for an internal temperature of 165°F (74°C) because safe chicken is happy chicken! Remember that tip about the wire rack? If you used one, they’ll be crunchy from top to bottom. Pull them out when they are golden and serve them instantly!
Ingredient Notes and Substitutions for Crispy Baked Chicken Tenders
When it comes to these crispy baked chicken tenders, the ingredients you choose really matter, even if the list looks simple. If you try to substitute the Panko breadcrumbs with regular dried breadcrumbs, you’ll be disappointed, I promise. Panko is Japanese style, and those flakes are much lighter and larger, which means they absorb less oil and toast up way airier and crispier in the oven. It’s just what you need for that crunch factor!
If you happen to only have chicken thighs on hand instead of breasts, go for it! Thighs are actually more forgiving because they have more fat, so they stay super moist even if you happen to bake them a minute or two too long. Just ensure you trim off any excess fat before you start breading them.
Don’t be afraid to play around with the seasonings in that third dish too. If you’re feeling zesty, throw in a half teaspoon of onion powder alongside the garlic powder. For a little kick, a tiny pinch of cayenne pepper blended right into your Panko mix works like a charm. Just remember to taste your seasoning mix before you start dredging, so you know exactly what flavor explosion you’re aiming for!
Serving Suggestions for Your Crispy Baked Chicken Tenders
When those crispy baked chicken tenders come out of the oven, you need the perfect partner for dipping and enjoying them! Honestly, these are fantastic dipped straight into a big bowl of creamy ranch dressing—it’s my personal favorite pairing. But don’t stop there!
If you want something sweet and tangy, whip up a quick honey mustard. BBQ sauce is always a winner, especially if you have picky eaters. For the plate, keep it easy for a weeknight. A simple side salad dressed with Italian vinaigrette cuts through the richness beautifully. Or, if you’re feeling ambitious, toss some sweet potato fries or quick roasted broccoli in the oven alongside them. They’re versatile little marvels!
Storage and Reheating Instructions for Leftover Crispy Baked Chicken Tenders
If you’re lucky enough to have any crispy baked chicken tenders left over—and wow, that surprises me every time—storage is key to keeping that crunch alive. You absolutely must let them cool down just slightly before you put them away. Throwing hot food into the fridge creates steam, and steam is the enemy of crispiness!
Tuck them into an airtight container, and they’ll be happy in the refrigerator for about three or four days. Now, for reheating, please, please, please don’t reach for the microwave. It turns them into sad, rubbery sponges, and frankly, we worked too hard for that!
The best way to bring those tenders back to life is in a hot oven at about 375°F, or if you have one, your air fryer works magic. Just a quick five to seven minutes depending on your appliance, and they’ll crisp right back up like they were just made. Trust me on this reheating trick!
Frequently Asked Questions About Making Crispy Baked Chicken Tenders
I get so many great questions whenever people start making these for the first time! It’s normal to have a few worries when trying a new method, especially when you’re trying to nail that crispy texture in the oven. I’ve gathered the ones I hear the most right here. If you’re looking for other lighter meal ideas, check out my list of healthy dinner recipes for weight loss!
Can I make these Crispy Baked Chicken Tenders ahead of time?
You certainly can prep ahead, which is fantastic for busy nights! I wouldn’t recommend breading them entirely and leaving them in the fridge overnight, though. The moisture from the breading will start to get soggy against the chicken. What works best is cutting the raw chicken, getting your whole breading station ready, and then breading them right before you plan to bake them. If you must prep earlier, you can bread them, lay them out on a fresh sheet tray, and freeze them solid—then bake straight from frozen, which might add about 5 extra minutes to your baking time.
What is the secret to truly crispy baked tenders?
If you have one question for me, this is it! The secret is a three-pronged attack, honestly. First, ditch those old breadcrumbs and use Panko. Second, make sure you are pressing that Panko onto the chicken firmly so it adheres well. Third, and this is the real pro move: spray the tops with cooking spray AND lift them up off the baking sheet using a wire rack. That air circulation underneath is what dries out the bottom crust so it doesn’t steam while baking. Do those three things, and you’ll have the crunchiest baked tenders ever.
Are these considered healthy chicken tenders?
Compared to deep-fried versions? Absolutely! Because we are baking them at 400°F and only using a quick spray of cooking oil instead of fully immersing them, we drastically cut down on the fat content while still getting that great texture. That’s why I categorize this as a healthier chicken option for dinner!
Why didn’t my baked tenders get golden brown?
Usually, this comes down to two things. Either your oven wasn’t hot enough—we need 400°F to really crisp things up quickly—or you forgot that crucial flip! You have to flip these halfway through baking so that the underside gets its turn facing the heating element and browns up. Don’t be shy when you flip them, and make sure you give the new top side a little spray of cooking spray right after you flip!
Nutritional Estimate for Crispy Baked Chicken Tenders
Now, I always feel a little bit better about eating comfort food when I know roughly what I’m putting into my body. Since we are baking these instead of frying them, they are a fantastic lower-fat choice compared to traditional tenders. The recipe yields about four good servings, with each serving being roughly four tenders.
Here’s the basic rundown based on my calculations for the entire batch. Remember always, this is just an estimate because the exact size of your chicken breasts and how much spray you use can shift things around a bit!
- Serving Size: 4 tenders
- Calories: Around 280 per serving
- Total Fat: Low, about 6 grams
- Protein: Wow, look at that protein! About 35 grams!
- Carbohydrates: Mostly from the panko, roughly 20 grams
See? A great way to get a satisfying dinner without feeling weighed down. Since we’re using lean meat and skipping the deep fryer, you get all the flavor and crunch with way less saturated fat and calories. It’s a win-win situation for a quick, healthy chicken dinner!
Share Your Experience Making Crispy Baked Chicken Tenders
Now that you’ve tried these amazing crispy baked chicken tenders, tell me everything! Did you nail that golden-brown crunch on the first try? Were you surprised how easy it was to skip the deep fryer? I just love hearing from you all when a recipe becomes a family favorite.
Please leave a star rating right here on the page so other folks know what you thought. Even better, drop a comment below telling me what you dipped them in. Were you a classic BBQ fan, or did you try a homemade aioli? Don’t keep those delicious pairing secrets to yourself!
If you snapped a picture of your beautifully crunchy results—especially if you used that wire rack trick—I’d love to see it! Feel free to tag me on social media when you share your masterpiece. Seeing your successful, healthy chicken dinners is genuinely the best part of my day. Happy cooking, everyone!
Print
Crispy Baked Chicken Tenders
- Total Time: 37 min
- Yield: 4 servings 1x
- Diet: Low Fat
Description
Simple recipe for making chicken tenders crispy without deep frying.
Ingredients
- 1.5 lb boneless, skinless chicken breasts
- 1 cup all-purpose flour
- 2 large eggs
- 1 tablespoon water
- 1.5 cups panko breadcrumbs
- 1 teaspoon salt
- 0.5 teaspoon black pepper
- 0.5 teaspoon garlic powder
- 0.25 teaspoon paprika
- Cooking spray
Instructions
- Preheat your oven to 400°F (200°C). Line a baking sheet with parchment paper and lightly coat with cooking spray.
- Cut the chicken breasts into uniform tender shapes, about 1 inch thick.
- Set up a standard breading station with three shallow dishes.
- In the first dish, place the flour.
- In the second dish, whisk the eggs and water together.
- In the third dish, combine the panko breadcrumbs, salt, pepper, garlic powder, and paprika.
- Dredge each chicken tender first in the flour, shaking off excess.
- Dip the floured tender into the egg mixture, letting excess drip off.
- Coat the tender thoroughly in the panko mixture, pressing gently to adhere.
- Place the breaded tenders on the prepared baking sheet in a single layer.
- Spray the tops of the tenders lightly with cooking spray.
- Bake for 18 to 22 minutes, flipping halfway through, until the internal temperature reaches 165°F (74°C) and the coating is golden brown and crisp.
Notes
- For extra crispiness, you can place a wire rack on top of the baking sheet before arranging the tenders.
- Serve immediately with your preferred dipping sauce.
- Prep Time: 15 min
- Cook Time: 22 min
- Category: Main Course
- Method: Baking
- Cuisine: American
Nutrition
- Serving Size: 4 tenders
- Calories: 280
- Sugar: 1
- Sodium: 350
- Fat: 6
- Saturated Fat: 1
- Unsaturated Fat: 5
- Trans Fat: 0
- Carbohydrates: 20
- Fiber: 1
- Protein: 35
- Cholesterol: 95
Keywords: crispy chicken, baked tenders, healthy chicken, breaded chicken, easy dinner