
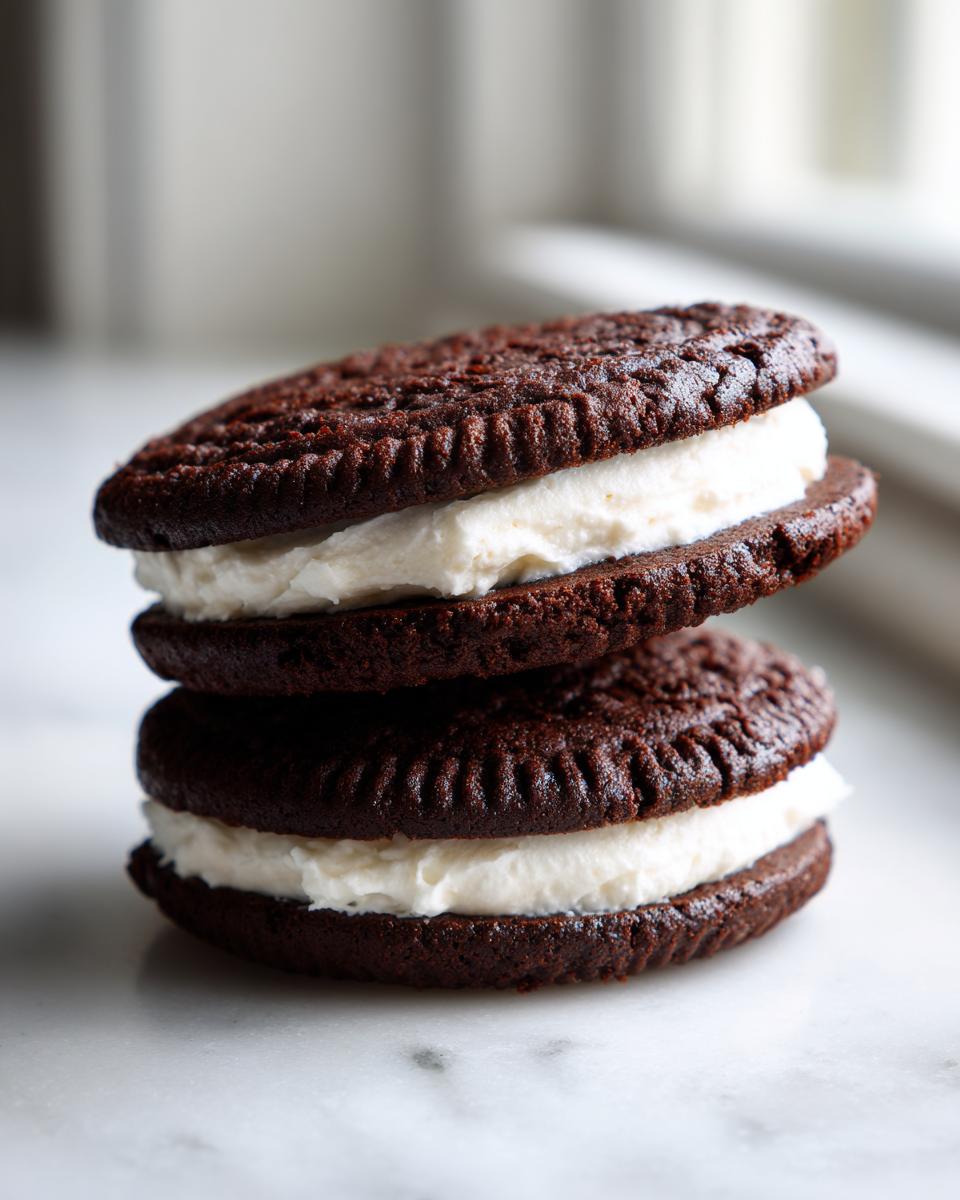
Oh, you know those treats from childhood? The ones that just smell like pure happiness? I’ve spent years trying to recreate that nostalgic perfection, and friends, I’ve nailed it. Forget those dry, store-bought imposters – we are talking about making the best **Chocolate Sandwich Cookies** right here in your own kitchen, complete with that fluffy, melt-in-your-mouth cream filling.
Truly, mastering the classic chocolate sandwich cookie recipe was a journey for me. I must have gone through three bags of cocoa powder before I got the cookie part dark and tender enough. But when everything finally clicked—when the cookie snapped just right and the filling was perfectly sweet—it felt like winning the baking lottery. This recipe is absolutely foolproof, I promise. It focuses on simple steps that ensure deeply flavored, perfectly structured cookies every single time. Get ready to fall in love with homemade again!

Why You Will Love These Chocolate Sandwich Cookies
Honestly, once you make these at home, you will never go back to the store shelf, and I mean that! These are miles better than anything pre-packaged you can buy. They just have that homemade magic that you can’t replicate with machines.
- Unbeatable Flavor: We use rich cocoa powder, so that dark chocolate flavor really sings through the cookie. It’s intense but balanced.
- The Filling is Creamy Perfection: Forget waxy fillings. Ours is buttery, sweet, and clouds up beautifully in your mixer. You control how thick you spread it!
- Total Customization: Want to add a little espresso powder to the cookie? Go for it! Want peppermint extract in the middle? It’s your kitchen!
- It’s a Fun Project: Making these chocolate sandwich cookies takes you back to being a kid. It’s satisfying, and you get to eat the test batches (if you can resist assembling them all!).
Essential Ingredients for Perfect Chocolate Sandwich Cookies
Okay, the secret to making these superior chocolate sandwich cookies doesn’t actually involve some obscure pantry item. It’s all about making sure the basic things—especially the chocolate moments—are spot on. We break this down into the cookie shells and the glorious filling components. Pay close attention to the temperature of your butter, because honestly, that starts the whole process off right!
If you skip the softening step, you end up fighting your mixer, and nobody wants that kind of stress in their baking!
For the Chocolate Sandwich Cookies
When it comes to the cookie part, the cocoa powder matters more than you think. I always reach for a good quality, unsweetened Dutch-process cocoa powder because it gives these shells that beautiful, deep black color and a richer chocolate background note. You don’t want flavorless brown snacks, right?
- 1 cup all-purpose flour, measured correctly.
- 1/2 cup unsweetened cocoa powder—make this one count!
- 1 teaspoon baking soda.
- 1/2 teaspoon salt, just to balance the sweetness.
- 1/2 cup unsalted butter, softened to room temperature (it should yield slightly when pressed).
- 1 cup granulated sugar.
- 1 large egg, room temperature is best.
- 1 teaspoon vanilla extract.
- 1/4 cup milk, any kind works fine here.
For the Cream Filling
This filling is what makes them classic, and we aren’t skimping! The consistency of the butter here is everything. If it’s too cold, you get lumps. If it’s too warm and melted, the cookie sandwiches slide everywhere. We are aiming for perfectly smooth and creamy.
- 1 cup powdered sugar, please sift this first for the fluffiest results!
- 1/2 cup unsalted butter, also softened perfectly to room temperature.
- 1 teaspoon vanilla extract.
Equipment Needed to Make Chocolate Sandwich Cookies
You don’t need a fancy bakery setup for these beauties, but having the right tools makes the whole process flow so smoothly. Having everything handy means you can get these chocolate sandwich cookies mixed and baked before you even realize what happened!
First off, you absolutely need a decent electric mixer—either a sturdy hand mixer or a stand mixer—for creaming that butter and sugar until it looks like happy, fluffy clouds. That’s crucial for the cookie texture.
- Baking sheets (you’ll need at least two so you can work in batches).
- Parchment paper or silicone mats. Trust me, don’t skip this—it prevents sticking beautifully.
- A couple of good mixing bowls.
- A wire cooling rack to let those shells cool down properly before filling.
- A small offset spatula or a piping bag if you want to get fancy with the filling application!
Step-by-Step Instructions for Amazing Chocolate Sandwich Cookies
This process is really straightforward once you get into a rhythm. Before we even touch the cocoa powder, go ahead and set your oven rack to the middle position and get that temperature cranked up to 350 degrees F (175 degrees C). Line those baking sheets—don’t forget the parchment paper! That’s your insurance policy against sticking, which is key when you have such a deep, dark chocolate cookie base.
Preparing and Baking the Chocolate Sandwich Cookies
First things first, we build the flavor foundation. In a medium-sized bowl, just whisk together your flour, that dark cocoa powder, baking soda, and salt. Whisking is great because it aerates everything and breaks up any little cocoa clumps before they hit the wet items. Set that dry mix aside for a moment.
Now, grab your big bowl for the magic part: creaming. Beat that 1/2 cup of softened butter with the full cup of sugar until it looks pale and wonderfully fluffy. This takes a few minutes, but don’t rush it! This is how we get air into the cookie so they aren’t totally rock hard. Beat in your egg and the vanilla extract until it’s all incorporated and looking smooth.
Time to marry the wet and dry! You need to alternate adding your dry flour/cocoa mixture with the milk. Start and end with the dry ingredients. So, add about a third of the dry, mix until just barely combined, then half the milk, mix a little, another third of the dry, the rest of the milk, and finally, the last bit of dry flour. Remember what I always say? Don’t overmix! Stop as soon as you don’t see long streaks of flour anymore. If the dough feels just a tiny bit too soft to handle right away—and trust me, chilling is always helpful—pop the whole bowl into the fridge for about 30 minutes. Chilled dough is so much easier to scoop and prevents spread. Think of it like letting your muscles rest before a big lift!
Drop rounded teaspoons of the dough onto your parchment-lined sheets, leaving about 2 inches between them because they will puff up a bit. Bake them for 10 to 12 minutes. You’re looking for a cookie that is set but still looks deeply dark. Let them hang out right on the baking sheet for a good 5 minutes before carefully moving them to a wire rack to cool completely. If you move them too early, they might crack! For recipes like this, sometimes chilling the dough helps set the shape better, just like when deciding if you need to check out a recipe like sour cream banana bread, patience pays off!
Creating the Fluffy Cream Filling
While those shells are getting cool—and they *must* be totally cold before you try filling them, or you get a chocolate soup—we make the filling. Beat that other 1/2 cup of softened butter by itself until it’s really smooth and looking pale. This is important; no cold chunks allowed here!
Now, slowly add your powdered sugar. If you dump it all in at once, you’re going to create a white cloud that might just take over your kitchen! Gradual additions are the way to go. Beat that in, then mix in the vanilla extract. Keep beating until it’s light, creamy, and looks truly fluffy. If you have some time, sifting your powdered sugar beforehand really guarantees that no tiny lumps survive. It makes the filling so much silkier, it’s worth the extra minute!
Assembling Your Chocolate Sandwich Cookies
This is the rewarding finale! Once your chocolate cookies are fully chilled and firm, take one cookie and flip it so the flat bottom is facing up. Scoop or pipe a nice dollop of that creamy filling onto the flat side. Remember, you want enough filling so that when you gently press the second cookie on top, the filling peeks out just perfectly around the edges. Don’t press too hard, or the filling will squish out the sides unevenly. Just a gentle sandwich action! Then, pop those finished chocolate sandwich cookies onto parchment paper to set up before serving. Enjoy that moment of pure, sweet satisfaction!
Tips for Success When Making Chocolate Sandwich Cookies
We’ve made the dough and the filling, and now we just want these chocolate sandwich cookies to turn out absolutely perfect, right? I’ve learned a few little tricks over the years to make sure they don’t spread into flat puddles or end up with runny filling. These aren’t things you always see in recipes, but they are game-changers!
First up: if you are worried about spread, that 30-minute chill time isn’t optional, I promise. Cold fat melts slower in the oven, keeping those cookie edges crisp and defined instead of letting them relax too much. You can even chill the dough for up to an hour if your kitchen is warm!
Second, for perfectly matched pairs, try using a small cookie scoop. It keeps the dough balls uniform in size, so they bake at the same rate and match up nicely when you’re assembling the final sandwiches. Uniformity is nice for looks!
Thirdly, when you’re making the filling, if you feel like it’s just too soft to pipe neatly, don’t even think about adding more powdered sugar right away—that can make it grainy. Instead, pop the filling bowl into the fridge for 10 minutes. A little chill firms it right up without ruining the texture. It’s good troubleshooting, much like when people adapt a savory recipe like homemade pesto sauce, small adjustments make a huge difference in the end result.
Finally, always frost the flat sides. It creates a better seal and keeps the filling neatly contained within the chocolate walls!
Storage and Keeping Your Chocolate Sandwich Cookies Fresh
These homemade chocolate sandwich cookies really are best enjoyed fresh, but they do store surprisingly well! The key here is keeping the air out. I always use a really good airtight container—the kind with the seal that clicks tightly shut.
You can keep them right on the counter at room temperature; they usually stay lovely for about three to four days. If they last longer than that (which is rare in my house!), refrigeration is fine, but they might firm up a bit, so let them sit on the counter for 15 minutes before you eat them. Don’t try to microwave them, though! That just makes the filling weird. If you want to keep them for longer, flash-freeze them first, then store them in a heavy-duty freezer bag. They thaw out beautifully on the counter in an hour!
Variations for Your Homemade Chocolate Sandwich Cookies
One of the best parts about making these fantastic chocolate sandwich cookies from scratch is that you can customize them endlessly! They are such a great base for trying out new flavors. You’re already using intense cocoa, but why stop there?
If you want to deepen that chocolate flavor in the cookie shells, try adding about a teaspoon of instant espresso powder right in with your dry ingredients. It won’t make them taste like coffee, but wow, does it boost the chocolate notes! It’s a trick I learned from reading up on great chocolate cocktails—it works in baking too!
For the filling, don’t feel locked into just vanilla. Swap it out for peppermint extract for a fantastic holiday twist, or maybe even a tiny bit of almond extract for a really delicate flavor. And for the grand finale presentation? After you sandwich the cookies, you can gently roll the edges of the cream filling in colorful sprinkles or some finely chopped nuts. It makes them look so professional, even though they were totally easy!
Frequently Asked Questions About Chocolate Sandwich Cookies
I get so many questions about these chocolate sandwich cookies after people try them! It’s wonderful that you’re asking, because troubleshooting is just part of the fun in the kitchen. Honestly, most issues come down to temperature or mixing technique, both of which we covered, but here are the specifics people ask me about most often concerning these treats.
Can I use melted butter instead of softened butter for these Chocolate Sandwich Cookies?
Oh, honey, please don’t! If you use melted butter, you skip over that crucial creaming step where we incorporate air into the dough. Melted butter will result in cookies that are flat, dense, and super greasy—they might even melt completely on the baking sheet before they even have a chance to set. We need that softened butter to hold onto the sugar crystals so we can whip air in there for a nice lift. Keep it soft and pliable for the best results on your chocolate sandwich cookies!
How do I stop my Chocolate Sandwich Cookies from spreading too much?
This is super common, especially if your kitchen is warm! The number one fix, like I mentioned before, is chilling that dough. If you find your cookies are spreading thin and fast, stick the scooped dough balls in the freezer for just 15 minutes instead of the fridge for 30. Freezing solidifies that fat really quickly. Also, make absolutely sure you are measuring your flour correctly. Too much flour can sometimes affect the structure too, but usually, for cookies, it’s the temperature of the dough going into the oven that matters most. We want a nice, defined circle, not a chocolate puddle!
What is the best way to store the filling separately?
That’s a smart way to plan ahead, especially if you’re making them for a party! If you make the cream filling ahead of time, just place it inside an airtight container. You must keep it refrigerated if you plan on storing it for more than a day, just because of the butter content. When you take it out to assemble cookies later, you will need to let it sit on the counter for about 30 to 45 minutes until it softens back up to a pipeable consistency. It’s perfect for those big game days when you want to pull everything out fast, perhaps alongside some classic Super Bowl snacks!
Nutritional Snapshot of These Chocolate Sandwich Cookies
Now, let’s talk fuel for a moment. I know we don’t bake these perfect chocolate sandwich cookies because we are counting every single calorie, but it’s good to have a general idea of what you’re indulging in! I took the numbers from my standard recipe breakdown, which serves about 18 sandwiches in total, so this is per cookie, and admittedly, it’s a generous serving!
Remember, these numbers are based on the specific amounts I listed—if you use extra filling or a richer cocoa powder, the totals will shift a little. But this will give you a solid baseline for your homemade chocolate indulgence!
- Serving Size: 1 cookie sandwich
- Calories: Around 220 Cals
- Total Fat: About 12g (that creamy filling adds up!)
- Carbohydrates: Roughly 28g
- Protein: Just about 2g
- Sugar: Close to 18g (mostly from the filling, which explains why they taste so good!)
For those tracking specific things, you’ll also find about 100mg of sodium and 7g of saturated fat per serving. My main takeaway when looking at this snapshot is that these homemade chocolate sandwich cookies are a treat meant to be savored, not snacked upon mindlessly. They give you a little energy boost from the sugar but are packed with that real butter flavor that store-bought versions just miss!
Print
Chocolate Sandwich Cookies
- Total Time: 32 min
- Yield: 18 sandwiches 1x
- Diet: Vegetarian
Description
Recipe for making classic chocolate sandwich cookies with cream filling.
Ingredients
- 1 cup all-purpose flour
- 1/2 cup unsweetened cocoa powder
- 1 teaspoon baking soda
- 1/2 teaspoon salt
- 1/2 cup unsalted butter, softened
- 1 cup granulated sugar
- 1 large egg
- 1 teaspoon vanilla extract
- 1/4 cup milk
- 1 cup powdered sugar (for filling)
- 1/2 cup unsalted butter, softened (for filling)
- 1 teaspoon vanilla extract (for filling)
Instructions
- Preheat your oven to 350 degrees F (175 degrees C). Line baking sheets with parchment paper.
- In a medium bowl, whisk together the flour, cocoa powder, baking soda, and salt. Set aside.
- In a large bowl, cream together the 1/2 cup butter and 1 cup sugar until light and fluffy.
- Beat in the egg and 1 teaspoon vanilla extract.
- Gradually add the dry ingredients to the wet ingredients, alternating with the milk, mixing until just combined. Do not overmix.
- Drop rounded teaspoons of dough onto the prepared baking sheets, about 2 inches apart.
- Bake for 10 to 12 minutes. Let the cookies cool on the baking sheet for 5 minutes before transferring them to a wire rack to cool completely.
- To make the filling, beat the 1/2 cup butter until smooth. Gradually add the powdered sugar and 1 teaspoon vanilla extract, beating until light and creamy.
- Once cookies are completely cool, spread or pipe the filling onto the flat side of one cookie and top with another cookie to form a sandwich.
Notes
- Chill the dough for 30 minutes before baking for easier handling.
- For a smoother filling, sift the powdered sugar before mixing.
- Prep Time: 20 min
- Cook Time: 12 min
- Category: Dessert
- Method: Baking
- Cuisine: American
Nutrition
- Serving Size: 1 cookie sandwich
- Calories: 220
- Sugar: 18g
- Sodium: 100mg
- Fat: 12g
- Saturated Fat: 7g
- Unsaturated Fat: 5g
- Trans Fat: 0g
- Carbohydrates: 28g
- Fiber: 1g
- Protein: 2g
- Cholesterol: 30mg
Keywords: chocolate cookies, sandwich cookies, cream filling, homemade cookies, dessert