
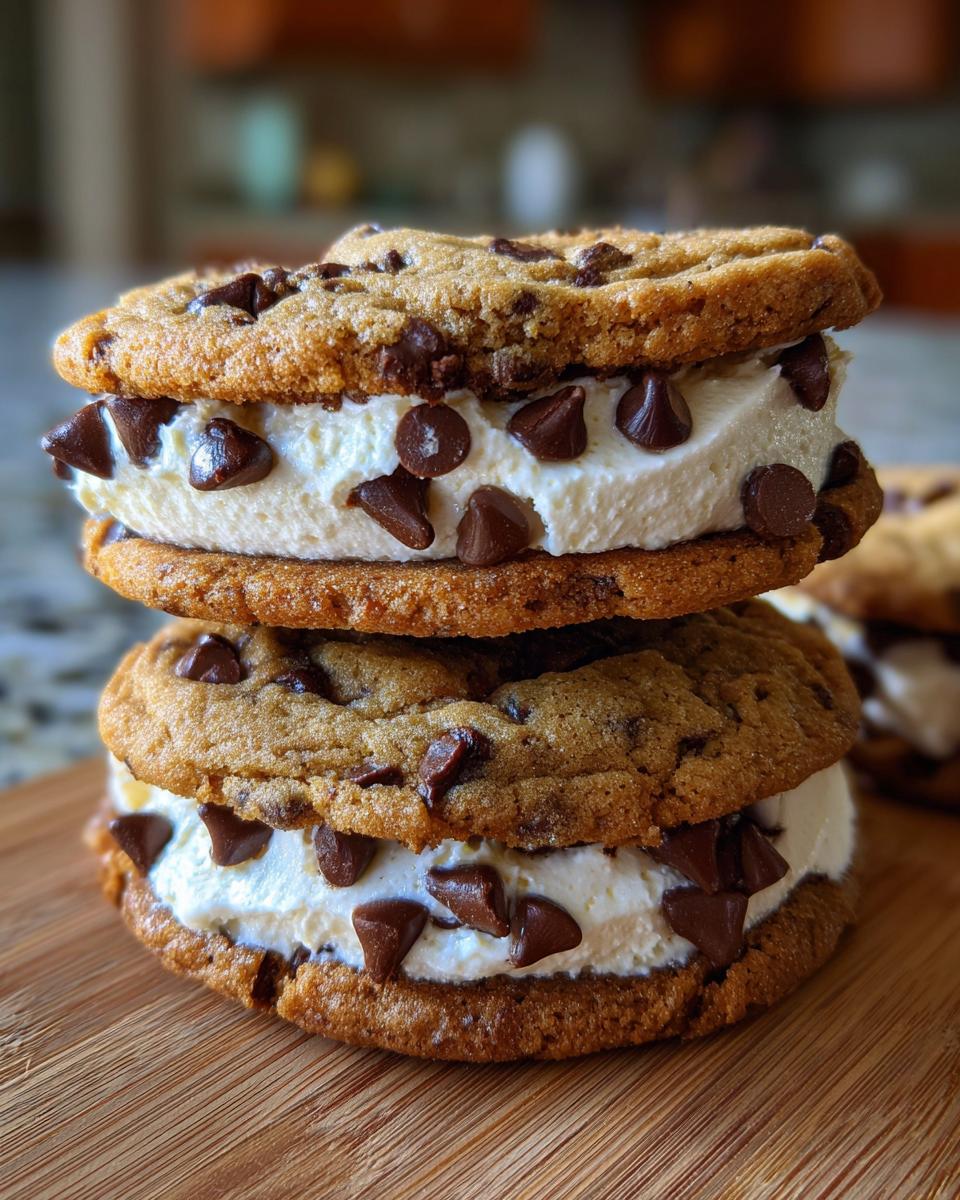
Oh, who doesn’t dream about that perfect, nostalgic cookie? I swear, the smell of warm chocolate chips takes me right back to grade school bake sales faster than anything else. But why settle for store-bought when you can make something truly spectacular? These are my absolute favorite go-to recipe because they combine two amazing things: that slightly crisp, chewy chocolate chip cookie base, sandwiched around the silkiest, sweetest cream filling you’ve ever tasted. Trust me, making your own Chocolate Chip Sandwich Cookies at home is completely game-changing. I’ve been tinkering with this combo for years, and I finally nailed the balance between the cookie’s rich texture and the filling’s smooth sweetness. You won’t find a better version, I promise!
Why You Will Love These Chocolate Chip Sandwich Cookies
Honestly, these aren’t just cookies; they’re an event! I’ve made hundreds of batches over the years, and I keep coming back to this exact formula because it never lets me down. Forget dry, crumbly sandwich cookies. These offer that perfect bite every single time.
- The cookie base is perfectly chewy in the middle with those wonderfully golden, crisp edges.
- The homemade cream filling? Oh my gosh, it’s pure bliss—so light, fluffy, and it sets up beautifully.
- They look impressive! They’re perfect for your next holiday tin or just impressing your neighbors.
- Best of all, you control the chocolate! Use dark, milk, or even mini chips if that’s your style.
They just scream homemade comfort, and they disappear fast. You’ve been warned!

Essential Ingredients for Perfect Chocolate Chip Sandwich Cookies
When we talk about making cookies that hold up to a creamy filling, we need precision, friend! This isn’t the time to wing it. Getting your butter temperature spot-on makes a huge difference in how much your cookies spread. I learned the hard way that cold butter means tough cookies! So, pull everything out for the cookies ahead of time about an hour before you plan to mix. Don’t forget to grab the ingredients for the filling too, because we want that center to be rich and stable!
I’ve got a link here that talks about how to make perfect simple syrup, which is another thing where temperature and measurement really matter for cocktails, and it’s the same idea for baking. You really need to measure correctly for bakery-quality Chocolate Chip Sandwich Cookies. You can check out my guide on simple syrup recipe if you want a quick refresher on precise measurement!
For the Chocolate Chip Cookie Bases
These are the stars that need to be sturdy enough to hold all that lovely filling without crumbling. Remember, room temperature butter is non-negotiable here!
- 1 cup unsalted butter, softened perfectly to room temperature—it should yield slightly when you press it.
- 3/4 cup granulated sugar.
- 3/4 cup packed brown sugar (I insist on packed; it adds necessary moisture).
- 2 large eggs, also at room temperature; crack these into a little bowl first just in case!
- 1 teaspoon vanilla extract.
- 2 1/4 cups all-purpose flour.
- 1 teaspoon baking soda.
- 1/2 teaspoon salt.
- 1 cup semi-sweet chocolate chips (use the good stuff!).
For the Cream Filling of Your Chocolate Chip Sandwich Cookies
This filling uses shortening instead of all butter. Why? Because melted shortening helps the filling stay fluffy and stable at room temperature without becoming greasy or collapsing under the weight of two cookies. It’s a secret weapon!
- 1/2 cup shortening (like Crisco—it works best for structure).
- 3 cups powdered sugar, sifted if it’s lumpy!
- 1 teaspoon vanilla extract.
- 2 tablespoons milk (whole milk is best for richness).
Step-by-Step Instructions for Making Chocolate Chip Sandwich Cookies
Okay, let’s get baking! This recipe moves surprisingly fast once you have your ingredients ready. We’re going to tackle the cookies first, get those cooled, and then whip up the perfect filling while we wait. Don’t rush the cooling, though—that’s where a lot of people mess up their sandwich cookies and end up with melted goo!
If you’ve ever looked at a baking recipe and wondered about the science behind it, you might enjoy my guide on irresistible caramel apple pie recipe. Sometimes knowing *why* we do a step helps us do it better next time!
Preparing the Chocolate Chip Cookie Dough
First things first: get that oven ready! Preheat your oven to 375 degrees F right away and line those baking sheets with parchment paper. That parchment is your best friend for easy cleanup and perfect bottoms!
Grab your big bowl and cream together that softened butter, granulated sugar, and brown sugar until it looks light and fluffy—we’re looking for that creamy texture. Then, beat in your eggs one at a time. Make sure each one is fully mixed in before you add the next one. Stir in that vanilla extract right after the eggs.
In a separate bowl, quickly whisk together your flour, baking soda, and salt. Now, here is my one major rule about mixing flour: add the dry ingredients to the wet ones *gradually*. Mix only until you see just a few streaks of flour left. Seriously, stop mixing! Overmixing develops gluten, and we want chewy cookies, not tough ones. Finally, gently stir in those semi-sweet chocolate chips.
Scoop out rounded tablespoons of dough and drop them onto your prepared sheets, spaced about 2 inches apart. They do spread a bit, so give them room to breathe!
Baking and Cooling the Cookie Bases
Pop those trays into the hot oven and bake them for about 9 to 11 minutes. You’re watching for those edges to turn a nice, beautiful golden brown. If you like them softer—and I usually do for sandwich cookies—pull them out closer to the 9-minute mark.
This next part is crucial for successful assembly: Let the cookies cool right there on the baking sheets for a good 5 minutes. They are too fragile right out of the oven to move! Once they firm up a little, gently transfer them all over to a wire rack. They must be completely, totally cooled before we move on to the filling, or you’ll have a gigantic, melted chocolate chip cookie puddle!
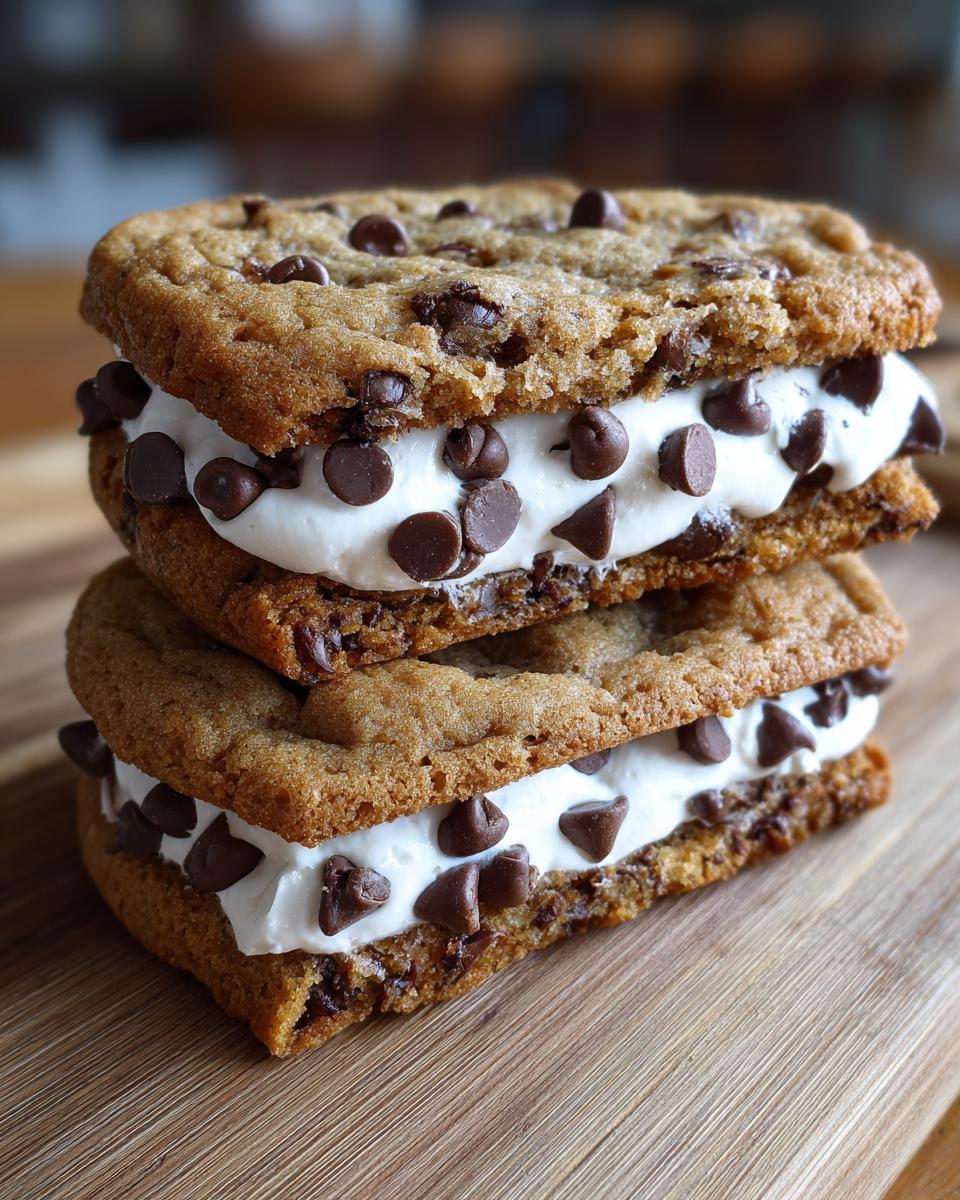
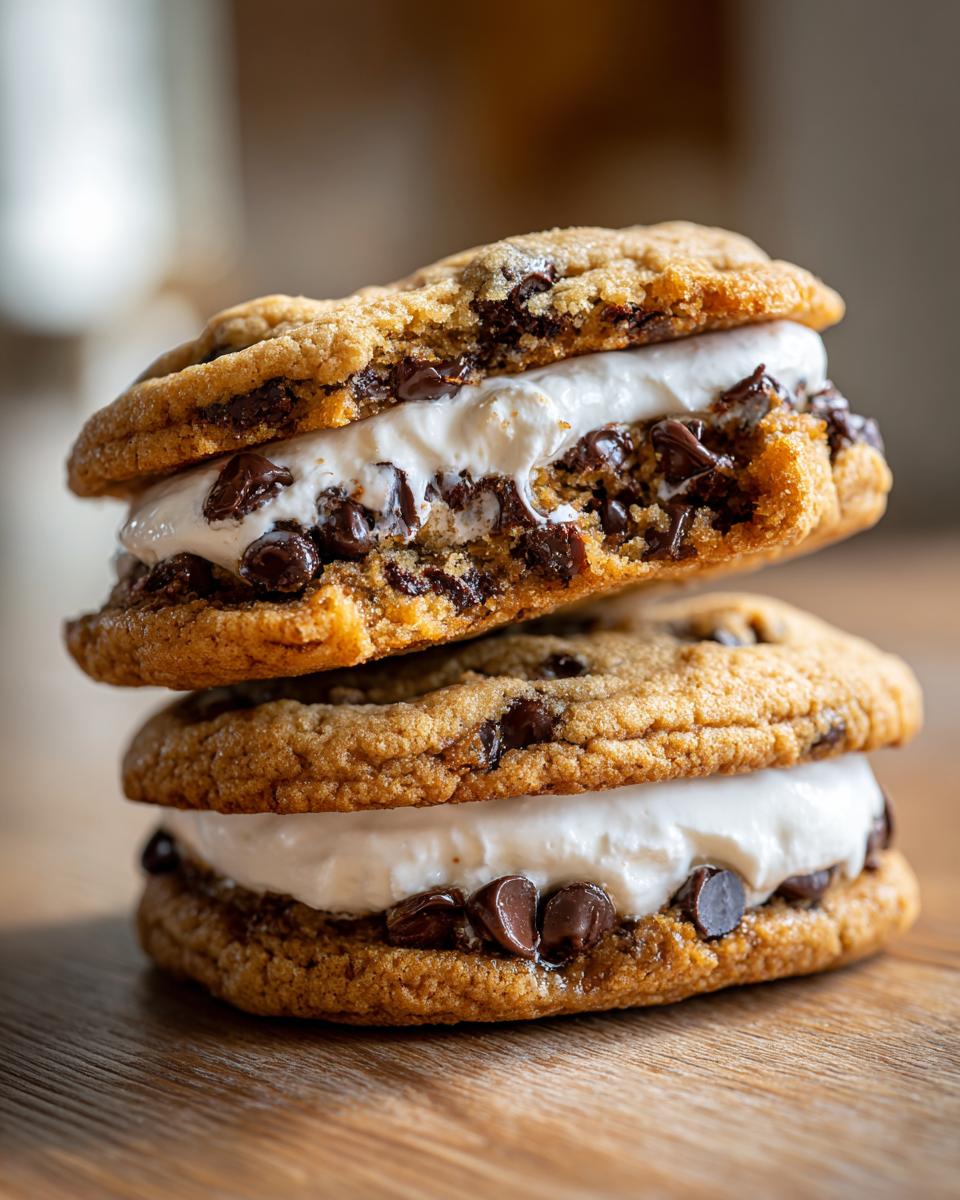
Assembling Your Chocolate Chip Sandwich Cookies
While the cookies are cooling down, it’s filling time! Beat that shortening, powdered sugar, vanilla, and milk together until it’s unbelievably smooth and fluffy. I use my stand mixer for this part; it makes the filling lighter than air.
When the cookies are cold, you just pair them up! For the prettiest result, I highly suggest using a small offset spatula or even putting the filling into a piping bag fitted with a large round tip. Pipe a small mountain of filling—about 2 tablespoons worth—onto the flat side of one cookie, and then gently press the second cookie on top to spread it out evenly. Don’t press too hard, or the filling will squish out the sides everywhere!
Tips for Achieving the Best Chocolate Chip Sandwich Cookies
So you’ve got the recipe, but how do you make sure yours look like they came from a fancy bakery window? It’s all about those little details we don’t always think about. When it comes to sandwich cookies, cookie spread is enemy number one because it makes assembly messy. If your dough is spreading too much when you bake them, try this trick: Wrap the dough tightly and stick it in the fridge for about 30 minutes before scooping. Chilled butter takes longer to melt, resulting in a thicker, chewier cookie base that holds its shape perfectly!
Another biggie is flour measurement. If you scoop your measuring cup right into the bag of flour, you are packing in way too much, and that makes your cookies dry and dense. Always spoon the flour lightly into your measuring cup and then level it off with a flat knife. That tiny difference makes a huge impact on the final texture!
If you want to explore homemade pantry staples that require a little care, check out my article on how to make almond milk without soaking. Baking is chemistry, and knowing your base ingredients is half the battle won!
Variations on Classic Chocolate Chip Sandwich Cookies
The beauty of a great base recipe like this one is that you can totally play around with it! I mean, why stick to just semi-sweet if you don’t want to? The recipe notes hint already that you can swap out the chocolate chips—and you absolutely should if you’re feeling adventurous. I often use half semi-sweet and half dark chocolate chips to give the cookies a richer, more complex flavor that really kicks up the taste when paired with that sweet cream filling.
Another fun thing to try is messing with the vanilla. If you swap out some or all of that vanilla extract for almond extract, you get this unexpected, slightly floral note that is just divine with chocolate. Just use less almond extract than vanilla, maybe half the amount, because it’s strong! You could also chop up some toasted pecans or walnuts and fold those in with the chips. They add a fantastic crunch that contrasts so nicely with the smooth filling. Keep the mix-ins to about a cup total so you don’t compromise the structure of your cookie base!
Storage and Make-Ahead Tips for Chocolate Chip Sandwich Cookies
I get asked all the time if these Chocolate Chip Sandwich Cookies are good for making ahead of time, especially since I usually double the batch! The answer is yes, but you have to be strategic about it to keep that filling perfectly cloud-like and prevent sogginess.
For the best freshness, I always bake the cookie bases and store them completely cooled in an airtight container for up to three days before I plan on filling them. That keeps the cookie texture pristine. If you try to freeze the assembled cookies, the filling can get a little weird when it thaws, so I skip that.
If you absolutely must make them ahead assembled, make sure the filling is thick, and put them between layers of parchment paper in a container. But for truly the best result? Bake the cookies, make the filling, and assemble them the day you plan to serve them. It’s worth the extra 15 minutes right before the party to avoid a soggy bottom!
Speaking of making things ahead, if you ever want to try making your own bread, my guide on homemade oatmeal honey bread shows you how making things from scratch makes a huge difference in flavor!
Frequently Asked Questions About Chocolate Chip Sandwich Cookies
I get so many great questions about these sandwich cookies after I post pictures, so let’s clear up a few things right here! It’s all about getting that perfectly balanced flavor and texture, which means answering common baking puzzles.
Can I use butter instead of shortening in the filling?
Yes, you technically can, and I know some of you prefer baking only with butter. However, I strongly suggest sticking to the shortening for structure! If you use all butter, the filling will be softer at room temperature and you risk it melting or oozing out the sides once you stack the cookies. If you must substitute, use half butter/half shortening. The shortening keeps the filling lighter and fluffier longer, which is exactly what you want in a great Chocolate Chip Sandwich Cookie filling.
How do I keep my sandwich cookies from getting soggy?
Sogginess is the enemy of a good sandwich cookie! The main culprit is usually waiting too long between baking and assembling. To avoid this, make sure your cookie bases are bone dry and completely cool—I mean room temperature cold—before they even see the cream filling. Also, don’t overdo the amount of filling; too much filling means more moisture transfer into the cookie. Keep them in a single layer, not stacked, if you aren’t eating them on the same day.
Do I really need to chill the dough when making the cookie bases?
Honestly, for this specific recipe, if you are worried about spread, chilling is a big help! Since these cookies are going to be paired up, you want them as uniform in size as possible so they match up nicely. Chilling the dough for even 30 minutes helps solidify the fats, which makes the dough scoops hold their shape better during the initial baking time. They won’t flatten out too much, giving you the perfect size to sandwich together.
What’s the best way to get even amounts of filling on every cookie?
If you want them to look professional, skip the butter knife all together! I find using a small offset spatula works wonders if you’re spreading it by hand, giving you a nice, even layer that doesn’t reach the edges too much. But my secret weapon? A piping bag with a large, plain round tip. It lets you dispense a perfect dollop right in the center, and then you just gently press the top cookie down until the filling is spread about 1/4 inch from the edge. It’s shockingly easy!
If you’re curious about homemade milks that work great in baking, maybe check out my guide to easy homemade oat milk. It gives you an idea of how small ingredient changes can alter texture!
Estimated Nutritional Information for Chocolate Chip Sandwich Cookies
Now, I have to give you the disclaimer here: I am a baker, not a food scientist! The numbers I’m sharing below are based on the ingredients listed and standard nutritional databases, so they are just estimates. Your actual calorie and sugar counts might vary a little bit depending on the brand of butter you use or exactly how much chocolate chip you stuff into the middle. But hey, these are homemade treats, so we enjoy them with love, right?
You can see the details for one beautiful, fully assembled sandwich cookie right here. These are definitely a splurge item, but totally worth it!
- Serving Size: 1 sandwich cookie (Yields 18 servings)
- Calories: Approximately 350
- Sugar: Around 35g (That’s where the deliciousness is!)
- Fat: About 18g total
- Carbohydrates: Roughly 45g
- Protein: About 3g
Remember, this information is just a guideline so you know what you’re dealing with when you decide to have one—or maybe two! Don’t sweat the small stuff; just make sure you savor every bite of these fantastic Chocolate Chip Sandwich Cookies.
Share Your Homemade Chocolate Chip Sandwich Cookies
Alright, my friends, I’ve handed over all my secrets for making these incredible Chocolate Chip Sandwich Cookies! Now it’s your turn to get your apron on and whip up a batch. I put so much heart into making sure this recipe is perfect for you, and I love seeing your results!
Once you bake these—remembering we get about 18 servings from this batch—please, please come back and let me know how they turned out. Did you try dark chocolate chips? Did you chill the dough? Did the filling stay perfectly fluffy? Drop a rating right here on the page so other bakers know what a winner this recipe is!
And if you took pictures—and I bet you did because these look gorgeous—tag me on social media! I absolutely love seeing my recipes enjoyed in your kitchens. Happy baking!
Print
Chocolate Chip Sandwich Cookies
- Total Time: 31 min
- Yield: 18 servings 1x
- Diet: Vegetarian
Description
Make classic sandwich cookies using homemade chocolate chip cookies filled with a sweet cream.
Ingredients
- 1 cup unsalted butter, softened
- 3/4 cup granulated sugar
- 3/4 cup packed brown sugar
- 2 large eggs
- 1 teaspoon vanilla extract
- 2 1/4 cups all-purpose flour
- 1 teaspoon baking soda
- 1/2 teaspoon salt
- 1 cup semi-sweet chocolate chips
- 1/2 cup shortening
- 3 cups powdered sugar
- 1 teaspoon vanilla extract
- 2 tablespoons milk
Instructions
- Preheat your oven to 375 degrees F. Line baking sheets with parchment paper.
- Beat the softened butter, granulated sugar, and brown sugar in a large bowl until creamy.
- Beat in the eggs one at a time, then stir in 1 teaspoon vanilla extract.
- In a separate bowl, whisk together the flour, baking soda, and salt. Gradually add the dry ingredients to the wet ingredients, mixing until just combined.
- Stir in the chocolate chips.
- Drop rounded tablespoons of dough onto the prepared baking sheets, spacing them about 2 inches apart.
- Bake for 9 to 11 minutes, or until the edges are golden brown. Let cool on the baking sheets for 5 minutes before moving them to a wire rack to cool completely.
- To make the filling, beat the shortening, powdered sugar, 1 teaspoon vanilla extract, and milk until smooth and fluffy.
- Pair two cooled cookies together with about 2 tablespoons of filling between them.
Notes
- For softer cookies, slightly underbake them.
- You can use dark or milk chocolate chips instead of semi-sweet.
- Store assembled cookies in an airtight container at room temperature.
- Prep Time: 20 min
- Cook Time: 11 min
- Category: Dessert
- Method: Baking
- Cuisine: American
Nutrition
- Serving Size: 1 sandwich cookie
- Calories: 350
- Sugar: 35g
- Sodium: 150mg
- Fat: 18g
- Saturated Fat: 10g
- Unsaturated Fat: 8g
- Trans Fat: 0g
- Carbohydrates: 45g
- Fiber: 1g
- Protein: 3g
- Cholesterol: 40mg
Keywords: chocolate chip cookies, sandwich cookies, cream filling, homemade cookies, dessert