
Oh, I love a dessert that seems fancy but is secretly hiding behind a very simple ingredient list! Sometimes you just need that perfect, rich treat for unexpected company, right? That’s exactly why these **Cheesecake Bars** have earned permanent residence in my recipe rotation. Forget fussing with fussy water baths or complicated swirls; this is the ultimate easy dessert. We’re talking a buttery, crunchy graham cracker crust hugging a perfectly creamy, tangy filling. I mean, seriously, watch how fast these come together—I usually whip up a batch when I realize I forgot to plan dessert for the weekend. These simple **Cheesecake Bars** always disappear first!

Why You Will Love These Simple Cheesecake Bars
Honestly, when I bring these out, people always ask if I spent all day slaving away. And I just smile! That’s the beauty of these classic **Cheesecake Bars**—they deliver massive payoff with minimal effort. If you need a foolproof recipe that tastes expensive but is truly beginner-friendly, grab your ingredients now.
- They are shockingly fast to assemble! You’ll be amazed at how quickly you can start baking.
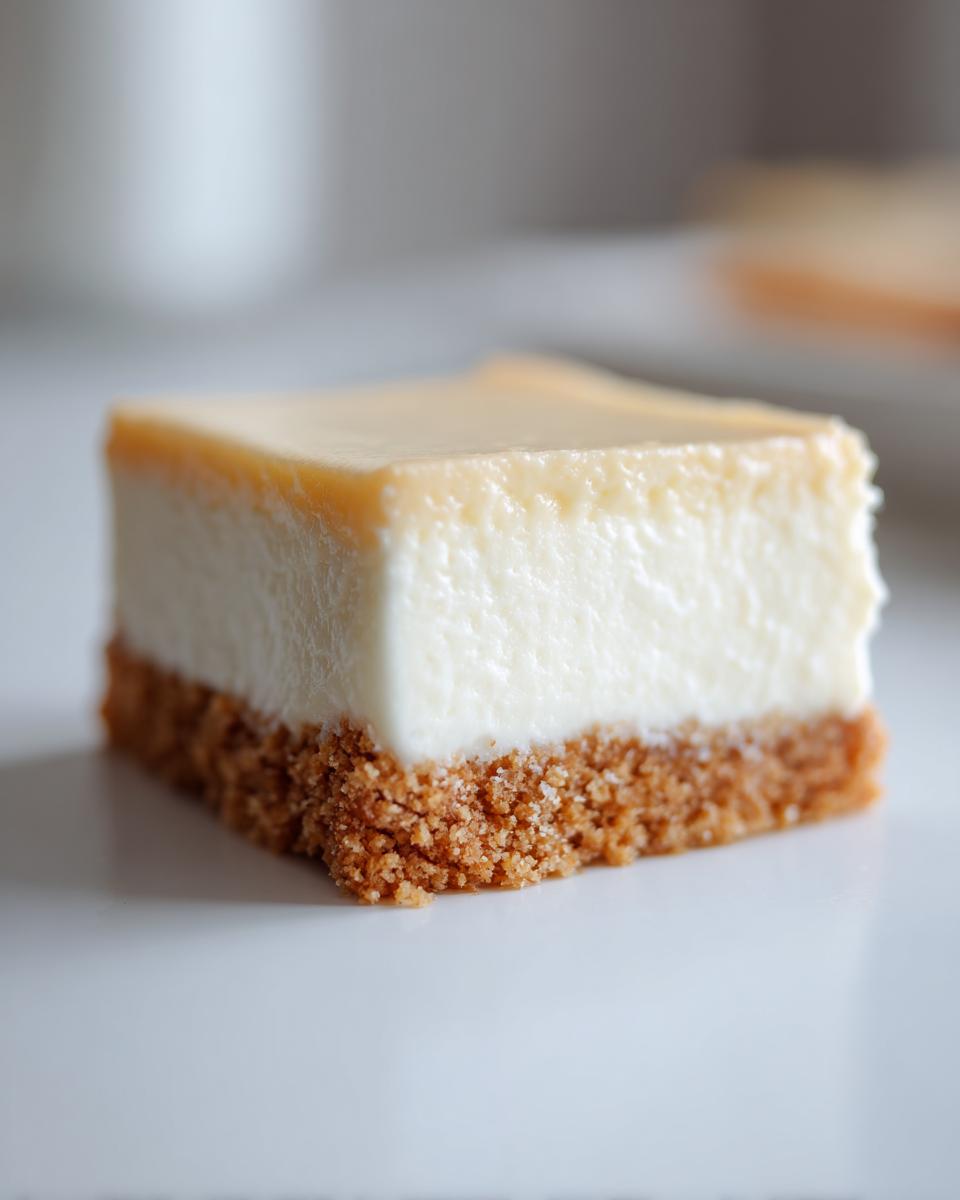
- The texture contrast is just heavenly—that crisp, salty-sweet crust meeting that velvety, smooth filling. Wow!
- They travel beautifully. I bring these to potlucks all the time, and they hold up way better than a traditional round cheesecake.
If you’re looking for other quick filling desserts, you might want to check out my guide on no-bake cheesecake recipes while you wait for these gems to chill!
Quick Prep Time for Perfect Cheesecake Bars
I clocked my own time on this the other day, just to be sure, and it was seriously under 15 minutes to get everything whipped up and into the oven. That’s the best part about these bars over a full cheesecake. You skip all the fussy stuff and get right to the good part. Life is too short to stress over dessert when you can have rich, dreamy cheesecake this fast!
The Ideal Texture of These Cheesecake Bars
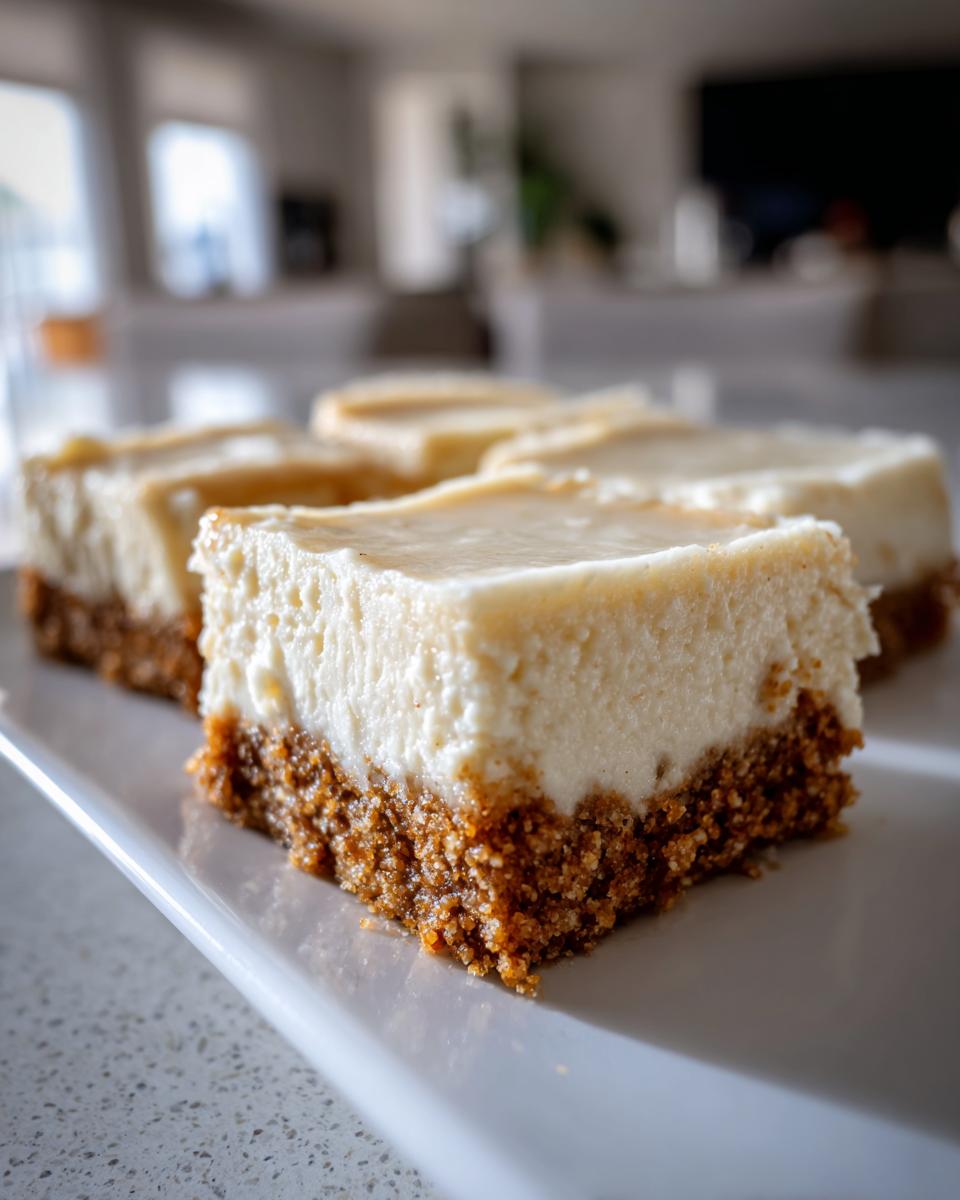
Texture is everything when it comes to cheesecake, and these bars nail it every time. You get that magnificent *crunch* from the perfectly baked graham cracker crust—buttery and slightly brown on the edges. Then, that sharp, cool tang of the filling hits your palate. It’s dense, sure, but it melts in your mouth. That is the true mark of a well-made **Cheesecake Bar**!

Essential Ingredients for Classic Cheesecake Bars
When you keep things simple, you really let the quality of the few ingredients shine through. These **Cheesecake Bars** rely on pantry staples that most of us already have on hand. Trust me, the secret here isn’t complicated; it’s about making sure everything is at the right temperature, especially that cream cheese! If you’re feeling adventurous later, you know I always link to my guide on simple syrup recipes, but for these bars, we don’t need any fancy syrups this time around!
For the Graham Cracker Crust
First up, we build the foundation. Don’t skimp on pressing this part down firmly—it needs to hold up to that glorious filling! You’ll need:
- 1 1/2 cups graham cracker crumbs (I use the ones right out of the box, no extra work needed!)
- 1/4 cup granulated sugar (this is just for the crust, keeping it sweet but sturdy)
- 6 tablespoons unsalted butter, melted (make sure it’s melted, not just soft!)
For the Creamy Cheesecake Filling
This is where the magic happens, and temperature control is key for that smooth, non-crack top. Remember, the cream cheese must be fully softened, or you’ll end up with lumps, and nobody wants a bumpy cheesecake experience.
- 16 ounces cream cheese, softened (this means leaving it out on the counter for hours!)
- 1 cup granulated sugar (the main sweetener for the tangy body)
- 1 teaspoon vanilla extract (just a splash for warmth)
- 3 large eggs (make sure they are large, not medium!)
Step-by-Step Instructions for Making Cheesecake Bars
Okay, let’s get down to business! Putting these simple **Cheesecake Bars** together is actually quite interactive—you’re moving things in and out of the oven, which keeps you engaged. Just read these steps once through, and you’ll see how straightforward the method is. If you’re looking for other excellent layered recipes, you might enjoy checking out my thoughts on deep-dish chicken dishes, like this Longhorn Parmesan-Crusted Chicken, as they follow a similar layering principle!
Preparing the Crust for Your Cheesecake Bars
First things first, get that oven warmed up to 350 degrees F, or 175 degrees C. I highly recommend lining your 9×13 inch pan with parchment paper, but here’s my trick: let the paper hang over two opposite sides like little handles. This lets you lift the entire baked block out later, making cutting WAY easier! Mix your graham cracker crumbs and the crust’s sugar, pour in that melted butter, and give it a good stir until it looks like wet sand. Press it down firmly into the pan—I use the bottom of a glass to really pack it in—and then bake that crust alone for 10 minutes until it smells wonderfully toasted. Set it aside while you start the filling.
Mixing the Creamy Cheesecake Filling
Now for the good stuff! Grab that softened cream cheese and the cup of sugar. Beat them together until they look perfectly smooth, almost like satin ribbons. Don’t let your mixer run too long here; we are just combining. Stir in your vanilla. The critical part comes now: the eggs go in one at a time! Beat just until the yolk disappears after each addition, then stop. If you overmix once the eggs are in, you whip too much air in, and that’s what causes gigantic cracks in your beautiful **Cheesecake Bars** later on. We want creamy, not cracked!
Baking and Chilling the Cheesecake Bars
Gently pour that luscious cream cheese mixture over your still-warm crust. Spread it around evenly so the top is flat. Back into the oven it goes for about 25 to 30 minutes. You’re looking for the edges to be nicely set—firm to the touch—but the very center should still have a slight wiggle to it. That wiggle means moistness later! Pull them out and let them cool completely on a wire rack for a good while. Seriously, patience is key for cooling. Then, and this is non-negotiable, they need at least two hours in the refrigerator before you even think about slicing them. Don’t rush the chill!
Tips for Perfect Cheesecake Bars Every Time
Even with a recipe as easy as this one, a few little tricks make the difference between good and *amazing* **Cheesecake Bars**. Since these are the kind of bars everyone always asks for, I’ve collected a few pointers over the years to guarantee you get that picture-perfect result.
Achieving Clean Cuts on Your Cheesecake Bars
I mentioned chilling for two hours in the recipe, but honestly, if you want those beautiful, sharable squares that look straight out of a bakery case, you need to wait longer. For truly clean cuts without any smushing or dragging, push yourself to chill these bars for 4 hours or, even better, overnight in the fridge. When the fat in the cream cheese fully firms up, it gives the structure the backbone it needs to slice perfectly without tearing. Trust me, the extra wait time is worth seeing those sharp edges!
Flavor Variations for Your Cheesecake Bars
While the classic combination of cream cheese and vanilla is truly divine, sometimes you feel like jazzing things up a tiny bit! If you want a little brightness that cuts through all that richness, try grating the zest of half a lemon right into your filling mixture—it just wakes everything up. Another little thing I love to do? I sprinkle just a tiny dash of ground cinnamon over the crust *after* I press it into the pan but *before* I bake it. It adds a warm note that pairs perfectly with the graham crackers.
Storage and Reheating of Leftover Cheesecake Bars
Since we are working with a lovely dairy-heavy dessert, storage is pretty straightforward, but you must keep these cool! Once you’ve sliced your beautiful **Cheesecake Bars**, put any leftovers into an airtight container. The fridge is their happy place, and they’ll stay wonderfully fresh for about four or five days. That sharp, cold temperature keeps that tangy flavor perfectly intact.
Now, about reheating—don’t even worry about it! Unlike some baked goods, you never want to warm up cheesecake. It just gets soft and sad. These bars are designed to be served chilled. If they sit out on the counter for about 15 minutes before serving, that’s the perfect time for them to soften just slightly from fridge-cold. It makes them so much easier to eat! And speaking of things that need their serving temperature right, if you ever make iced drinks, be sure to avoid the fatal mistake everyone makes when preparing ice!
Serving Suggestions for Cheesecake Bars
These **Cheesecake Bars** are fantastic all on their own, but if you want to turn them into a showstopper dessert, a little something extra on top goes a long way! Because the filling is so rich and tangy, you want toppings that offer a little contrast. A handful of fresh berries—raspberries or sliced strawberries—is usually my go-to; they look gorgeous sprinkled over the top.
If you’re feeling a little sweeter, a drizzle of homemade sauce is dreamy. You can’t go wrong with a bright strawberry sauce recipe, which cuts through the creaminess perfectly. Or, really keep it simple: just a light dusting of powdered sugar right before serving makes these look instantly professional!
Frequently Asked Questions About Cheesecake Bars
Whenever I post these **Cheesecake Bars** online, I get so many questions about baking adjustments and problems people run into—it’s totally normal because cheesecake is sensitive! Don’t worry, there are usually simple fixes for whatever happens in the oven. I’ve gathered the most common ones here so you can have perfect results next time. If you’re looking for party ideas after eating these, I’ve got a giant list of cocktail recipes ready to go!
Why did my cheesecake bars crack?
Oh, the dreaded crack! This usually happens for two reasons related to the filling instructions. The number one culprit is overmixing the eggs! Remember, you only mix until they are *just* combined. If you whip them too much, you incorporate air, and that air expands and then collapses upon cooling, causing a fissure. The other common reason is cooling too fast. Don’t move them straight from the hot oven to a cold counter—let them cool gradually at room temperature before they even see the fridge!
Can I use a different crust for these cheesecake bars?
You absolutely *can* mix things up, but for this particular recipe, the graham cracker crust is the classic partner for these **Cheesecake Bars**. It provides that necessary salty-sweet snap that balances the tangy filling so perfectly. If you happen to be out of graham crackers, you could certainly make a shortbread-style crust using crushed vanilla wafers or even digestive biscuits mixed with the melted butter and sugar. Just make sure you press whatever you choose down really firmly!
How long do these cheesecake bars last in the fridge?
Because these bars have such a high fat content from the cream cheese and eggs, they stay incredibly fresh when stored properly. Keep them in that airtight container I talked about, and they should be absolutely fantastic for about four to five days in the refrigerator. Honestly, though, they rarely last that long in my house! They are best enjoyed within the first couple of days when that crust still has a little bit of its initial crispness.
Nutritional Estimate for Simple Cheesecake Bars
Now, I know some of us look at dessert and immediately wonder about the numbers—totally fair! While these simple **Cheesecake Bars** are definitely a treat (and they are worth every bite, trust me!), I always want to give you a general idea of what you’re enjoying. Based on the ingredients we use and aiming for 24 servings, here is the breakdown according to my calculations.
It’s important to remember that these figures are estimates, you know? How much sugar actually sticks to the side of the bowl doesn’t count toward the final bar, so treat this as a helpful guide, not a strict science!
- Calories: Around 200 per bar
- Fat: About 12g total fat
- Carbohydrates: Roughly 20g
- Protein: Just 4g of goodness
- Sugar: We’re looking at about 18g of sugar
- For the heart-conscious: Cholesterol hovers around 50mg
They clock in with 7g of saturated fat, which is just part of the joy of using real cream cheese and butter! Enjoying one of these **Cheesecake Bars** is totally allowed, especially when made with love right in your own kitchen.
Share Your Simple Cheesecake Bars Creations
Well, that’s it! You’ve got the magic formula now for truly simple, perfect **Cheesecake Bars**. I sure hope you love them as much as my family does. There’s nothing that makes my day more than hearing from you when you try one of my favorite recipes.
So, after they’ve chilled and you finally dig in, come right back here and let me know what you thought! Please, rate this recipe using the stars below—it helps other bakers figure out if this is their next must-make dessert. And if you snapped a photo on your phone, I’d absolutely love to see your beautiful, clean-cut squares!
If you aren’t ready to bake right this second, don’t lose this perfect recipe! Use that little bookmark icon on your browser or pin it to your favorite dessert board so you can pull it up fast the next time you need an easy showstopper. If you ever have questions about the recipe or just want to chat about baking mishaps, you can always head over to my contact page. Happy baking, friends!
Print
Simple Cheesecake Bars
- Total Time: 45 min
- Yield: 24 servings 1x
- Diet: Vegetarian
Description
A straightforward recipe for making classic cheesecake bars with a graham cracker crust.
Ingredients
- 1 1/2 cups graham cracker crumbs
- 1/4 cup granulated sugar (for crust)
- 6 tablespoons unsalted butter, melted
- 16 ounces cream cheese, softened
- 1 cup granulated sugar (for filling)
- 1 teaspoon vanilla extract
- 3 large eggs
Instructions
- Preheat your oven to 350 degrees F (175 degrees C). Line a 9×13 inch baking pan with parchment paper, leaving an overhang on the sides for easy removal.
- Combine graham cracker crumbs and 1/4 cup sugar in a bowl. Pour in melted butter and mix until fully moistened. Press the mixture firmly into the bottom of the prepared pan.
- Bake the crust for 10 minutes. Remove from the oven and set aside.
- In a large bowl, beat the softened cream cheese and 1 cup of sugar until smooth. Mix in the vanilla extract.
- Beat in the eggs one at a time, mixing just until combined after each addition. Do not overmix.
- Pour the cream cheese mixture evenly over the warm crust.
- Bake for 25 to 30 minutes, or until the edges are set and the center is mostly firm.
- Let the bars cool completely on a wire rack.
- Chill the bars in the refrigerator for at least 2 hours before cutting into squares.
Notes
- For easier cutting, chill the bars for 4 hours or overnight.
- You can add lemon zest to the filling for a brighter flavor.
- Prep Time: 15 min
- Cook Time: 30 min
- Category: Dessert
- Method: Baking
- Cuisine: American
Nutrition
- Serving Size: 1 bar
- Calories: 200
- Sugar: 18g
- Sodium: 150mg
- Fat: 12g
- Saturated Fat: 7g
- Unsaturated Fat: 5g
- Trans Fat: 0g
- Carbohydrates: 20g
- Fiber: 1g
- Protein: 4g
- Cholesterol: 50mg
Keywords: cheesecake bars, graham cracker crust, easy dessert, baked cheesecake