
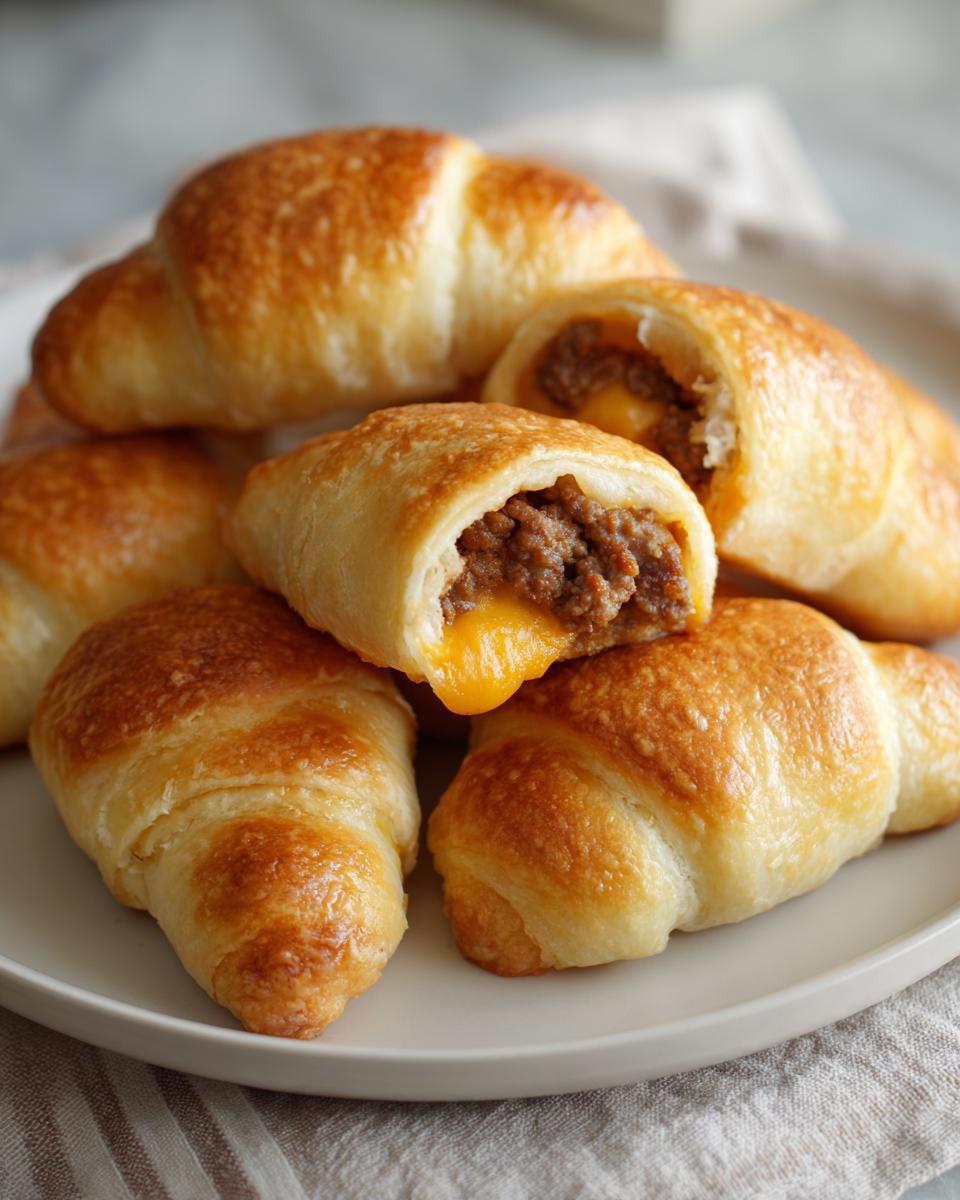
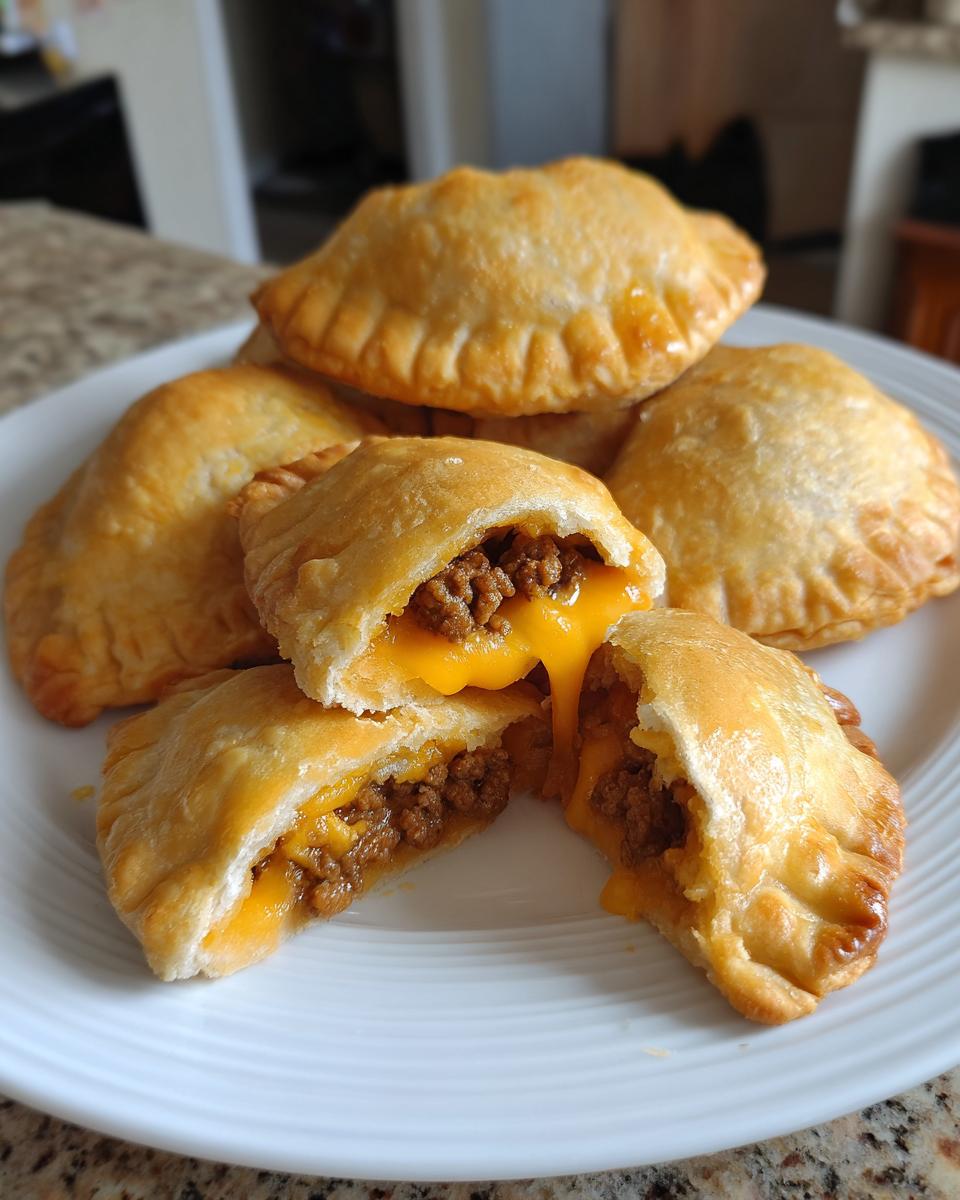
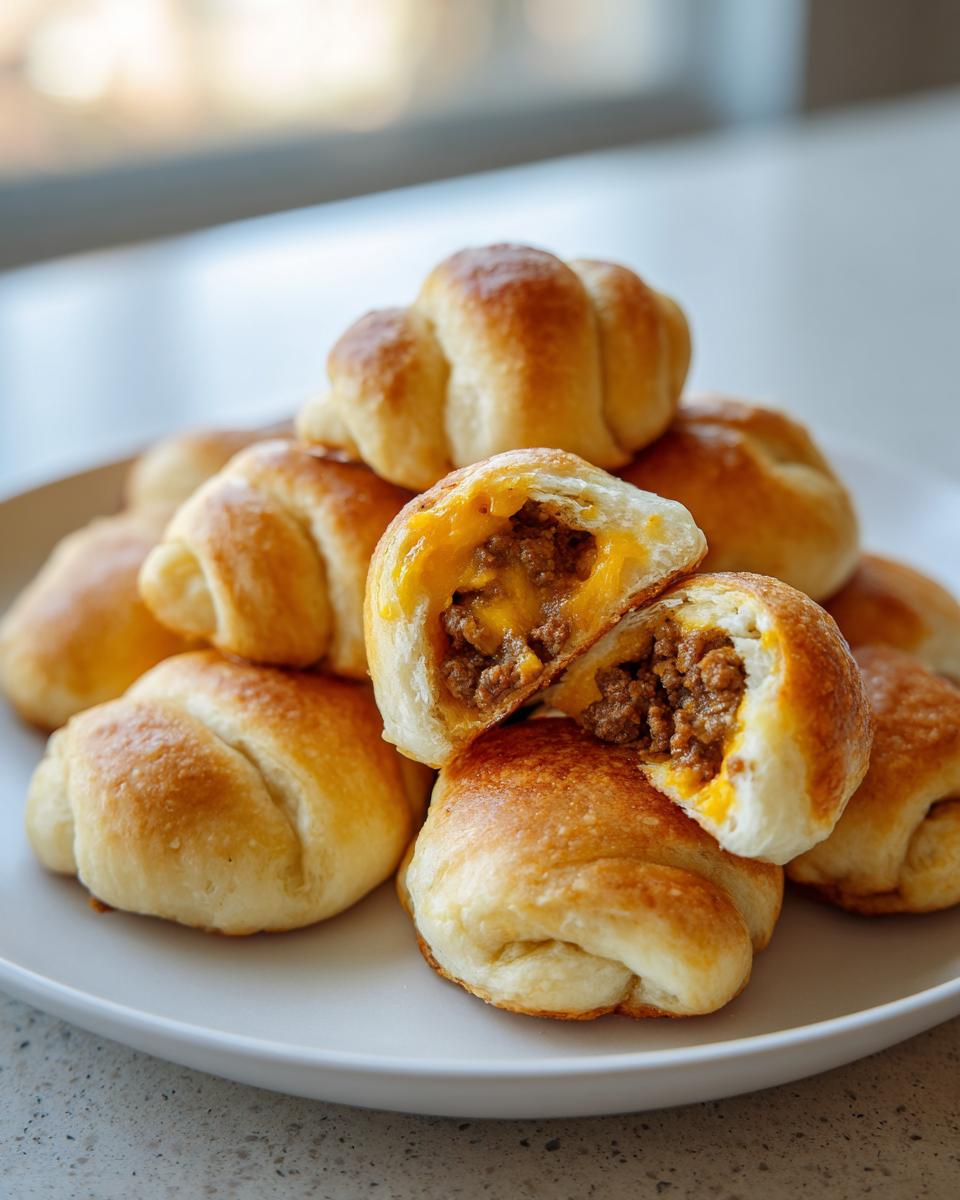
Oh my gosh, you know those nights when you just crave that perfect, salty, cheesy, meaty hug of a classic cheeseburger, but you really don’t want to fire up the grill or deal with messy lettuce and tomatoes? I totally get it! That’s exactly why I perfected these amazing Cheeseburger Bomb Bites. Seriously, they are my secret weapon for game days because they come together impossibly fast. We’re talking ground beef, sharp cheddar, and all those savory seasonings tucked inside flaky crescent roll dough. They are baked, not fried, which is so much cleaner, and they disappear faster than any other snack I bring to a party. Forget the fancy finger foods; I’m telling you, everyone just wants to pop these little flavor bombs!
Why You Will Love Making Cheeseburger Bomb Bites
Listen, I test a lot of recipes, and honestly, the ones that stick around are the ones that save me time without sacrificing flavor. These little bites are total winners. They’re super easy, taste exactly like your favorite burger joint, and require almost ZERO cleanup. Trust me, these will become your new go-to when company drops by unexpectedly or when you just need a fun dinner!
Quick Prep and Cook Time for Cheeseburger Bomb Bites
- The prep time is ridiculously fast—only about 15 minutes!
- Once they hit the oven, they bake up golden in just 15 to 18 minutes.
- We’re talking about having these amazing bites completely done in under 35 minutes total. You can’t beat that speed!
Perfect Party Food: Cheeseburger Bomb Bites Yield
You get 16 perfectly portioned bites out of one standard sheet of dough. That’s plenty for a small crowd, but honestly, they are so addictive you might want to double the recipe if you’re having a big gathering. They’re substantial enough to be satisfying, too, thanks to that savory beef filling.

Essential Ingredients for Perfect Cheeseburger Bomb Bites
When you’re making something this simple, the quality of your ingredients really shines through! We aren’t hiding anything here; it’s all about getting that classic burger taste wrapped up perfectly. Using things like finely chopped onion instead of powder gives you that fresh bite that makes a huge difference. Don’t skimp on the cheese—get the good stuff!
Ground Beef Filling Mixture for Cheeseburger Bomb Bites
For the filling, we need just about everything that makes a great burger savory. I always use 85/15 ground beef because it has the right amount of fat to keep these bites juicy after baking. You’ll mix that with one cup of shredded cheddar cheese, which melts beautifully without turning oily. Then we hit it with the binders and seasoning:
- 1 large egg, acting as our main glue.
- 1/4 cup of onion, and I mean finely chopped—we want the flavor, not big chunks!
- A splash of Worcestershire sauce for that deep, earthy flavor.
- And the perfect seasoning trio: salt, pepper, and garlic powder.
Crescent Roll Dough for Wrapping Cheeseburger Bomb Bites
This is the easy part that really makes these so fast! You only need one standard 8-ounce package of refrigerated crescent roll dough. Make sure it’s the kind that comes pre-cut into little triangles. This dough is what puffs up and turns golden brown around the meat mixture, giving you that perfect crunch outside and soft center inside. It’s the perfect little blanket for our burger filling!
Step-by-Step Instructions to Make Amazing Cheeseburger Bomb Bites
Okay, this is where we put it all together! The actual assembly is super quick once your ingredients are ready. Remember, we’re mimicking that amazing flavor combo from a perfectly grilled burger, but using the oven to keep things tidy. If you’ve ever made my irresistible ground beef enchiladas, you know the filling process is similar, but these little guys are way faster!
Preparing the Meat Mixture for Cheeseburger Bomb Bites
First things first, crank that oven up to 375 degrees Fahrenheit and lightly grease up your baking sheet. Now grab a bowl and mix everything for the filling—that’s the ground beef, cheese, bread crumbs, egg, onion, Worcestershire, and all your seasonings. Here’s my little trick: mix it until it is *just* combined. Seriously, stop mixing the second you don’t see streaks of dry bread crumb anymore. Overmixing makes the meat tough, and we want tender bites! While nobody should eat raw meat, if you’re feeling experimental and know your sourcing is great, tasting a tiny, pea-sized amount for salt adjustment before baking can be helpful, but use your best judgment!
Assembling and Sealing the Cheeseburger Bomb Bites
Now for the fun part—wrapping them up! Unroll that crescent dough and separate all those little triangles. You want to place about a tablespoon of that meat mixture right near the wide end of each triangle. Now, roll it up tight, just like you would a tiny crescent roll! As you reach the pointy end, make sure you pinch those seams together really well. This next step is vital: place them seam-side down on your baking sheet. If those seams aren’t sealed, cheesy meat magma is going to leak out while they bake, and that makes cleanup a pain!
Baking Time and Golden Brown Finish for Cheeseburger Bomb Bites
Once they are all snug on the sheet, slide them into that preheated oven. They usually need between 15 and 18 minutes. You’re looking for two things: the dough has to be puffy and deeply golden brown, and the inside has to be cooked all the way through. When they come out—wow, the smell is incredible! Let them cool down for just a few minutes on the pan before moving them to a rack. Giving them a moment helps them set up so they don’t fall apart when you pick them up to dip them.
Tips for Success When Making Cheeseburger Bomb Bites
Honestly, just following the steps gets you 90% of the way there, but every great dish has those little secrets that take it from good to spectacular, right? Since we’re using refrigerated dough, we need a few extra cheats to make sure these Cheeseburger Bomb Bites are perfect—no sad, undercooked centers or messy leaks allowed! These little pointers are what I learned after my first few practice batches.
Preventing Leaks in Your Cheeseburger Bomb Bites
I cannot stress this enough: sealing is key! If you roll them up and they look a little iffy on the seams, go ahead and give them an extra security blanket. Take a tiny bit of whisked egg yolk—just what you would use for an egg wash—and brush it right over those crimped edges where the dough meets. It acts like edible glue and gives the dough a beautiful sheen, too! Also, line your baking sheet with parchment paper. While it doesn’t stop leaks from happening, it stops any cheesy drips from bonding permanently to your pan, saving you scrubbing time later. It’s like making homemade croutons; preparation is everything!
Ingredient Substitutions for Cheeseburger Bomb Bites
Life happens, and sometimes you’re missing one thing or another. If you’re out of ground beef, don’t fret! You can totally swap that out for ground dark meat turkey, which keeps the texture nice and hearty. Just know that turkey is leaner, so you might want to add a tiny splash more Worcestershire sauce to compensate for that missing beefy richness. For the cheese, if you don’t have cheddar on hand, Monterey Jack or a mild Colby works beautifully since they both melt really well without getting oily. Avoid super hard cheeses like Parmesan here; you need that smooth, gooey texture for the ‘bomb’ factor!
Serving Suggestions for Your Cheeseburger Bomb Bites
So, your Cheeseburger Bomb Bites are baked, they are golden, and they smell absolutely incredible—what now? Well, you can literally just put them on a platter and watch them vanish, but I like to give them the full diner treatment without any of the hassle! Presentation makes everything taste better, even when it’s a savory, cheesy bite.
The most crucial serving tip is setting up a little topping station. Since these taste exactly like a classic burger, you need the classic condiments! I always put out small ramekins of good quality ketchup, of course, maybe a spicy brown mustard for those of us who like a little kick, and definitely some thinly sliced dill pickle chips. Letting people dip them exactly how they like their burger is half the fun.
If you’re making these for a game night or a casual party, pairing them with something crisp and cool is perfect. They go brilliantly with a simple tossed salad or maybe some crunchy carrot and celery sticks on the side to balance out all that richness. And if you happen to be mixing up some fantastic drinks, these bites go wonderfully alongside something bright, like a zesty margarita—you can check out my favorite recipe for a classic margarita if you need a suggestion!
Don’t forget to serve them warm, too! While they are fine at room temperature, these are at their absolute peak when the cheddar inside is still gooey and soft. A 10-minute rest after they come out of the oven is plenty before you dive in!
Storage and Reheating Instructions for Leftover Cheeseburger Bomb Bites
Okay, let’s be real. If these are as amazing as I say they are—and trust me, they are—you might actually have leftovers! Which is great, because honestly? These are almost as good the next day, provided you reheat them correctly. Nobody wants a sad, cold, chewy crescent roll, so let’s keep them amazing.
If you are just chilling them in the fridge, put them in any airtight container. They should keep beautifully for about three or four days. I usually use a zip-top bag for the last couple of days because I like to press most of the air out. They don’t seem to sit around long enough for me to worry about long-term storage, but if you need more time, freezing is your friend!
Freezing Your Cheeseburger Bomb Bites
If you want to make these ahead, which I totally recommend doing before a big party, you have two options for freezing. You can freeze them *after* they are baked, or you can freeze them raw. If you freeze them baked, make sure they are completely cooled first. Lay them out on a tray separated so they don’t stick together, flash freeze for an hour, and then toss them all into a freezer bag with all the air squeezed out. They’ll keep for about a month this way without losing much quality!
Reheating Options for Leftovers
The microwave is fast—I know, I use it sometimes in a pinch—but it makes the crescent roll dough go flat and chewy almost instantly. For the absolute best texture, you want to use dry heat to crisp that dough back up again. I always go back to the oven. Preheat it to about 325 degrees Fahrenheit, place the bites right on a baking sheet (no need to grease it again), and let them warm up for about 8 to 10 minutes. They come out warm, the cheese softens up, and the pastry gets that delightful crunch back! If you’re in a real rush, an air fryer works like a charm too, usually at 350 for about 3 to 4 minutes; that gives you maximum crispiness instantly!
Frequently Asked Questions About Making Cheeseburger Bomb Bites
I always get questions about making things ahead of time, especially when you’re planning for a party or just trying to sneak a little prep into a busy week. Don’t worry if you’re not an immediate baker; these little flavor pockets are pretty versatile! We’ve covered the basics, but here are a few extra things folks ask me when they’re planning their menu.
Can I make the Cheeseburger Bomb Bites filling ahead of time?
You absolutely can make just the meat filling ahead of time! That’s a great time-saver. Once you mix up the ground beef, cheese, egg, and seasonings, you should store it tightly covered in the refrigerator. It stays good for up to two days. When you’re ready to bake, just let the mixture sit on the counter for about 15 minutes to lose that deep chill, and then proceed with rolling it in the crescent dough as usual. It makes getting these appetizers onto the pan so much faster!
What temperature should I bake the Cheeseburger Bomb Bites at?
We bake these at a nice, hot temperature to make sure the crescent dough gets golden and crispy before the inside overcooks. You’ll want your oven preheated to precisely 375 degrees Fahrenheit. Anything significantly lower, and the dough might get greasy before the beef cooks fully. Anything higher, and you risk burning the outside while the center is still cool.
Are these Cheeseburger Bomb Bites freezer-friendly?
Yes, they are fantastic for freezing! This is my secret for stress-free game days. You can freeze them either baked or raw. If you freeze them raw, roll them completely, pinch the seals tight, and place them on a parchment-lined sheet to freeze solid for about an hour. Pop them into a freezer bag after that. When you want to bake them from frozen, just add about 5 to 8 minutes to the bake time at 375°F. You can find some inspiration for other make-ahead treats like my no-bake cheesecake recipes if you need dessert plans too!
Estimated Nutritional Information for Cheeseburger Bomb Bites
Because these are so delightfully snackable, it’s smart to know what you’re grabbing when you reach for one! I pulled together the estimates based on the ingredients we used—one pound of beef, one can of crescent rolls, cheese, and the seasonings. This recipe is surprisingly decent for an appetizer since it’s baked and the yield is pretty generous, giving you 16 individual bites.
Remember, this nutritional breakdown is just an estimate, and it can change depending on the fat percentage of the ground beef you pick or exactly how much cheese you manage to tuck inside each wrapper! But to give you a general idea of what one little bite packs, here’s the run-down:
- Serving Size: 1 bite (This is important—don’t eat the whole batch at once!)
- Calories: About 180 calories per bite
- Fat: Around 10 grams
- Saturated Fat: Roughly 5 grams
- Protein: A solid 10 grams, which helps keep you full!
- Carbohydrates: About 12 grams, mostly coming from that dough wrapper.
- Sodium: This clocks in near 250mg, so maybe go easy on the extra salt shaker when dipping!
- Sugar and Fiber: Thankfully, these are very low in both sugar (just 1g) and fiber (1g).
There you have it! A savory, satisfying little snack that tastes like a full burger experience but is portion-controlled enough to enjoy guilt-free—well, as guilt-free as a cheesy, beef-filled pastry can be! Having this info handy just makes me feel better about grabbing that third one!
Share Your Delicious Cheeseburger Bomb Bites Creations
Now that you’ve made a batch of these unbelievably tasty Cheeseburger Bomb Bites, I desperately want to hear about them! Did they make it through the whole party? Did your family love them as much as mine does? I really hope you took a snapshot of them cooling on the rack or sitting pretty next to those dipping sauces!
Please, don’t be shy! Leave a quick rating below—even just five stars tells me you loved this simple recipe. Even more, drop a comment telling me what your favorite dipping sauce was. Did you try them with a spicy aioli? Or maybe you stuck to the classic ketchup and mustard combo?
If you shared any photos on Instagram or Facebook, tag me! I absolutely love seeing your kitchen creations come to life. It makes my day to know that a recipe I obsessed over actually made your snack time—or your party—a little more delicious and a lot easier. If you have any burning questions that I somehow missed in the FAQ, send them over via the contact page; I’m always happy to chat cooking tips!
Print
Cheeseburger Bomb Bites
- Total Time: 33 min
- Yield: 16 bites 1x
- Diet: Low Fat
Description
Small, baked bites filled with ground beef, cheese, and seasonings, resembling a cheeseburger flavor profile.
Ingredients
- 1 pound ground beef
- 1 cup shredded cheddar cheese
- 1/2 cup bread crumbs
- 1 large egg
- 1/4 cup finely chopped onion
- 1 teaspoon Worcestershire sauce
- 1/2 teaspoon garlic powder
- 1/4 teaspoon black pepper
- 1/4 teaspoon salt
- 1 (8 ounce) package refrigerated crescent roll dough
Instructions
- Preheat your oven to 375 degrees Fahrenheit. Lightly grease a baking sheet.
- In a medium bowl, combine the ground beef, cheddar cheese, bread crumbs, egg, onion, Worcestershire sauce, garlic powder, pepper, and salt. Mix until just combined. Do not overmix.
- Unroll the crescent roll dough and separate it into the individual triangles.
- Place about 1 tablespoon of the meat mixture near the wide end of each triangle.
- Roll up the dough tightly, starting from the wide end, to seal the filling inside. Pinch the seams to close.
- Place the rolled bites seam-side down on the prepared baking sheet.
- Bake for 15 to 18 minutes, or until the dough is golden brown and the meat is cooked through.
- Remove from the oven and let cool slightly before serving.
Notes
- Serve these bites with ketchup, mustard, or pickles for dipping.
- You can substitute ground turkey for ground beef if desired.
- Prep Time: 15 min
- Cook Time: 18 min
- Category: Appetizer
- Method: Baking
- Cuisine: American
Nutrition
- Serving Size: 1 bite
- Calories: 180
- Sugar: 1
- Sodium: 250
- Fat: 10
- Saturated Fat: 5
- Unsaturated Fat: 5
- Trans Fat: 0
- Carbohydrates: 12
- Fiber: 1
- Protein: 10
- Cholesterol: 35
Keywords: cheeseburger bites, ground beef appetizer, crescent roll recipe, baked appetizer, party food