
Oh man, you are going to thank me for this one! When game day rolls around, or honestly, just any random Tuesday when the kids are starving, I need an appetizer that tastes like a fiesta but cleans up faster than my kitchen sinks after baking bread. I am talking about the ultimate shortcut snack: my legendary Cheesy Taco Sticks.
This recipe uses refrigerated crescent roll dough, which is basically my secret weapon for looking like I tried really hard when I barely lifted a finger. We’re stuffing everything delicious—spicy ground beef, that glorious melted cheese blend—into those flaky pillows and baking them until they’re golden brown. They come together in seriously under 30 minutes flat, and trust me, your crew will devour every single one. I’ve perfected my technique over years of football Sundays; these things are always the first thing gone at any party!

Why You Will Love These Cheesy Taco Sticks
Honestly, these are going straight into your ‘must-make-again’ file. I wouldn’t feature them here if they weren’t absolute rockstars. Here’s the quick rundown on why you need to drop everything and make these right now:
- They are unbelievably fast! Seriously, from start to fully baked, you are looking at about 30 minutes total. Perfect for those last-minute cravings.
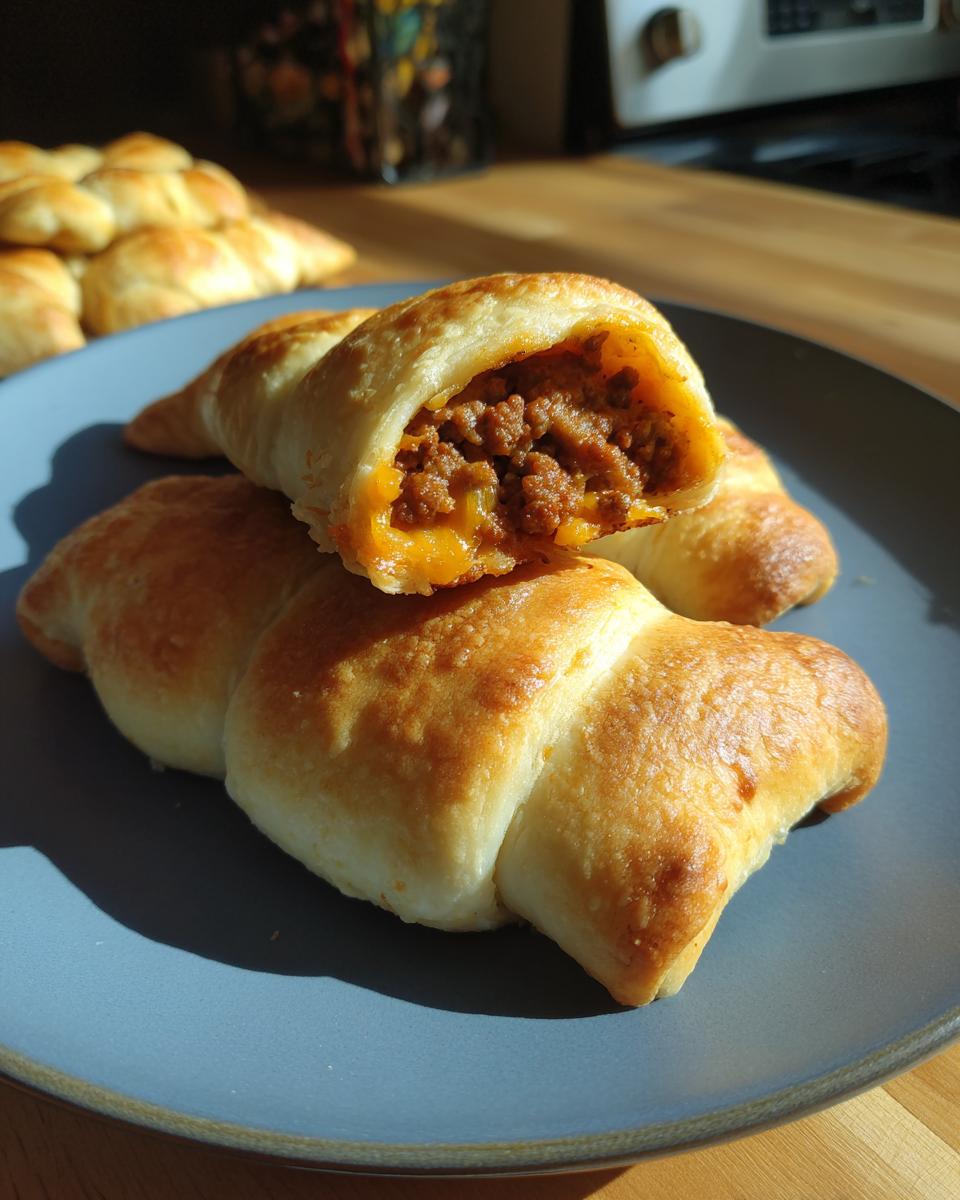
- That flavor combination is pure magic. You get the savory, seasoned beef mixed with the tang of cream cheese and sharp cheddar. It’s everything you love about tacos, just wrapped up nicely.
- Cleanup is a breeze! Since we use parchment paper (pro tip!), you basically just toss the paper and wipe down one skillet.
- They are genuinely irresistible to absolutely everyone. Kids, spouses, your picky neighbor—no one can resist a warm, flaky, cheesy crescent roll.
Essential Ingredients for Perfect Cheesy Taco Sticks
Okay, ingredient list time! This is where we establish the foundation, and honestly, the best part is that you probably have almost everything in your pantry or fridge right now. No fancy trips to the specialty store needed, which is a win in my book!
You’ll need:
- 1 pound ground beef (or whatever meat you prefer – see below!)
- 1 packet taco seasoning mix (use the whole thing, don’t skimp!)
- 1/2 cup water
- 8 ounces cream cheese, make sure it’s softened to room temperature—this is super important!
- 1 cup shredded cheddar cheese, and look, don’t pack that cup! Just lightly spoon it in.
- 1 (8 ounce) package refrigerated crescent roll dough (the full 8 triangles!)
- 1 egg, beaten lightly for that beautiful egg wash finish.
Ingredient Notes and Substitutions for Cheesy Taco Sticks
Let’s chat about making this recipe your own. If you’re not feeling the beef, ground turkey works absolutely perfectly here. It cooks the same way, but it keeps the fat content down slightly. Just remember to drain off any excess liquid just like you would with the beef!
Now, the cream cheese. Please, please, please, make sure it’s softened. If it’s cold, you’ll end up with cheese clumps in your filling, and we want silky smooth gooiness here, remember? You’ll know it’s right when you can press a finger into it easily. And for the cheese? Cheddar is traditional, but if you have a bag of Monterey Jack or that Mexican blend, throw it in! They melt beautifully and give you those amazing cheese pulls.

Equipment Needed for Making Cheesy Taco Sticks
I’ve designed this recipe to be as simple as possible, so you won’t need a million fancy gadgets gathering dust. Honestly, you can probably whip up a batch using what you already have out for everyday cooking. It’s all about getting the job done efficiently!
Here is the short list of things you’ll need to pull out of the cupboard for these amazing taco sticks:
- A good quality skillet—medium-sized usually works best for browning the pound of beef without crowding it.
- A sturdy mixing bowl for whipping up that cheesy filling.
- Your trusty spatula or spoon for combining the meat mixture later.
- A large baking sheet. And listen, this is where you save yourself scrubbing! Make sure you line it with parchment paper or a silicone mat. I cannot stress this enough for easy cleanup.
- Your measuring cups and spoons, of course, for accuracy!
See? Nothing intimidating! Just basic tools for maximum payoff. You’re halfway to taco town already!
Step-by-Step Instructions to Create Cheesy Taco Sticks
Alright, let’s get cooking! This is the fun part where everything comes together, and you start smelling that amazing taco seasoning filling your kitchen. Remember, speed is key, but prep is everything, especially on the front end so your taco sticks don’t get waterlogged.
Preparing the Taco Meat Filling for Cheesy Taco Sticks
First things first: hit that oven right away! Preheat it to 375 degrees Fahrenheit, and get some parchment paper lined up on your baking sheet. This little step saves so much scrubbing later, honestly. Now for the meat. Brown your pound of ground beef in the skillet over medium heat. Once it’s looking nicely browned, you *must* drain off every bit of fat you possibly can. I mean it! If you skip this, you end up with soggy bottoms on your snacks, and nobody wants that. Soggy taco sticks are a tragedy!
Once drained, stir in that taco seasoning and the half cup of water. Let it simmer—just for about five minutes—stirring every so often so things don’t stick. When it’s done simmering, pull it off the heat immediately. We need it to cool down just a touch before we wrap things up. If it’s piping hot, it’ll melt that beautiful cream cheese way too fast, and we want texture!
Assembling and Rolling Your Cheesy Taco Sticks
While that meat is cooling off, it’s time for the cheese mixture. Take your softened cream cheese and that cup of cheddar, and just mix them up until they look gorgeous and uniform. Remember I said softened? If you didn’t soften it, you’re going to be hand-massaging lumps in this bowl, and nobody has time for that!
Next, unroll your crescent dough. Remember, the package gives you eight lovely triangles. On the wide end of each dough piece, spread out a tablespoon of that cheese blend. Then, spoon a good two tablespoons of that slightly cooled taco meat right on top of the cheese. Now you roll! Start at that wide end and roll it snugly all the way up to the point. Seam-side down, my friends! Place them all lined up neatly on your prepared baking sheet. Try not to worry if a little filling peeks out, that’s just flavor escaping!

Baking the Cheesy Taco Sticks to Golden Perfection
We are almost there! Take that beaten egg and brush a nice, thin coat right over the top of every single taco stick. This ‘egg wash’ is what guarantees you that amazing, deep golden color we are looking for. Pop them into your 375°F oven and watch them closely. They only need about 12 to 15 minutes. You know they’re done when they puff up and turn that beautiful, shiny golden brown color. Don’t overbake them, or they get hard! Just a few minutes resting on the pan after they come out, and then dig in. If you are using these for dipping later, maybe check out how to make your own amazing iced tea to sip on while they bake!
Tips for the Best Ever Cheesy Taco Sticks
We’ve already covered the basics, but if you want to elevate these simple snacks from great to legendary, I have a few little tricks I’ve picked up over the years. These aren’t in the main instructions because they are the ‘extra credit’ steps that prove you really know your way around a crescent roll!
First up, let’s circle back to the cream cheese. I know I keep hammering this, but seriously, if your cream cheese is cold, you’re going to waste time fighting it. Let it sit out on the counter for at least an hour before you start cooking. Don’t even try to zap it in the microwave unless you want melted patches in your cheese filling. Room temperature cream cheese mixes instantly with the cheddar, creating that smooth, creamy layer that protects your crescent roll from getting greasy.
Second, and this is vital for baking success: Don’t overfill! It’s so tempting to pile on extra meat, but if you put too much filling in, the dough won’t seal properly, and you’ll end up with cheesy leakage all over your pan. That escaping cheese burns, and you’re left scrubbing again. I measure out the meat onto my teaspoon—no more than two tablespoons—and trust the process.
My final must-do tip involves the egg wash. Everyone brushes the tops with egg, right? But don’t just use the egg! For an extra layer of flavor and even better browning, mix a tiny pinch of salt and maybe just a dash of garlic powder into that beaten egg before you brush it on. It sounds minimal, but trust me, it gives the outside of these taco sticks a slightly savory, bakery-style crust. If you start realizing you want to make even more savory baked goodness next time, you absolutely have to check out my recipe for easy ground beef enchiladas!
Serving Suggestions for Your Cheesy Taco Sticks
We’ve baked these beauties to perfection, and now comes the best part: dipping! These Cheesy Taco Sticks are basically little flavor delivery systems, but they are *way* better when paired with something cool and tangy to cut through that rich beef and cheese filling.
You absolutely must have salsa on hand, whether you like it chunky or smooth. A classic medium salsa is usually the happy medium for my family. And, of course, there’s sour cream. Cold sour cream hitting that hot, cheesy interior? It’s just perfection. It cools everything down and adds that perfect creamy texture contrast.
But if you’re feeling fancy—like, Game Day Extra Fancy—you HAVE to make a quick batch of my 10-minute guacamole. Seriously, it takes almost no time, and the fresh lime and avocado really make these taco sticks taste like they came from your favorite Mexican spot. You can find my shortcut recipe for the best guacamole here. Trust me, once you try dipping these sticks into fresh guac, you’ll never go back to plain!
Storage and Reheating Instructions for Leftover Cheesy Taco Sticks
Here is the good news: these Cheesy Taco Sticks are actually great as leftovers! Which means you can make a huge batch and not feel guilty about it. But how you store and reheat them is going to make or break that glorious crescent roll crunch!
First, you absolutely must let them cool down completely before you even think about putting a lid on anything. If you store them warm, the steam gets trapped, and you’ll wake up to a package of sad, soggy shells. Once they are totally cool, transfer them to an airtight container. I find that lining the container with a paper towel first helps absorb any lingering moisture. They’ll keep perfectly fine in the refrigerator for about three or four days.
Now, reheating is where the magic happens—or rather, where we save the magic from disaster! Please, I’m begging you, don’t even look at the microwave. The microwave will turn those once-flaky crescent rolls into soft, chewy rubber bands, and that defeats the entire purpose of making them! We want them crisp again.
The best route, hands down, is the oven or an air fryer. If you’re only reheating a couple, the air fryer is your champion. Set it to about 325 degrees Fahrenheit and cook them for just 3 to 4 minutes until they are hot all the way through and you can hear that little crunch when you press on them.
If you’re warming up half a batch or more, use the regular oven. Set it to 350 degrees Fahrenheit and lay them out in a single layer on a clean, parchment-lined baking sheet. Give them about 8 to 10 minutes. You’ll see the cheese get a little gooey again, and the outside will revert to being perfectly golden and crisp. It’s like they’re fresh again! Enjoy those second-day snacks!
Frequently Asked Questions About Cheesy Taco Sticks
I know when I get excited about a recipe, I start having a million questions pop into my head, so I wanted to clear up a few things folks often ask me about these Cheesy Taco Sticks before you dive into making them. These little bundles of joy are pretty forgiving, but a little insider knowledge always helps!
Can I make these Cheesy Taco Sticks ahead of time?
You absolutely can! This is a real lifesaver when you’re hosting a party or just want to prep for a busy afternoon. The best way to make these ahead is to complete everything right up until the egg wash step. So, assemble the meat, mix the cheese, roll those crescent rolls tightly with the filling inside, and place them seam-side down on your baking sheet—just like in the instructions. Then, cover the whole tray tightly with plastic wrap and pop it into the fridge. They can sit like that for up to 24 hours!
When you’re ready to bake them, just let them sit on the counter for about 15 minutes while the oven preheats. Then, brush on that beaten egg and bake them exactly as written. Because they were chilled, they might need just an extra minute or two to get that deep golden brown color, so keep an eye on them!
What is the best cheese to use besides cheddar for taco sticks?
While cheddar brings that sharp, classic flavor that pairs beautifully with taco seasoning, I’m a big believer in blending cheeses for maximum meltiness and flavor complexity! My favorite swap-out is using a pre-shredded Mexican blend cheese. Those usually have Monterey Jack, Asadero, and maybe some Queso Blanco mixed in. Those softer cheeses melt wonderfully and give you that incredible, stretchy cheese pull when you break a taco stick in half.
If you want a bit more tang, swap half your cheddar for Pepper Jack! It gives you a tiny bit of kick without turning the internal heat up too much. The key is always to ensure that whatever cheese you use—cheddar, Jack, or a blend—it’s shredded, not shredded *or* block cheese you grate yourself, as pre-shredded cheeses sometimes include anti-caking agents that help them spread nicely in the filling.
If you are curious about how to use similar ground meat mixtures in a completely different way next time, you should check out my recipe for a fantastic taco beef rice skillet. It’s a totally different vibe, but uses that same flavor base!
Estimated Nutritional Information for Cheesy Taco Sticks
Now, look, I’m a cook, not a nutritionist! I use these numbers more as a guideline when I’m tracking things, but you should always remember that these are just estimates based on the specific ingredients I listed (like the 80/20 beef and standard crescent rolls).
If you use ground turkey instead of beef, or maybe a low-sodium seasoning packet, those numbers are going to shift around on you. So treat this as a helpful starting point, okay? We’re aiming for deliciousness here, not perfect compliance!
Based on making 8 servings, here is what the general breakdown looks like for one Cheesy Taco Stick:
- **Serving Size:** 1 stick
- **Calories:** 280
- **Fat:** 18g (with 9g coming from Saturated Fat)
- **Carbohydrates:** 15g (with 1g of Fiber and 2g of Sugar)
- **Protein:** 14g
- **Sodium:** 450mg
It’s a solid, satisfying appetizer that packs a good punch of protein. Just be mindful of that sodium, especially if you’re snacking on a whole plate full! Definitely best enjoyed alongside a big glass of water.
Print
Cheesy Taco Sticks
- Total Time: 30 min
- Yield: 8 servings 1x
- Diet: Vegetarian
Description
Simple baked sticks filled with seasoned ground beef, cheese, and wrapped in crescent roll dough.
Ingredients
- 1 pound ground beef
- 1 packet taco seasoning mix
- 1/2 cup water
- 8 ounces cream cheese, softened
- 1 cup shredded cheddar cheese
- 1 (8 ounce) package refrigerated crescent roll dough
- 1 egg, beaten
Instructions
- Preheat your oven to 375 degrees Fahrenheit. Line a baking sheet with parchment paper.
- Cook the ground beef in a skillet over medium heat until browned. Drain the fat.
- Stir in the taco seasoning mix and water. Simmer for 5 minutes, stirring occasionally. Remove from heat and let cool slightly.
- In a bowl, mix the softened cream cheese and shredded cheddar cheese until combined.
- Unroll the crescent roll dough. Separate it into 8 triangles.
- Spread about 1 tablespoon of the cheese mixture onto the wide end of each dough triangle.
- Spoon about 2 tablespoons of the cooled taco meat mixture over the cheese on each triangle.
- Roll each triangle up tightly, starting from the wide end, towards the point. Place seam-side down on the prepared baking sheet.
- Brush the tops of the rolls with the beaten egg.
- Bake for 12 to 15 minutes, or until golden brown.
- Let cool for a few minutes before serving.
Notes
- Serve with salsa or sour cream for dipping.
- You can substitute ground turkey for ground beef.
- Prep Time: 15 min
- Cook Time: 15 min
- Category: Appetizer
- Method: Baking
- Cuisine: Mexican-American
Nutrition
- Serving Size: 1 stick
- Calories: 280
- Sugar: 2
- Sodium: 450
- Fat: 18
- Saturated Fat: 9
- Unsaturated Fat: 9
- Trans Fat: 0
- Carbohydrates: 15
- Fiber: 1
- Protein: 14
- Cholesterol: 55
Keywords: taco sticks, cheesy, ground beef, crescent rolls, appetizer, baked snack