
Oh, you know those afternoons when you desperately need something sweet right now, but you just don’t have the energy for a whole pie crust drama? Me too! That’s why I live and breathe by these easy cherry pie bars. Seriously, they are my absolute secret weapon for last-minute bake sales or when unexpected guests drop by.
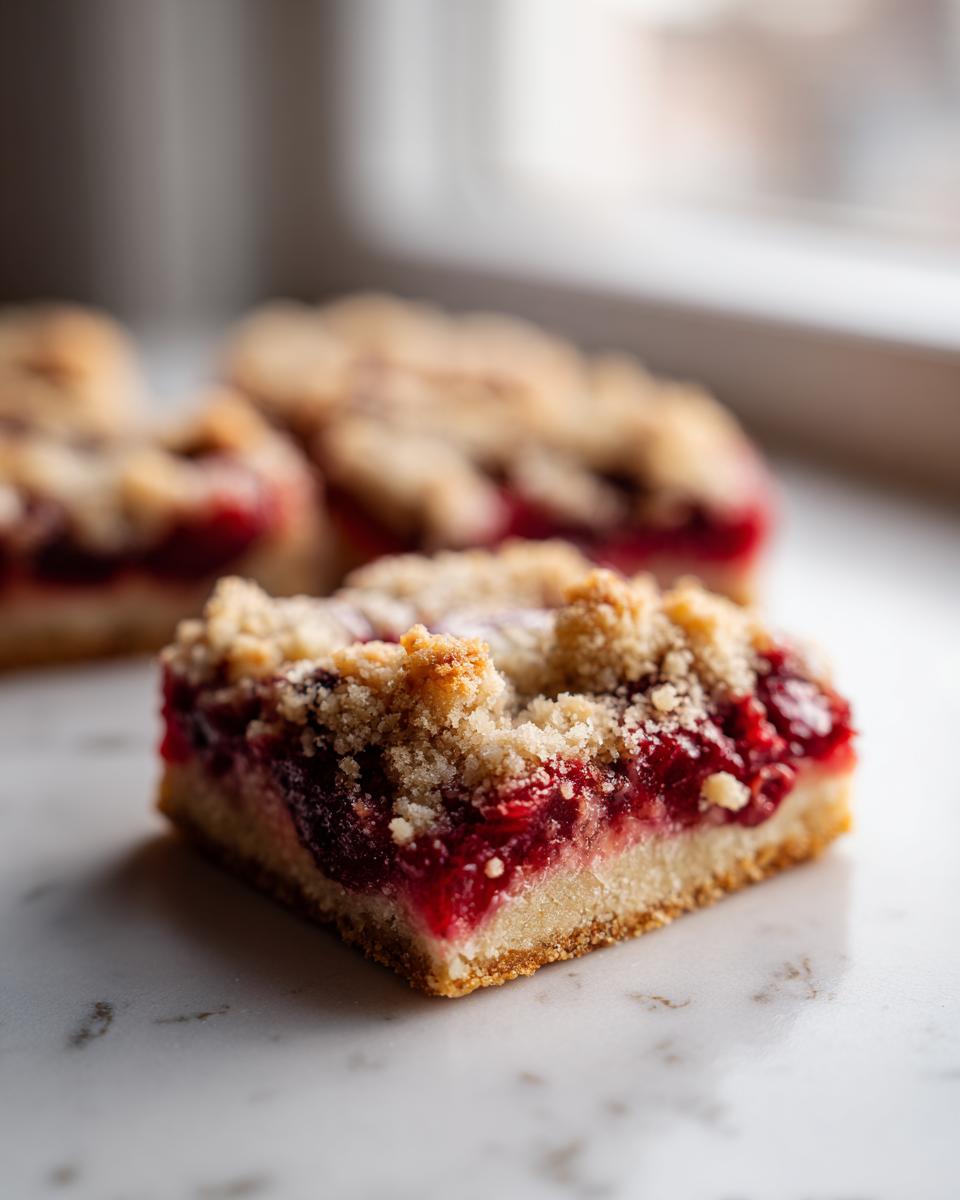
We’re talking about the perfect handshake between a crumbly, buttery shortbread crust and that gorgeous, sweet-but-tart cherry pie filling. You get all the satisfaction of a classic pie without needing to roll out a single thing. I whip these up anytime I need a dessert in under an hour. They are always the first thing gone, especially since they travel like a dream!

Why You Will Love These Easy Cherry Pie Bars
I swear, sometimes baking feels like too much work for the reward. Not with these bars, though! They hit every single mark, and honestly, they’re way faster than assembling a traditional deep-dish pie. Trust me on these points; this recipe is a keeper.
- They are hands-down the fastest dessert for a busy schedule! From the mixing bowl to the oven, it takes barely 15 minutes of active time. We’re talking about serious results with minimum fuss.
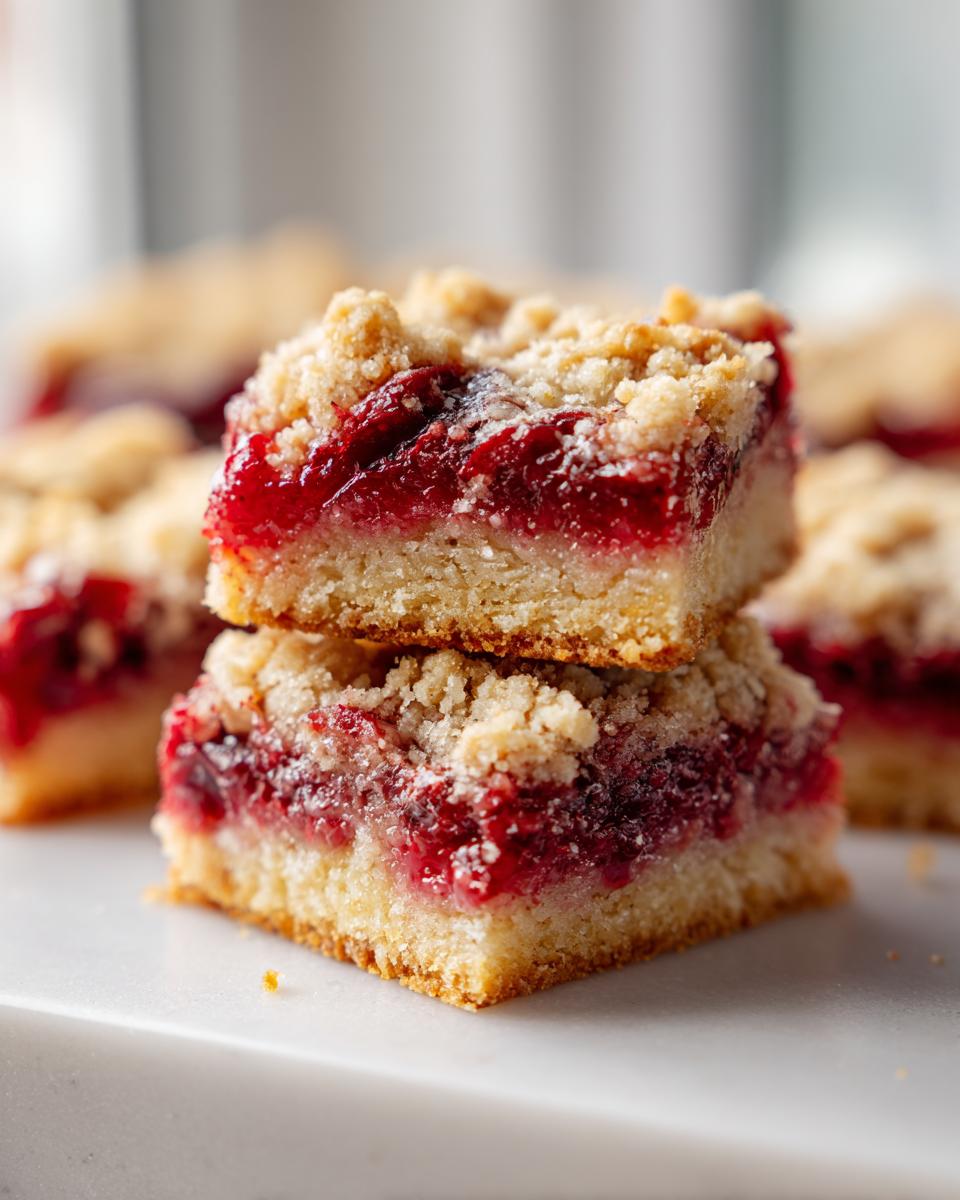
- You get that wonderful textural contrast. The shortbread crust is tender and melts in your mouth, balancing beautifully against the jiggly, tangy cherry filling. It’s sweet, yes, but the tartness keeps it from being annoying, if you know what I mean!
- These easy dessert bars freeze and transport like a dream. I just cut them up, stack them with parchment paper in between, and bring them to every single potluck. No dripping latticework to worry about!
- The secret is the shortbread crust, which gets this slightly magical crumble on top too. We use two-thirds for the bottom and crumble the rest over the filling. That double-crumb action is what makes them addictive.
- They look sophisticated! Honestly, if you dust them with a little powdered sugar like I recommend in the notes, people always think I spent hours on them. Shhh, that’s our little secret.
Essential Ingredients for Easy Cherry Pie Bars
The beauty of these bars, truly, is that they rely on pantry staples. You probably have most of this stuff sitting around already, which is why I call them my ‘emergency’ dessert recipe! We aren’t messing around with fancy, obscure things here; we are going straight for delicious simplicity.
The shortbread base uses the classic combination of fat, flour, and sugar, which creates that dense, crumbly texture that holds up perfectly when baked. I always make sure my butter is truly soft—not melted, just patient.
Here’s the list you need to gather up. You’ll notice I specified exactly what kind of butter and how much flour. These measurements are locked in because they create that perfect shortbread structure that supports the filling without collapsing!
- 1 cup unsalted butter, softened. Make sure it’s soft enough to leave an imprint easily, but still cool to the touch.
- 1 cup granulated sugar. Regular white sugar works perfectly for the crust structure here.
- 2 cups all-purpose flour. Measure this right; spoon it into the cup before leveling off, don’t scoop the measuring cup directly into the bag!
- 1/2 teaspoon salt. Don’t skip this little pinch! It really makes the butter flavor pop.
- 1 large egg. This is for the light drizzle on top to help everything brown nicely.
- 1 teaspoon vanilla extract. A splash of good vanilla always elevates simple baked goods.
- 1 (21 ounce) can cherry pie filling. This is the star for our easy dessert flavor! Make sure it’s the canned stuff, not a jam from a jar, for the right consistency.
If you’re looking for other great shortbread recipes that use similar base ingredients, you should check out my recipe for peanut butter shortbread bars—it shares that same buttery foundation!
Tips for Perfect Easy Cherry Pie Bars
Okay, so these are easy, but there are a couple of little secrets I learned after making about a billion batches of these easy cherry pie bars. Following these little nudges guarantees you get that perfect sliceable texture every single time. You want that buttery crust to hold up, right?
My number one tip is about handling the dough. Since it’s basically a shortbread, it can get a little oily and soft when you’re working it with your warm hands in the bowl. If you find the dough feels too loose to press evenly into the pan, just wrap that dough ball up and stick it in the fridge for about 15 minutes. Seriously, just a short chill time firms it up enough that it presses perfectly into the base layer. When you press it firmly, you’re building a good foundation for that cherry filling!
The second thing is what you do with the bit of dough you reserve for the top. Don’t try to roll it out! We want that rustic, crumbly look, so just break it up over the filling with your fingers. You want some nice, exposed patches of that beautiful cherry filling showing through. It helps prevent the whole bar from tasting too much like just crust.
Ingredient Notes and Substitutions for Easy Cherry Pie Bars
When keeping things simple, the ingredients matter even more! These bars rely on the richness of the butter, so don’t get tempted by substitutes if you can avoid it. Real, unsalted butter is non-negotiable for that pure shortbread flavor. If you use salted butter? Cut the added salt down to just a tiny pinch, maybe 1/8th of a teaspoon, because canned fillings already have some sodium in them.
As for the filling, stick to canned cherry pie filling. I know some of you amazing bakers might want to use fresh cherries, but honestly, the sugar and thickening agents in the canned stuff are what keep the bar structure intact. Fresh fruit is way too watery, and the bars won’t set up correctly—you’ll end up with cherry soup, and nobody wants that!
I also want to talk about that egg wash on top. It’s just one egg whisked with vanilla. That little bit of liquid on the crumbs helps them bind together just enough so they turn that lovely light golden brown, instead of just staying pale and dusty. If you’re making this for someone who can’t have eggs? You can skip the egg and just give the top crumbs a very light brush with milk instead. It won’t brown quite as much, but it will still give you that lovely texture.
Step-by-Step Instructions for Easy Cherry Pie Bars
Alright, let’s get this baking party started! Even though these are simple, taking your time with the mixing order ensures we get that perfect crumbly base that holds up to all that gooey cherry filling. It’s all about respecting the ingredients—just like those wonderful Nanaimo bars we all love! Once we’re done here, you’ll see why these easy cherry pie bars are my go-to recipe for speed.
Preparing the Shortbread Crust for Easy Cherry Pie Bars
First things first, you need to get your oven ready. I always start by preheating mine to 350 degrees F (175 degrees C). While that warms up, go ahead and grease and flour a 9×13 inch baking pan. Don’t skimp here; a sticky base means sad, broken bars later on!
Now for the crust magic. In a big bowl, beat your softened butter and the sugar together until they look nice and creamy—pale yellow and fluffy is the goal. Next, you’ll slowly mix in the flour and salt until it starts looking crumbly, like wet sand. That’s the right texture! Take two-thirds of that crumbly dough and press it down firmly and evenly into the bottom of your prepared pan. Press that base down hard; this is your foundation!
Assembling and Baking Your Easy Cherry Pie Bars
With your base set, spread that entire can of cherry pie filling evenly right over the crust layer. Just pour it on and smooth it out gently so you don’t disturb the shortbread underneath. Make sure you get it right to the edges!
In a tiny little bowl, whisk up that single egg with the vanilla extract. This isn’t a major layer, but it helps everything bind up top. Now, take the remaining one-third of your reserved dough and crumble it loosely over the cherry filling. You don’t need to press this top layer; let it stay nice and loose!
Pop that pan into the oven and bake it for about 30 to 35 minutes. You’re looking for the top crumbs to turn a lovely, light golden brown—that means the filling is hot and everything is set. The hardest part? You have to let these bars cool completely in that pan before you even *think* about cutting them into squares. If you slice them hot, they’ll just fall apart on you. Patience pays off!
Storage and Reheating Tips for Easy Cherry Pie Bars
Okay, these easy cherry pie bars just never seem to last long enough in my house for me to worry about long-term storage, but I have perfected the art of keeping them delicious for when they do linger!
Because this recipe uses a shortbread crust and canned filling, they are surprisingly sturdy. If you’ve let them cool completely—and I mean *completely*, otherwise they get sticky—you can store them right on the counter, covered tightly with plastic wrap or in an airtight container. They usually stay perfectly fresh at room temperature for about two to three days. I prefer mine cool, honestly!
If you need them to last longer, definitely move them to the fridge. Storing them in the refrigerator will extend their life to almost a week! Just make sure they are really well-covered because that buttery crust can sometimes absorb smells from other things in the fridge. If you refrigerate them, just let them sit out on the counter for about 20 minutes before serving. That takes the chill off and lets that shortbread flavor come back to life.
Do I recommend *reheating* them? Not really! These bars are best served cool or at room temperature. If you try to microwave them, that lovely, firm crust gets soft way too fast, and the cherry filling can get scalding hot while the crust stays cold. If you absolutely must warm a single bar up, maybe give it 10 seconds, but I promise you, they shine when served cool!
Serving Suggestions for Easy Cherry Pie Bars
Now that you’ve successfully navigated the baking and endured the cooling phase (which is always the hardest part, isn’t it?), it’s time for the fun bit: eating them! These easy cherry pie bars are fantastic all on their own, but why stop at good when you can aim for glorious?
I think the best way to serve these is slightly chilled, about 30 minutes out of the fridge. That firmness gives you that perfect, clean slice when you cut them. But if you want to elevate them for a dessert plate, you need something creamy to contrast that tart cherry flavor. My standard go-to move is always a big, generous dollop of good quality, high-fat vanilla ice cream. The melting ice cream runs into the buttery crust, and oh my goodness, it’s heaven!
If you’re serving these later in the evening or maybe after a heavy meal, I find something lighter works better. A simple mountain of freshly whipped cream, maybe lightly sweetened with a touch of vanilla, is just perfect. It melts nicely into the little crevices between the crumble topping.
And for the grown-ups? Coffee! These bars are amazing with a hot cup of coffee, especially if that coffee is strong. I sometimes make myself a little cocktail version of my usual morning routine, maybe a little Tiramisu Espresso Martini recipe (shh!) to go alongside a square. The bitterness of the coffee cuts right through the sweetness of the shortbread, letting that cherry flavor really shine. It just rounds the whole experience out perfectly. You deserve a nice drink after all that baking!
Frequently Asked Questions About Easy Cherry Pie Bars
Whenever I post these easy cherry pie bars online, I always get the same dozen questions popping up! It’s totally normal; we all want to make sure our shortbread crust turns out just right. So, I figured I’d just jot down the answers here so you don’t have to hunt around!
Can I use fresh cherries instead of the canned pie filling?
This is the classic question! Here’s the deal: you *can*, but it completely changes the recipe, and honestly, it makes them much less “easy.” Canned cherry pie filling already has the sugar and the thickening agents built in, which is crucial for that gooey texture that sets up nicely when cooled. If you use fresh cherries, you’ll have to cook them down separately with sugar and cornstarch to make your own filling. It’s a totally different process, so for these specific baked bars to work their crumbly magic, stick to the can!
How thick should the shortbread crust be when I press it down?
You want that base to be firm and relatively even across the entire bottom of the 9×13 pan. Aim for about a quarter-inch thick, maybe a tiny bit more if you really love that buttery base. Use the bottom of a measuring cup or just your knuckles to press it down hard! Remember, this layer is holding up all that weight when it comes out of the oven. A well-pressed crust guarantees you can lift a whole slice out clean later. Don’t be shy when pressing!

What happens if I skip the egg wash on top of the crumbles?
Skipping the egg wash (the whisked egg and vanilla) isn’t a recipe disaster, but it will change the look of your topping. The egg acts like a little binder and gives those remaining crumbs that beautiful light golden-brown sheen when they bake. If you leave it off and just crumble the dry dough on top, the topping will stay paler, drier, and more purely crumbly—less like a “pie top” and more like true streusel. Either way tastes fantastic, but the egg wash looks prettier when serving guests!
Can I use salted butter if I forgot to buy unsalted?
Yep, don’t panic! If you only have salted butter on hand, the general rule in baking is to reduce the added salt in the recipe. Since these easy cherry pie bars call for 1/2 teaspoon of salt, I would suggest cutting that completely. If your salted butter is very salty, you might even want to dial it back to just 1/8th of a teaspoon or skip it entirely. Canned filling always has some sodium, so it’s better to under-salt than end up with bars that taste distinctly salty!
Nutritional Estimates for Easy Cherry Pie Bars
Now, I know what you’re thinking! Sometimes you just gotta know the damage, right? Especially when something tastes this good, it feels like it *should* be loaded with everything naughty. But here’s the cool part of these easy cherry pie bars—they are actually pretty reasonable for a satisfying dessert bar, especially since they yield 24 squares!
I pulled these numbers straight from my recipe software, so please take them with a grain of salt—pun totally intended! These are just estimates based on standard kitchen measurements for butter, sugar, and the canned filling. If you use low-sugar pie filling or swap out ingredients, your totals will absolutely change.
For a single, decent-sized square (which is one serving size), here is what we are generally looking at. I always appreciate seeing the protein number stay above 1, even in a dessert. It means the little bit of flour and egg is doing some work!
- Serving Size: 1 bar
- Calories: 210
- Sugar: 18g (This is where most of the fun comes from, naturally!)
- Fat: 12g
- Saturated Fat: 7g
- Protein: 2g
- Carbohydrates: 25g
- Fiber: 1g
- Sodium: 95mg
So, there you have it! A delicious, quick-to-make treat that gives you a little boost of energy without totally derailing your day. Enjoy them guilt-free—or maybe just eat two and call it a day! That’s my usual strategy for these easy cherry pie bars!
Share Your Easy Cherry Pie Bars Success
You did it! You conquered the shortbread, you layered the cherry filling perfectly, and now you’re looking at a gorgeous, cooling pan of the best easy cherry pie bars ever made. Don’t just let that masterpiece sit there silently! I absolutely LIVE for hearing how these recipes turn out in your own kitchens!
This is the part where I beg you—pretty please—to let me know how they turned out! Did you frost them with that powdered sugar dusting, or did you sneak a scoop of ice cream on top while they were still slightly warm? Don’t be shy!
Please, please leave a comment down below telling me what you thought. A quick rating or a paragraph about your experience helps other new bakers feel confident trying this recipe out. Seeing your successes—whether it was your first time making a shortbread crust or your thousandth—keeps me going in the kitchen!
And if you got a great photo? Tag me! I’d love to share your beautiful easy cherry pie bars on my social feeds. Knowing I helped bring a sweet, tangy treat into your home is the best reward there is. Happy baking, friend!
Print
Easy Cherry Pie Bars
- Total Time: 50 min
- Yield: 24 bars 1x
- Diet: Vegetarian
Description
Simple recipe for sweet and tart cherry pie bars with a shortbread crust.
Ingredients
- 1 cup unsalted butter, softened
- 1 cup granulated sugar
- 2 cups all-purpose flour
- 1/2 teaspoon salt
- 1 (21 ounce) can cherry pie filling
- 1 large egg
- 1 teaspoon vanilla extract
Instructions
- Preheat your oven to 350 degrees F (175 degrees C). Grease and flour a 9×13 inch baking pan.
- In a large bowl, beat the softened butter and sugar until creamy.
- Gradually mix in the flour and salt until a crumbly dough forms.
- Press two-thirds of the dough evenly into the bottom of the prepared baking pan.
- Spread the cherry pie filling over the crust layer.
- In a small bowl, whisk the egg and vanilla extract together.
- Crumble the remaining one-third of the dough evenly over the cherry filling.
- Bake for 30 to 35 minutes, or until the topping is lightly golden brown.
- Let the bars cool completely in the pan before cutting into squares.
Notes
- For a firmer crust, chill the dough for 15 minutes before pressing it into the pan.
- You can dust the cooled bars with powdered sugar before serving.
- Prep Time: 15 min
- Cook Time: 35 min
- Category: Dessert
- Method: Baking
- Cuisine: American
Nutrition
- Serving Size: 1 bar
- Calories: 210
- Sugar: 18
- Sodium: 95
- Fat: 12
- Saturated Fat: 7
- Unsaturated Fat: 5
- Trans Fat: 0
- Carbohydrates: 25
- Fiber: 1
- Protein: 2
- Cholesterol: 35
Keywords: cherry pie bars, easy dessert, shortbread crust, cherry filling, baked bars