
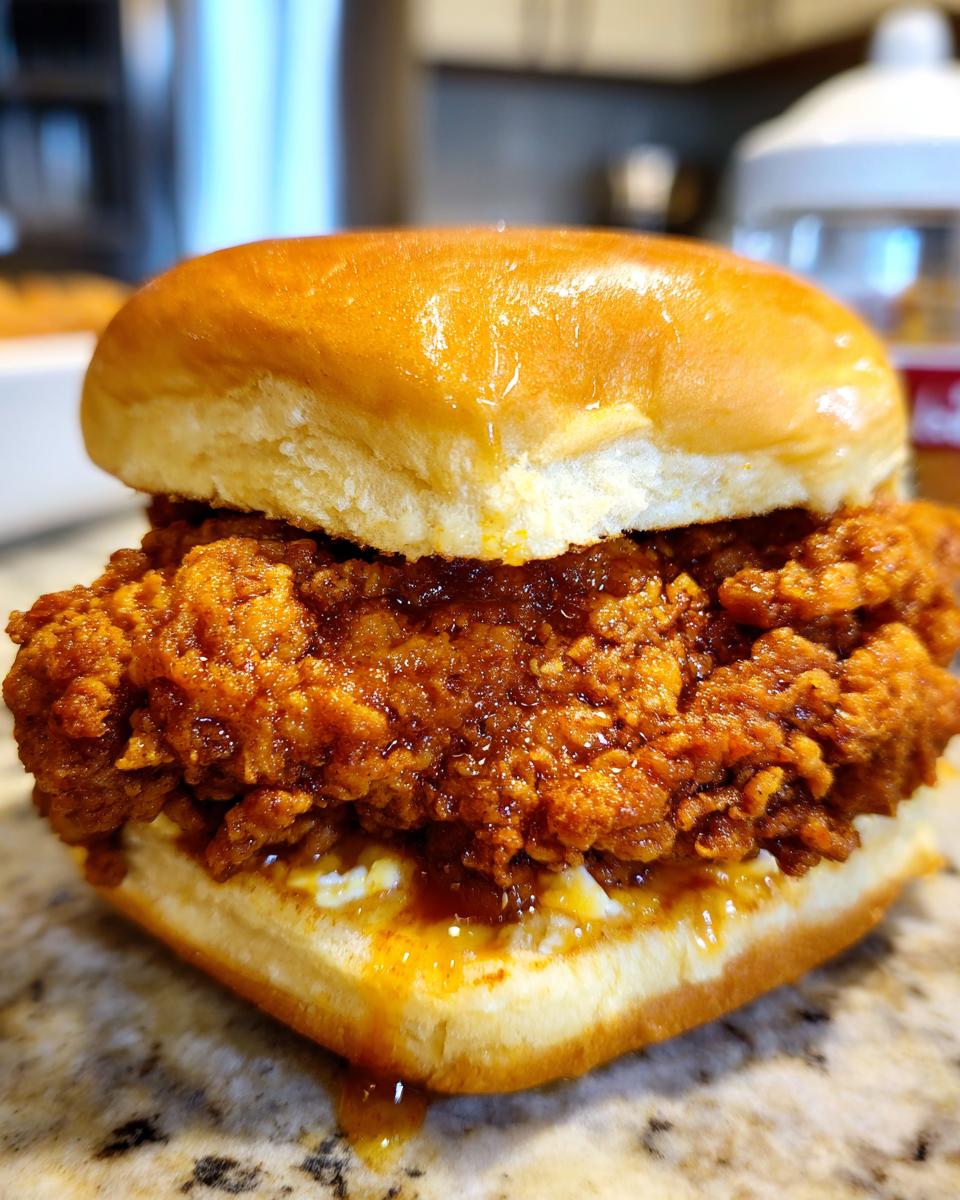
Okay, listen up, because I’ve cracked the code on the absolute best game-day snack known to humanity. Forget those giant messy sandwiches; we are talking bite-sized perfection here. These Fried Chicken Sliders are guaranteed to disappear before the first quarter ends! Seriously, I spent weeks tweaking the ratios because I wanted that maximum crunch factor without sacrificing the juiciness inside the tiny chicken pieces. It took a lot of trial and error, but now? Now we have flawless, crispy chicken tucked into soft little buns. You simply cannot beat them when you’re hosting a crowd or just want a seriously satisfying treat!

Why You Will Love These Fried Chicken Sliders
I know you’re busy, and that’s why this recipe is a keeper! It checks all my boxes for crowd-pleasing food because it’s incredibly fast and delivers huge flavor payoff for very little effort.
- Perfect Portion Control: Since everything is scaled down to slider size, people can try one or three without feeling too full. It makes managing appetizer plates so much easier!
- Seriously Crunchy Texture: We’re talking major crunch here. My dipping method—which I’ll show you in a bit—ensures that every single piece of chicken has that audible, shatteringly crisp coating holding up against the soft bun.
- Assembly is a Snap: Once the chicken is fried, putting these Fried Chicken Sliders together takes maybe five minutes flat. You toast the buttered buns, dress them, and drop the hot chicken right in. Done!
- Customizable Flavor Base: The basic recipe is fantastic, but the chicken itself is ready for whatever flavor you want to throw at it—spicy mayo, sweet pickles, tangy slaw—it all works!
Essential Ingredients for Perfect Fried Chicken Sliders
If you’ve ever tried to make crispy chicken only to have the coating get soggy in the frying oil, I can tell you right now: it’s usually the simple ratios in the dredge. For these Fried Chicken Sliders, we need to be precise so that every single bite gives you that beautiful crunch we worked so hard for! Don’t worry, this is straightforward stuff that’s probably already in your pantry, but the small details make a huge difference.
For the Crispy Fried Chicken Coating
This is where the magic starts. Getting the seasoning right in the flour mix is non-negotiable! If you leave the salt and pepper out of the flour and just sprinkle it on later, it just falls off. We want that flavor built right into that thick, craggy coating.
- One pound of boneless, skinless chicken breast, cut into roughly 1-inch pieces. Keep them small so they fit perfectly on the slider bun!
- One full cup of all-purpose flour. This is our main structure.
- One teaspoon of salt—don’t skimp here!
- Half a teaspoon of black pepper. Freshly ground tastes best, trust me.
- A quarter teaspoon of paprika. This gives us that lovely faded golden color, not too spicy, just color!
For Assembling the Fried Chicken Sliders
Once the chicken is coated beautifully, we need our binder (the egg wash) and the final destination: the tiny buns. You know I almost always have extra pickles on hand because they cut through the richness of the fried chicken so perfectly.
- The 1-inch chicken pieces we just talked about.
- One large egg, whisked up.
- Half a cup of milk to mix with that egg.
- Vegetable oil, enough for frying—we need at least 2 inches deep in the skillet to get those pieces swimming happily.
- Twelve small slider buns. They have to be the small ones, or they stop being “sliders,” right?
- Butter, softened, just for toasting the buns later.
- Pickle slices—totally optional but highly recommended!
- Your favorite sauce! Whether you go for simple mayo or something kicking like a homemade cocktail sauce here, make sure you have plenty ready!
Step-by-Step Instructions for Making Fried Chicken Sliders
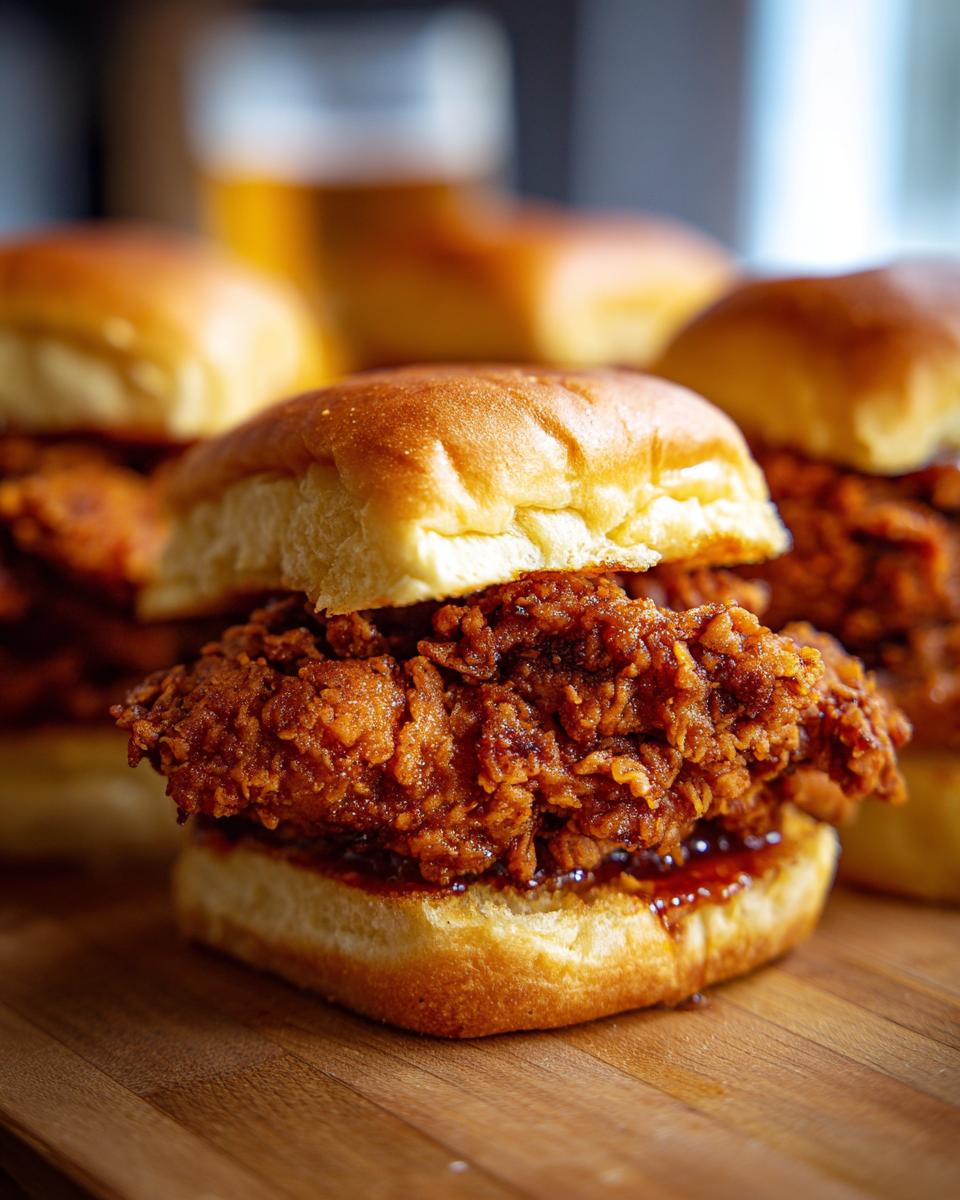
You’re ready to make the best Fried Chicken Sliders ever, and honestly, the process is surprisingly fast once you get your stations set up. The trick here is using three separate bowls for the coating process. When I first tried making these, I tried the quick dip and nearly cried when the coating fell off in the hot oil. We are not doing that today! We are aiming for that craggy, thick crust that you see in the best fried chicken joints.
Always make sure your chicken pieces are dry before you start dipping. Pat them down with a paper towel; wet chicken hates sticking to dry flour! If you want that extra insurance against sogginess (and you definitely do!), you can double-dip the chicken—dip, shake, dip in wet, shake, and then dip back into the flour mix one last time. It really builds that crispy shell.
Preparing the Chicken Coating and Dredging
First thing: get your flour mixture combined evenly in one shallow dish. Next, in a separate bowl, grab your whisk and mix up the egg and milk until it’s frothy. This whisked liquid is your binder. Now, take a piece of chicken, coat it thoroughly in the flour mix—make sure it’s covered right to the edges. Then, dunk it quickly into the egg/milk wet dip, letting the excess drip off just for a second. Finally, take it back to the flour one last time, pressing that dry mix onto the chicken gently to seal the deal.
Frying the Chicken for the Fried Chicken Sliders
This part requires your attention! Get about two inches of vegetable oil heating up in a deep skillet. We need it right at 350°F (175°C). If it’s too cool, the chicken soaks up oil and gets greasy; too hot, and the outside burns before the inside cooks. If you need practice dipping, you can test on an old chicken scrap first! Carefully lower the coated pieces in. Don’t rush it or smash them all in there at once—work in small batches so the oil temperature doesn’t crash. They need about 4 to 6 minutes, flipping often, until they hit a safe internal temperature of 165°F (74°C). Pull them out onto paper towels draped over a wire rack. That rack is important; it lets the air circulate so the bottoms don’t steam!
Toasting Buns and Assembling Your Fried Chicken Sliders
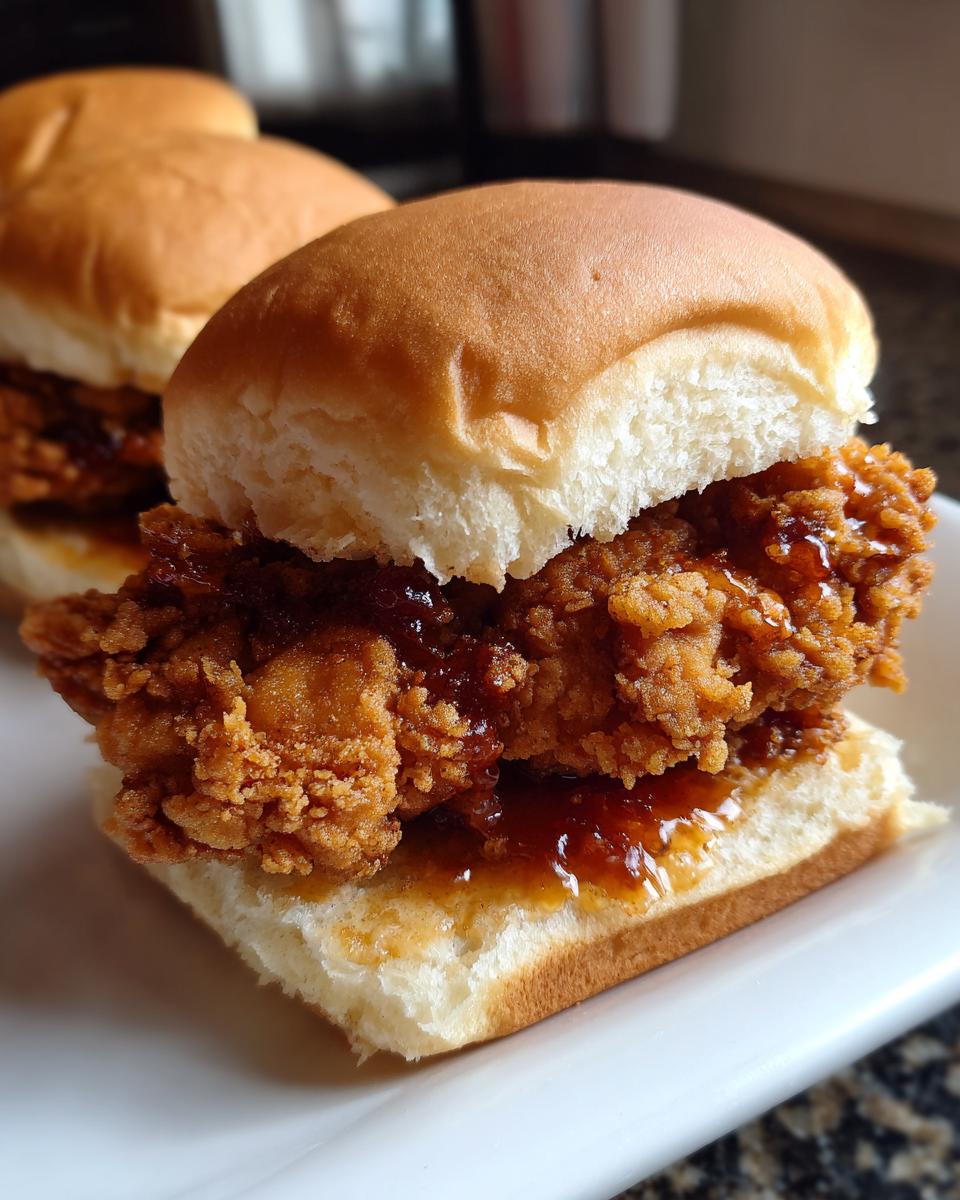
While the chicken is draining a bit, take those slider buns, spread a tiny bit of softened butter on the cut sides, and toast them. I usually put mine face-down in a dry, warm skillet for about 30 seconds, or a quick trip under the broiler works wonders. We want them just barely golden, not crunchy toast! For assembly, it’s easy: bottom bun, slather on your favorite sauce—a hit of spicy mayo works so well here—lay down that crispy fried chicken piece, add a couple of pickle slices if you’re being good, and cap it with the top bun. Seriously, eat these right away while the chicken is still piping hot!
Tips for Achieving Ultra-Crispy Fried Chicken Sliders
If you want those seriously craggy, unbelievable edges on your Fried Chicken Sliders, you absolutely must commit to the double-dip method I mentioned earlier. It feels like extra work, but it’s what separates the okay chicken from the showstoppers. That second coat in the flour mixture really layers up the crust!
Also, the oil matters! I use straight-up vegetable oil because it has a high smoke point and doesn’t taste funky when heated up. Make sure you have enough depth—at least two inches—so the oil temperature doesn’t drop wildly when you add the chicken. If you’re worried about them getting greasy, never skip the wire rack for draining, okay? It lets air hit the bottom so steam can escape. If you’re cleaning up later, you can check out how to make delicious crispy chicken without deep frying completely if you need an alternative!
Ingredient Substitutions for Your Fried Chicken Sliders
Listen, I know not everyone has the exact pantry setup that I do, and that’s totally fine! We can absolutely make substitutions without sacrificing the integrity of these amazing Fried Chicken Sliders. The main goal, no matter what we swap, is maintaining that wonderfully thick, crispy coating. If the coating gets weak, the whole slider falls apart!
The flour mixture is usually the first place people ask about. If you need to go gluten-free? Go ahead and swap in a good quality 1-to-1 GF blend. Just know that GF flours sometimes absorb moisture differently, so you might need to slightly thicken your wet dip if it seems too runny.
For the wet dip—the milk and egg—if you have a dairy sensitivity, you can swap the regular milk for unsweetened almond milk or even just plain water mixed with a tablespoon of vinegar to make a buttermilk substitute. It sounds weird, I know, but it helps break down the chicken a tiny bit and helps the coating stick! Just don’t use flavored milks; we need neutral binders here.
When it comes to buns, if you can’t find the tiny slider buns, using Hawaiian rolls works beautifully because they’re already pulled apart easily. Just watch the toasting time since they are sweeter and might brown faster. If you want to get wild with sauces, you totally can! But skip anything super watery on the chicken itself, like plain runny mayonnaise, because that moisture will immediately soften your hard-earned crispiness. Stick to thicker sauces or put the thinner sauces right on the top bun!
Creative Variations for Your Fried Chicken Sliders
The beauty of having a solid foundation recipe for these Fried Chicken Sliders is that they become a launchpad for all sorts of fun flavor adventures! Once you’ve mastered that perfect crunch, you can start playing around with what you dust them with or what you dress them up with before you close the bun. I love experimenting right before a big party!
My favorite way to switch things up is to change the spice profile in that initial flour dredge. Don’t just stick to salt and pepper, people! If you love heat, try incorporating a teaspoon of cayenne pepper right into that flour mix. It gives the chicken a beautiful, slow-burning warmth that pairs wonderfully with a cooling, creamy sauce.
Speaking of sauces, this is where you can really get creative. Obviously, the standard mayonnaise works, but have you tried mixing in some sriracha or chili garlic sauce to make your own spicy mayo? It’s so simple, but that bright heat on the crunchy chicken is just addictive. Sometimes I even whip up a quick honey mustard sauce—the balance of sweet and tangy is incredible with the savory chicken.
And don’t stop at the sauce! Pickles are great, but what about adding thinly sliced fresh jalapeños for a sharp bite? Or, if you’re feeling ambitious, you could even mimic some of the deep, complex flavors you find in other dishes. For instance, if you are looking for inspiration on complex spice blends that might work beautifully in a coating, I saw a fascinating article about seasoning mixes used in dishes like jerk seasoning that you might find interesting. Just be careful not to add too much moisture, or you’ll lose that coveted crispness we worked so hard to achieve on these Fried Chicken Sliders!
Serving Suggestions for These Fried Chicken Sliders
We’ve nailed the main event, which means we need to talk about what goes on the platter next to these perfect Fried Chicken Sliders! Because they are small and snackable, you don’t want to bring out a giant heavy side dish that nobody can manage. Quick, easy sides are the name of the game here.
My go-to accompaniment is always something cool and crunchy to balance out that hot, rich flavor of the fried chicken. A classic, creamy coleslaw is unbeatable. It offers that refreshing tang and crisp texture that just makes sense next to a savory slider. You can mix up a batch while the oil is heating if you plan ahead!
If you’re looking for something heartier that still feels fun, you cannot go wrong turning this into a sweet-and-savory combo. Sweet potato fries are my secret weapon for any fried food night. They bake up beautifully and everyone loves dipping them in ranch or even that spicy mayo you made for the chicken! You can find an amazing recipe for truly irresistible sweet potato fries if you need a distraction from deep frying one more thing!
For those times when you want to keep things light, a simple side salad works wonders. It doesn’t need to be complicated—just some mixed greens, maybe a few cherry tomatoes, and a light vinaigrette. Having something green on the plate cuts the richness perfectly, and it makes you feel slightly less guilty when you sneak a second slider!
Storage and Reheating Instructions for Fried Chicken Sliders
Oh man, if you have leftovers—which is a minor miracle because mine never last—you need to treat them right! The number one rule for storing these Fried Chicken Sliders is separation. Do not store the assembled slider together! The moisture from the sauce, pickles, and bun is the enemy of crispy chicken, and you’ll end up with sad, soggy pieces really fast.
For the best results, if you have any leftover fried chicken pieces, tuck them into an airtight container lined with a paper towel and keep them in the fridge. That paper towel is your bodyguard against steam! The buns, if they haven’t been too personalized with sauce yet, can go into a sealed plastic bag or back in their original packaging.
Now, the reheating part is crucial. I’m begging you, please skip the microwave! Microwaving fried food is just asking for rubbery, steamed disappointment. We need to bake that crispiness right back in. My absolute favorite method is the air fryer. If you have one, pop the chicken pieces in there at about 375°F (190°C) for maybe 5 to 7 minutes, shaking them halfway through. They come out almost exactly like they were fresh from the oil.
If an air fryer isn’t an option, the regular oven works just as well, you just need to preheat it a bit hotter, maybe 400°F (200°C). Spread the chicken out on a baking sheet (again, line it with foil or parchment first if you want easy cleanup) and bake them for about 10 minutes. You want them hot all the way through and audibly crunchy when you tap them. Once the chicken is hot and crispy, quickly toast those buns—a minute in the same hot oven is perfect—then pile it all together with fresh sauce and enjoy your second batch of amazing Fried Chicken Sliders!
Frequently Asked Questions About Fried Chicken Sliders
I always get a ton of questions after I share this recipe because everyone wants that perfect balance of size and crunch! It’s natural to wonder about adapting things, so here are the questions I hear the most about making these incredible Fried Chicken Sliders.
Can I make these Fried Chicken Sliders ahead of time?
You absolutely can prep ahead, but I really, truly suggest you don’t assemble them until right before serving! The magic is in the hot, fresh crunch. What you can totally do is fry all your little chicken pieces a few hours ahead of time. Store them layered between paper towels in an airtight container in the fridge. Then, about 15 minutes before you want to serve the Fried Chicken Sliders, reheat the chicken in an air fryer or oven to crisp it back up. Toast the buns at the last second, and assemble them while they’re hot. That keeps the buns soft and the chicken crispy!
What oil temperature is crucial for the best Fried Chicken Sliders?
This is maybe the most important technical detail for getting that amazing texture! You absolutely must keep your oil right around 350°F (175°C). If you drop it in when it’s too cold, the chicken soaks up way too much oil and ends up greasy and soft. If it’s too hot, the outside burns charcoal black before the inside 1-inch piece of chicken is cooked safely. If you’re nervous about the temperature, you can always look up baking methods for a less hands-on approach, like this recipe for crispy baked chicken, but frying is truly the quickest way for the best slider coating.
Another quick tip I have is adjusting the coating if you are worried about sogginess—you can always try double-dipping the chicken in the flour mixture! It builds ridges that just seal in the crunch during frying.
Do you ever wonder if you can bake them instead of frying? People ask that all the time! While you certainly can bake or air fry these little guys for a lighter choice, you just won’t get that deep, craggy, super-crispy crust that makes these Fried Chicken Sliders famous. Baking tends to yield a thinner, more even coating, which is great, but frying gives you texture you can really sink your teeth into!
Nutritional Estimates for Fried Chicken Sliders
Now, I know we aren’t making these Fried Chicken Sliders because we are counting every single calorie—they are fried chicken, after all! But I always like to give you a snapshot of what you’re looking at, just so you know what you’re getting into when you bite into one of these beauties. Please know that these numbers are just my best guess based on the ingredients list provided.
Because everyone uses different brands of buns, different amounts of butter for toasting, and lets be real, most people use way more sauce than I budget for, these are estimates per serving—which we set at one slider. If your family eats three sliders each (which they totally will), you’ll need to multiply everything accordingly!
- Serving Size: 1 slider
- Calories: Roughly 350 calories per slider
- Fat: About 18 grams (Watch that butter on the buns!)
- Saturated Fat: Around 4 grams
- Carbohydrates: Roughly 30 grams (Mostly from the bun and flour coating)
- Protein: A solid 18 grams of protein per slider! Great for fueling up before the big game.
- Sugar: Very low, sitting right around 5 grams.
- Sodium: This one’s higher, around 550mg, based on seasoning the coating!
See? Not bad for something so incredibly satisfying! The main thing to remember is that these are estimates. If you use lighter toaster buns or swap out high-sodium seasonings, those numbers will happily dip down a little bit. But if you add gourmet pickles and slather on my famous spicy chili mayo, those numbers are going up! Enjoy them, and worry about the specifics later—these Fried Chicken Sliders are worth every delicious bite!
Share Your Perfect Fried Chicken Sliders
Alright, now that you’ve got the ultimate recipe for these amazing Fried Chicken Sliders, I truly want to see what you come up with! Cooking is so much more fun when we share the results, right?
When you make these and they disappear in under ten minutes (which I fully expect they will!), please let me know how it went! If you thought they lived up to the hype, give the recipe a solid five stars right here on the site—it really helps other readers know this is the real deal.
But the best part? The sauces! Everyone seems to have a secret favorite sauce that takes these little guys over the top. Did you use a truffle aioli? Maybe a spicy honey glaze? Drop a comment below and tell me exactly what you slathered on your buns. I’m always looking for the next great pairing for my next batch of Fried Chicken Sliders!
And hey, if you snapped a photo of your spread—especially if your platter got completely decimated by hungry guests—tag me on social media! Seeing all that crispy chicken goodness flying off the table makes my whole week. Happy cooking, and enjoy those incredible little bites!
Print
Fried Chicken Sliders
- Total Time: 35 min
- Yield: 12 sliders 1x
- Diet: Low Lactose
Description
Small sandwiches featuring crispy fried chicken pieces on slider buns.
Ingredients
- 1 lb boneless, skinless chicken breast, cut into 1-inch pieces
- 1 cup all-purpose flour
- 1 teaspoon salt
- 1/2 teaspoon black pepper
- 1/4 teaspoon paprika
- 1 large egg
- 1/2 cup milk
- Vegetable oil for frying
- 12 small slider buns
- Butter, softened
- Pickle slices (optional)
- Sauce of choice (e.g., mayonnaise, hot sauce)
Instructions
- Combine flour, salt, pepper, and paprika in a shallow dish.
- In a separate bowl, whisk the egg and milk together.
- Dip each chicken piece first into the flour mixture, then into the egg mixture, and finally back into the flour mixture, pressing to coat well.
- Heat about 2 inches of vegetable oil in a deep skillet to 350°F (175°C).
- Carefully place chicken pieces into the hot oil, ensuring not to overcrowd the pan.
- Fry for 4-6 minutes, turning occasionally, until golden brown and cooked through (internal temperature reaches 165°F or 74°C).
- Remove chicken from oil and place on a wire rack lined with paper towels to drain excess oil.
- Lightly butter the cut sides of the slider buns.
- Toast the buns lightly in a dry skillet or under a broiler until golden.
- Assemble the sliders: place a piece of fried chicken on the bottom bun, top with your chosen sauce and pickle slices if using, and cover with the top bun.
Notes
- For extra crispiness, you can double-dip the chicken in the flour mixture.
- Adjust seasoning in the flour mix to your taste preference.
- Use a meat thermometer to check the internal temperature of the chicken for safety.
- Prep Time: 15 min
- Cook Time: 20 min
- Category: Main Course
- Method: Frying
- Cuisine: American
Nutrition
- Serving Size: 1 slider
- Calories: 350
- Sugar: 5
- Sodium: 550
- Fat: 18
- Saturated Fat: 4
- Unsaturated Fat: 14
- Trans Fat: 0.5
- Carbohydrates: 30
- Fiber: 1
- Protein: 18
- Cholesterol: 60
Keywords: fried chicken, sliders, chicken sandwiches, crispy chicken, small sandwiches