
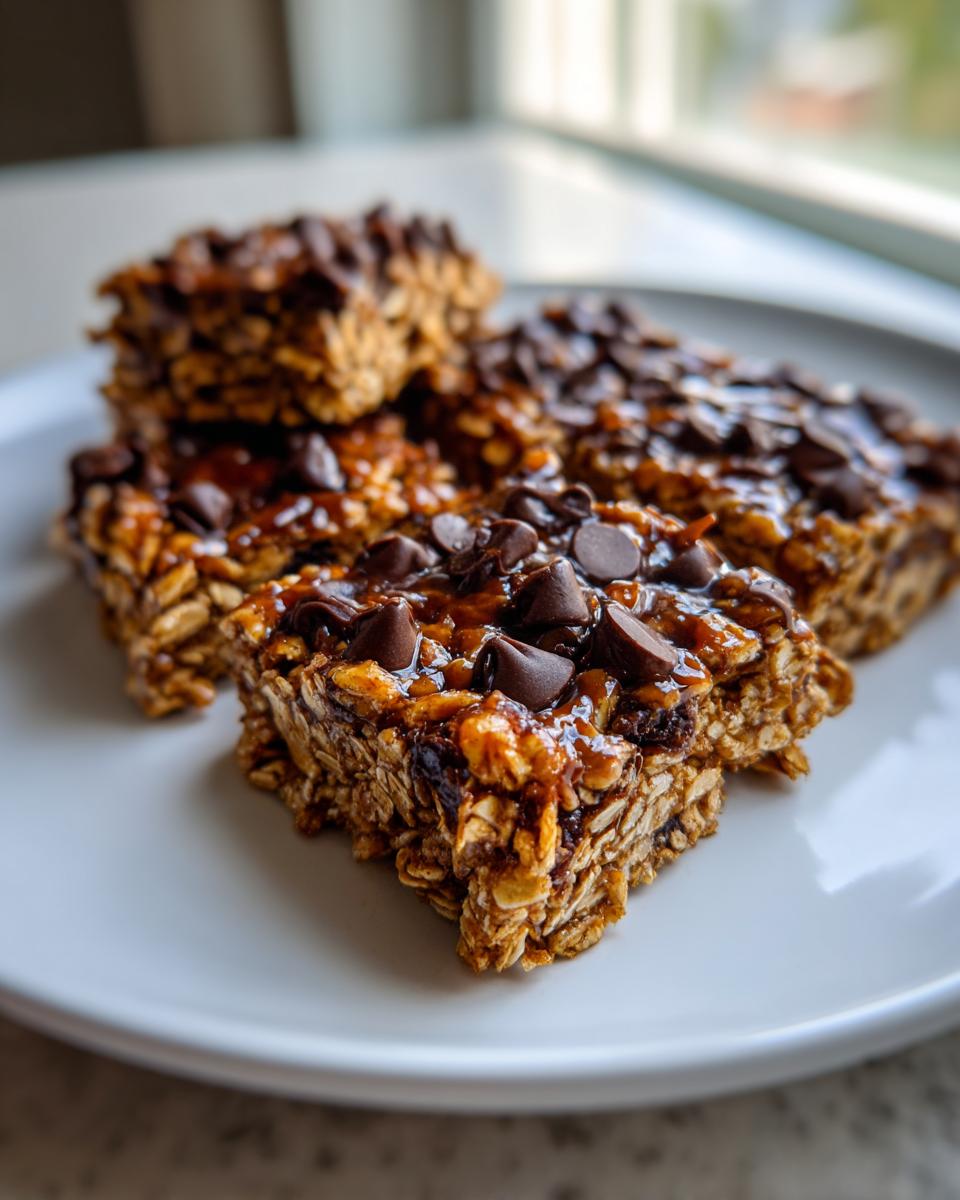
When the weather is absolutely sweltering, or honestly, when I just don’t want to turn the oven on for thirty minutes, I run straight for my no-bake stash. There is nothing better than pulling something fantastic out of the fridge that took practically no effort! Trust me when I say these are the easiest, chewiest Homemade No Bake Granola Bars you will ever set eyes on. I’ve been tweaking this recipe for ages—trying to find that perfect ratio where they stick together without being rock solid.
Getting that perfect, gooey chew factor without firing up the heating element is my specialty, especially during the summer months. If you want something reliably tasty for lunchboxes or a quick grab-and-go breakfast, you’ve absolutely hit the jackpot here. We’re talking about quality ingredients coming together in under ten minutes of active time. You really can’t beat that convenience!

Why You Will Love These Homemade No Bake Granola Bars
Honestly, what’s not to love about a snack that keeps the kitchen cool and hits the spot every single time? These no-bake bars are my go-to right now. They’re reliable, they taste like they should have taken way more effort, and cleaning up is a total breeze. I promise you’ll be reaching for this recipe every week once you see how simple it is!
- Quick Prep Time for Homemade No Bake Granola Bars: We are talking less than 20 minutes of active time, folks. Seriously! You whip up the binder, dump the dry stuff in, press it down, and let the fridge do the hard work.
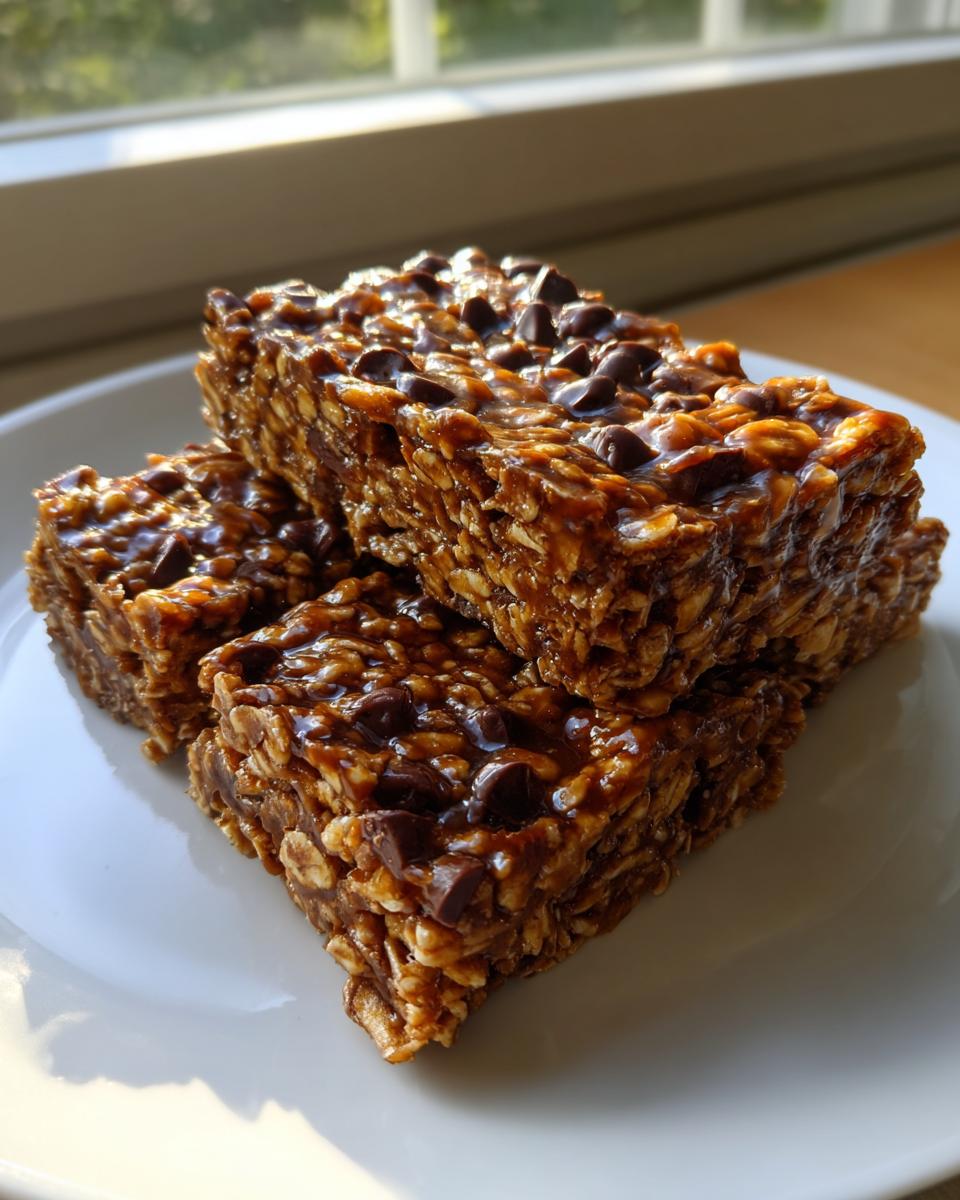
- Chewy Texture That Holds Together: Baking removes moisture, right? Well, by keeping the oven off, we lock in all that sticky goodness from the honey and peanut butter. These bars are perfectly chewy—they snap, they don’t crumble into a thousand pieces on your counter.
- Limitless Mix-In Options for Homemade No Bake Granola Bars: This is where you get to play! Toss in mini chocolate chips, maybe some toasted coconut, or dried cranberries. Whatever you love, you can fold it right in at the end. They’re totally customizable for whoever you’re feeding.
Essential Ingredients for Perfect Homemade No Bake Granola Bars
Getting the right texture in a no-bake bar means the binder has to be absolutely spot on. If you try to cheat here, you end up with a crumbly mess—and nobody wants that! These ingredients are non-negotiable if you want that perfect, satisfying chew and the bars to actually hold their shape when you cut them. I use a full cup of oats relative to the rice cereal, which really gives it that substantial, hearty feel. Remember, even though these are no-bake, ingredient quality still matters a ton!
When measuring your brown sugar, make sure you really pack it into the cup; that helps measure the molasses content correctly, which keeps things soft, unlike using white sugar alone. If you’re looking for alternatives to honey, sometimes I use a homemade simple syrup, but often maple syrup works just as beautifully for that deep, complementary sweetness.
Binding Agents: Honey, Peanut Butter, and Sugar
This is the sticky glue holding everything together. You need exactly 1/2 cup of creamy peanut butter—smooth is better than chunky here so it incorporates beautifully—and <1/2 cup of liquid sweetener. I flip-flop between pure honey or maple syrup depending on what I have open. Then, make sure that brown sugar is packed tight! This blend melts down into that gorgeous, thick sauce that coats all the dry bits.
Dry Base: Oats and Cereal
For this recipe, we are using <2 cups of good old rolled oats. Please, please don’t use instant oats! They break down too much when you stir in the warm mixture and you lose that chew. This recipe also calls for <1 cup of crisp rice cereal; that’s what gives these bars a lighter feel, so they don’t feel like a brick when you eat them.
Flavor and Mix-Ins for Homemade No Bake Granola Bars
First up for flavor is just <1 teaspoon of vanilla extract—it wakes everything up. Then comes the fun part: your mix-ins! I usually go for <1/2 cup of something, but you decide. Chocolate chips are always a winner, or if I’m making these for school lunches, I prefer something like dried apricots or tart cherries. If you use dried fruit, make sure it’s cut small so it doesn't throw off the bar structure.
Step-by-Step Instructions for Homemade No Bake Granola Bars
Okay, here is where the magic happens! Since we aren’t baking, the goal is just to heat the binders enough so they mix properly and then get everything chilled fast so it sets up perfectly. Don’t worry about preheating anything—that’s the beauty of this! I find that having everything measured out before I turn on the stove really helps, because once that honey starts melting, you need to move pretty quickly. These steps are foolproof, I promise. If you were baking, you’d be worried about oven temperature, but here, we just need to avoid boiling over our sticky mixture! I actually find this process less stressful than baking, kind of like making a really thick iced tea; you just need the right temperature control for the initial mix.
Preparing the Pan for Homemade No Bake Granola Bars
First things first: grab that 8×8 inch baking pan. You absolutely have to line it with parchment paper, and this is key—leave a good overhang on two opposite sides. Think of those flaps like built-in handles! When the bars are finished chilling, you just grab those paper handles and lift the whole block right out. Trying to pry them out without paper leads to a disaster, trust me, I’ve been there—it’s like trying to pull a wet tea bag out of boiling water, completely useless!
Creating the Warm Binding Mixture
Time to turn on the stove to medium heat. Grab a large saucepan—this is where everything comes together. Toss in your peanut butter, your honey (or maple syrup, if you went that route), and that packed brown sugar. You just stir this gently until the sugar completely dissolves and you have this glossy, smooth, unified syrup. Once it’s perfectly smooth, take it off the heat right away. We don’t want to cook it, we just want it warm enough to mix! Stir in that teaspoon of lovely vanilla extract right after you kill the heat.
Combining Dry Ingredients and Coating Thoroughly
While that warm binder is cooling for just a minute, grab a separate, big bowl and dump in your rolled oats and crisp rice cereal. Now, pour that warm peanut butter mixture over the dry stuff. You need to stir this really well—keep folding and mixing until honestly every single oat flake and piece of cereal is shiny and coated. No dry patches allowed! Once everything is coated, fold in your 1/2 cup of mix-ins. Don’t overmix once the chocolate chips or fruit are in, though!
Pressing and Chilling the Homemade No Bake Granola Bars
Now, transfer that sticky mass into your prepared pan. This is the most important pressing step! You need to use sheer force here! Use the bottom of a measuring cup or a second piece of parchment paper over the top and press down as hard as you physically can. I mean *firmly*! The tighter you pack these, the less they crumble later. Then, they go straight into the fridge for a minimum of two hours—longer is even better! You are waiting until they are completely firm before you just lift them out and cut them into perfect little squares.

Tips for Success When Making Homemade No Bake Granola Bars
No-bake recipes are usually foolproof, but when dealing with sticky binders, a couple of little tricks can save you a huge headache later on. I’ve learned these the hard way, trust me! My focus when making these Homemade No Bake Granola Bars is always ensuring they stick together like glue without ever needing an oven. If the mixture seems uncooperative while you’re stirring, it just needs a little encouragement!
Troubleshooting Stiff Binding Mixture in Homemade No Bake Granola Bars
If you feel like you’re wrestling too hard with your spoon when trying to coat all the oats—don’t panic! The mixture is probably too cool. Just pop that saucepan back onto the lowest heat setting for just 30 seconds, maybe a minute max, and stir it again. You want it warm enough to flow, not hot enough to burn your counter when you spread it out. Don’t overdo it, though, or you’ll end up with runny bars!
Achieving Clean Cuts on Your Homemade No Bake Granola Bars
I know I stressed pressing hard earlier, but the real secret to getting those beautiful, sharp squares that look like they came from a bakery case is patience in the chilling stage. You *must* chill them until they are totally, rock-solid firm. If you try to cut them when they are even slightly cool but still soft in the center, you’ll just push the whole thing out of shape. Give them at least those two full hours in the fridge, or even better, leave them overnight!
Storage and Make-Ahead Tips for Homemade No Bake Granola Bars
Since these Homemade No Bake Granola Bars don’t go into the oven, they actually keep really well! This is another huge reason I love them—I can make a big batch on Sunday, and they are perfect for quick snacks or lunches all the way through to Thursday afternoon. Because they rely on soft binders like peanut butter and honey, we have to be smart about how we store them so they don’t get too hard or melt slightly at room temperature.
Storing Homemade No Bake Granola Bars Properly
The refrigerator is your best friend here. Once you’ve cut your cold, firm bars, the absolute best way to store them is in an airtight container. I usually layer them, placing a small sheet of parchment paper between layers just to make sure they don’t get stuck together if they warm up even a tiny bit. Kept tightly sealed in the fridge, they usually stay perfectly chewy and fresh for about a week. If they sit out on the counter, they get a little too soft for my liking!
Freezing Homemade No Bake Granola Bars for Later
If you’ve made a double batch—and you should, because they disappear fast—freezing is the way to go! After you slice them, wrap each individual bar tightly in plastic wrap or maybe some wax paper. Then, pop those wrapped bars into a large, freezer-safe bag. They freeze beautifully, and you can just pull one out the night before you need it, or even let it thaw on the counter for an hour. They taste just as good even after a month or two in the deep freeze!
Ingredient Substitutions for Homemade No Bake Granola Bars
I always get questions about swaps, especially if someone has allergies or just happens to run out of one key ingredient mid-recipe! The beauty of these Homemade No Bake Granola Bars is that they are incredibly forgiving, provided you keep the binder ratio right. If you’re missing something, don’t stress—we can usually pivot without compromising that perfect, chewy texture. It’s all about maintaining the liquid-to-dry balance we worked so hard for!
Sweetener Swaps in Your Homemade No Bake Granola Bars
If you don’t have honey on hand, don’t let that stop you from making these! Maple syrup is a fantastic, direct swap. Measure it exactly the same amount—<1/2 cup—and it works beautifully. It sometimes gives the bars a slightly richer, woodsy flavor, but the binding power is identical. I’ve even tried using agave nectar in a pinch, though you sometimes need just a tiny bit less of that since it is often sweeter than honey.
Nut Butter Alternatives for Homemade No Bake Granola Bars
This is a big one, especially for school environments or allergies. If you absolutely cannot use peanut butter, you have great options! Almond butter is probably the most seamless replacement; use <1/2 cup just like you would the peanut butter. If you need a totally nut-free version, go for sunflower seed butter, sometimes called SunButter. It has a strong flavor, yes, but when mixed with the oats and chocolate chips, it’s delicious! The texture holds up just as well as the traditional nut butters.
Serving Suggestions for Homemade No Bake Granola Bars
These Homemade No Bake Granola Bars are so versatile! Since they are hearty and packed with protein and good fats from the peanut butter, I honestly eat them for almost any meal when I’m rushing. They make a slam-dunk quick breakfast when you’re running out the door—just grab one alongside a coffee. My husband loves them as a post-gym recovery snack, too. They also slice perfectly small to serve as a healthy afternoon treat when the 3 p.m. slump hits hard. You really can’t go wrong!
Frequently Asked Questions About Homemade No Bake Granola Bars
When you are dealing with a recipe this simple, most people just have a few quick questions about sticking power or substitutions. I get it! It’s hard to believe something this good doesn’t need an oven. Here are the most common things people ask me when they try these for the first time. Hopefully, this helps you get that batch perfect on your first try!
Can I make Homemade No Bake Granola Bars without peanut butter?
Oh, absolutely! I mentioned variations up above, but it bears repeating: peanut butter is great, but you can definitely skip it. If you want to stick with the same chewy texture, swap it out 1:1 with almond butter or sunflower seed butter if you have tree nut or peanut allergies. You want a creamy butter base, and those alternatives work just as wonderfully to bind your Homemade No Bake Granola Bars together.
Why do my no bake bars crumble?
If your bars are crumbling, nine times out of ten it’s one of two things, or maybe both! The one I stress the most is how much you press them into the pan. You have to pack them down *really* hard—don’t be shy! The second reason might be too much dry ingredient or not enough binder. If your honey/peanut butter mixture seemed too stiff to coat everything evenly in the bowl, you needed to warm it up just a touch longer. They need that sticky force to hold!
How long do Homemade No Bake Granola Bars last?
Since we aren’t baking the moisture out, these bars are definitely happiest when they stay cool. Store them in an airtight container in the refrigerator, and they easily stay deliciously chewy and fresh for a full week. If you put them in a plastic bag on the counter, they tend to get a little greasy or too soft after day three, so keep them chilled for the best results!
Estimated Nutritional Snapshot for Homemade No Bake Granola Bars
I always feel like I need to include this section, even though I’m not a certified nutritionist! When I’m grabbing these for a quick snack, I like to have a general idea of what I’m eating, especially since we have so much flexibility with our add-ins. The numbers below are just an estimate based on using standard measurements for the oils, sugars, peanut butter, and the base oats and rice cereal.
If you add a ton of peanut butter chips or use extra-sweet maple syrup, that will change things, of course! But this gives you a solid ballpark figure for what one chewy, satisfying bar packs in terms of energy. This is why I always recommend storing leftovers in the fridge—it keeps the fats firm and doesn’t mess with the calculation too much!
- Serving Size: 1 bar
- Calories: 220
- Sugar: 12g
- Sodium: 80mg
- Fat: 10g
- Saturated Fat: 2g
- Unsaturated Fat: 8g
- Trans Fat: 0g
- Carbohydrates: 30g
- Fiber: 3g
- Protein: 7g
- Cholesterol: 0mg
Remember, these estimates are based on using the standard ingredients listed in the recipe. Customize it, and those numbers shift! But for a quick, homemade treat, I think that 7 grams of protein is pretty fantastic!
Print
Homemade No Bake Granola Bars
- Total Time: 20 min
- Yield: 12 bars 1x
- Diet: Vegetarian
Description
Simple recipe for making chewy granola bars without baking.
Ingredients
- 2 cups rolled oats
- 1 cup crisp rice cereal
- 1/2 cup peanut butter
- 1/2 cup honey or maple syrup
- 1/4 cup brown sugar, packed
- 1 teaspoon vanilla extract
- 1/2 cup mix-ins (e.g., chocolate chips, dried fruit)
Instructions
- Line an 8×8 inch pan with parchment paper, leaving an overhang.
- In a large saucepan, combine peanut butter, honey (or maple syrup), and brown sugar over medium heat. Stir until the sugar dissolves and the mixture is smooth. Remove from heat.
- Stir in the vanilla extract.
- In a separate large bowl, combine the rolled oats and crisp rice cereal.
- Pour the warm peanut butter mixture over the oat mixture. Stir well until everything is evenly coated.
- Fold in your chosen mix-ins.
- Press the mixture firmly and evenly into the prepared pan. Use a piece of parchment paper on top to help press it down tightly.
- Refrigerate for at least 2 hours, or until firm.
- Lift the bars out using the parchment overhang and cut into desired bar sizes.
Notes
- If the mixture is too stiff to stir, warm it slightly longer.
- For easier cutting, chill the bars completely before slicing.
- Store leftover bars in an airtight container in the refrigerator.
- Prep Time: 15 min
- Cook Time: 5 min
- Category: Snack
- Method: No Bake
- Cuisine: American
Nutrition
- Serving Size: 1 bar
- Calories: 220
- Sugar: 12
- Sodium: 80
- Fat: 10
- Saturated Fat: 2
- Unsaturated Fat: 8
- Trans Fat: 0
- Carbohydrates: 30
- Fiber: 3
- Protein: 7
- Cholesterol: 0
Keywords: no bake granola bars, homemade granola bars, easy snack bars, peanut butter bars, oat bars