
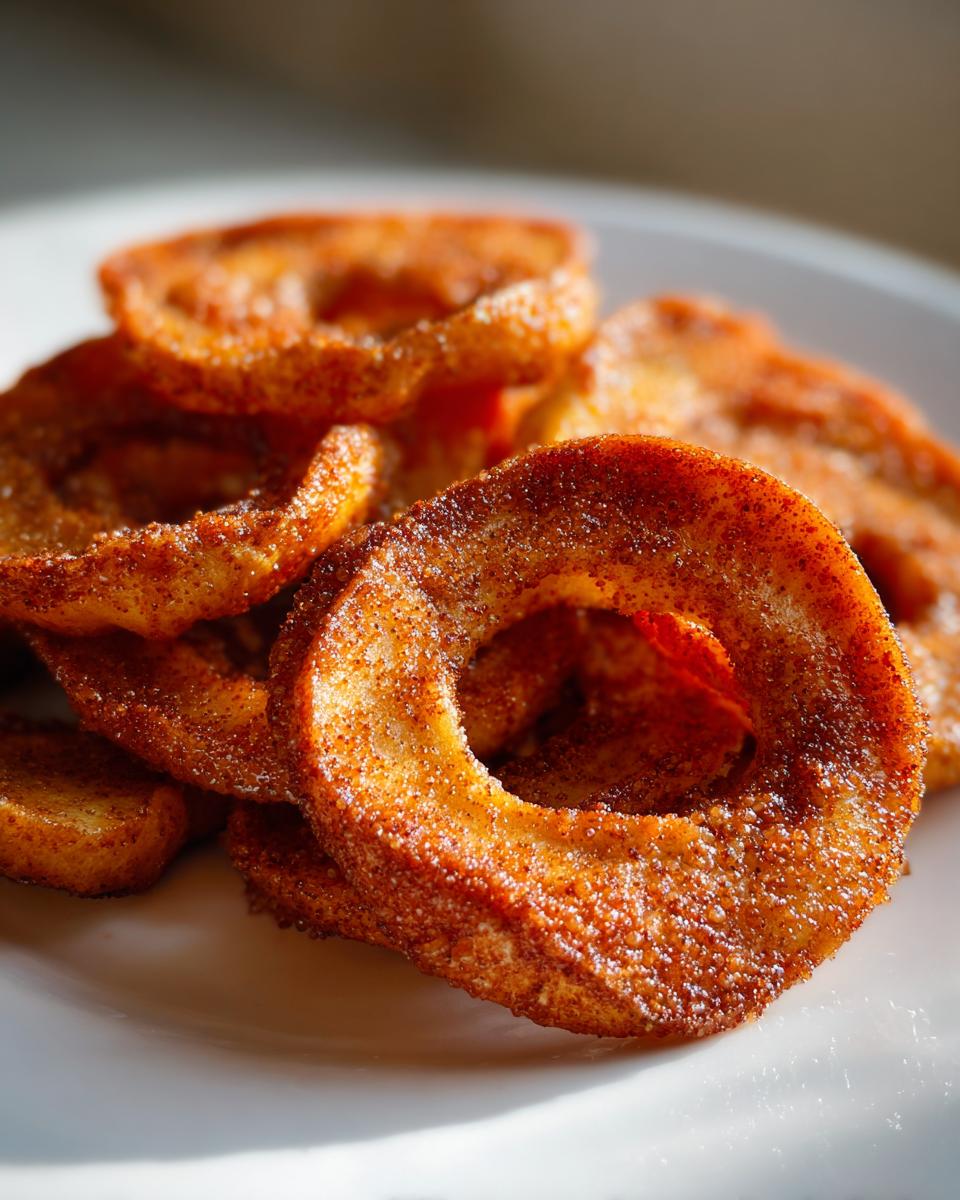
Sometimes you just need something sweet, warm, and comforting without making a huge production out of it, right? That’s exactly why I adore these incredibly simple baked **Apple Rings**. Seriously, these are the easiest dessert you will ever put together. When I was a kid, my dad used to core apples on the counter while Mom was making dinner, and we’d sneak the raw rings, but baking them? That was magic! It takes just a few staple ingredients and about 20 minutes in the oven.
The best part about this recipe is achieving that perfect texture—tender enough to melt in your mouth, but firm enough so they don’t collapse into apple mush. We nailed the balance between the cinnamon spice and just enough brown sugar, and trust me, the smell alone is worth the effort. You absolutely need these in your life for a quick weeknight treat!

Why You Will Love These Simple Baked Apple Rings
I promise, these are keepers for a reason. They check every box for a busy person who still wants something homemade and lovely!
- They use hardly any ingredients—just spices, butter, and brown sugar!
- Total hands-on prep time is less than 10 minutes, seriously quick.
- The texture hits just right: tender apple surrounded by caramelized spice goodness.
- They are the perfect warm fruit dessert when you need something sweet right now.
Honestly, what’s not to love? They bake up beautifully!
Essential Ingredients for Perfect Apple Rings
The beauty of this recipe lies in its simplicity, but you can’t just grab any old apple! You really need a firm variety that holds its shape when baked, like Fuji or the super crunchy Honeycrisp. Those softer apples will just turn to puree, which isn’t what we’re going for with these lovely rings.
You’ll need just five things total. Here’s your essential shopping list:
- Two large, firm apples (Fuji or Honeycrisp work best).
- One tablespoon of melted unsalted butter—no substitutions here, please!
- A single tablespoon of brown sugar; the molasses flavor is key.
- Half a spoonful of ground cinnamon.
- Just a tiny pinch of nutmeg to round out that warm flavor.
Keep these ready, and you’re halfway there!
Equipment Needed for Baking Your Apple Rings
You don’t need a specialized gadget for this recipe, thank goodness! If you can slice an apple, you’re equipped enough for this project.
Here is what you need to pull out of the cupboard:
- A sharp knife and a sturdy cutting board.
- An apple corer, or just be careful when cutting around the core.
- A small bowl for mixing up that incredible spice coating.
- A standard baking sheet—nothing fancy required!
That’s it! See? So straightforward. Have these ready before you start slicing!
Step-by-Step Instructions to Make Delicious Apple Rings
Okay, you’ve got your apples ready, and your pan is waiting. Now it’s time to make the magic happen! Remember, baking is chemistry, but it’s also intuition. We want tender apple rings, not baked soup, so pay attention to those timings, especially the flip!
Preheat and Prepare Baking Surface
First things first, get your oven going! We need it humming at 375°F (that’s 190°C). While that’s warming up, take a little bit of butter or cooking spray and lightly grease your baking sheet. This keeps our beautiful apple rings from gluing themselves to the pan when they get caramelized.
Preparing the Apple Rings
Wash those apples thoroughly, but don’t peel them! The skin is what holds the ring structure together, so leave it right on. You need to core them out, and then slice them horizontally—that means side to side, not stem to bottom—into slices about 1/4 inch thick. If they are too thin, they will disappear before you know it!
Creating the Cinnamon Spice Coating
Grab that tiny mixing bowl. Into it goes your melted butter, the brown sugar, cinnamon, and just that little bit of nutmeg. Give it a really good whisk until it’s all combined into a beautiful, gritty paste. You could use a simple syrup base instead of butter if you were trying out a different kind of glaze, maybe something you’d find over at simple syrup recipes, but for this classic taste, stick to the butter! Make sure you grab a pastry brush to paint this mixture on. You want that sugar mixture clinging on tight to get that perfect caramelized crust around your delicious baked Apple Rings!
Baking the Apple Rings to Perfection
Lay your coated apple slices onto the prepared sheet in a single layer; they shouldn’t be touching or they’ll steam instead of bake. Pop them into the hot oven for 15 to 20 minutes total. But here’s the key step: about halfway through—say at the 8-minute mark—you need to take them out and flip every single one over. That ensures even browning. You know they are done when they are wonderfully tender when poked with a fork, but they still have some body. We definitely don’t want mushy apple rings!
Tips for Achieving the Best Baked Apple Rings Texture
Getting the texture just right is what separates a good baked apple from a truly fantastic one. It all comes down to the apple you choose. Those firm varieties—Fuji or Honeycrisp—are your friends here; they resist turning to mush way better than a McIntosh would.
If you want them a little softer, which is nice if a little one is eating them, just leave those apple rings in the oven for an extra 5 minutes. Don’t be afraid to test one around the 18-minute mark! But if you like them with just a tiny bit of bite left in the center, pull them out right at 15 minutes. The texture should be yielding—like perfectly ripe caramel.
If you notice your rings are spreading out too much on the pan, it might mean your apples were sliced too thin, or maybe your oven temperature is running a bit low. Keep an eye on the sugar glaze; we want it caramelized, not burnt!
Creative Variations for Your Spiced Apple Rings
While the classic cinnamon and brown sugar is heavenly, these simple baked **Apple Rings** are just begging for a little creative flair! You don’t have to reinvent the wheel, just add a little sparkle. I love adding a tiny pinch of ground cardamom to the sugar mix; it gives it this incredible warm, slightly floral note that complements the baked apple perfectly.
If you’re avoiding refined sugar, swapping the brown sugar for pure maple syrup is a fantastic move. Just use the same amount, though you might need to bake them about 2 minutes longer since maple syrup is wetter. Seriously, try adding the zest of half an orange to that butter mixture—it brightens the whole dessert right up! It pairs perfectly with apple and cinnamon notes, almost like something you’d want to mix into a festive drink like that apple cinnamon fizz mocktail I shared last week!
Don’t stop at spice either; a drizzle of good quality caramel sauce right before serving takes these from simple snack to genuine plated dessert in seconds. Have fun playing around with them!
Serving Suggestions for Warm Apple Rings
What do you do once those perfect, warm baked **Apple Rings** come out of the oven? You definitely can’t just eat them plain, though I’ve certainly done that standing over the cooling rack! These deserve a little something extra to make them feel special, even though the recipe itself is so incredibly easy.
My absolute favorite way—the way I serve them when guests are over—is with the simplest addition: a scoop of good quality vanilla bean ice cream. The contrast between the warm, spiced apple and the cold, creamy ice cream? Oh man, talk about heaven on a plate. If you don’t have ice cream, even a dollop of freshly whipped cream works just fine.
If you’re feeling a bit more decadent, a thin drizzle of caramel sauce elevates these baked apples instantly. It mixes right into that buttery sugar coating and tastes divine. And for those mornings when you want a slightly healthier twist, these are fantastic served alongside a strong, hot cup of coffee. They remind me of the spiced flavors in those cold brew recipes I shared here, but served up warm!
They are simple, they are ready in minutes, and they pair beautifully with anything creamy or deeply roasted in flavor.
Storage and Reheating Instructions for Apple Rings
What if you actually have leftovers of these amazing baked **Apple Rings**? Lucky you! Don’t throw them out—they keep surprisingly well. Just let them cool completely first, and then you need to tuck them snugly into an airtight container. They’ll stay good in the fridge for three, maybe four days.
When you are ready for round two, and trust me, you will be, don’t even think about the microwave! That’s how you get mushy apples. The best way to revive them is a quick blast in the oven. Pop those rings back on a baking sheet at about 325°F (160°C) for just 5 minutes. That crisps the edges up beautifully without overcooking the inside. They’ll taste almost freshly baked—I promise!
Frequently Asked Questions About Baked Apple Rings
It’s amazing how many questions pop up when you’re baking something this simple! People always worry about the texture ending up weird, or maybe they realize halfway through they are out of butter. Don’t stress! I’ve got the answers for the most common things I hear about these baked **Apple Rings**.
Can I make these Apple Rings without butter?
Oh yes, you totally can! My recipe asks for butter because that melted fat is what carries the sugar and spice so beautifully onto the apple surface. But if you’re out, just use an equal measurement of a mild-flavored oil, like canola or refined coconut oil. It won’t have that rich dairy flavor, but it still works like a charm to coat everything and help that spice stick while baking.
What is the best apple to use for baked Apple Rings?
If you take one thing away from this whole recipe, let it be this: You need a firm apple! I sang the praises of Fuji and Honeycrisp because they really hold their shape against the heat. Avoid softer ones like Red Delicious or McIntosh. We want neat, pretty rings, not a pile of sweet, spiced applesauce when you go to flip them halfway through the baking time!
Can I use a different sweetener for these baked Apple Rings?
Absolutely! Brown sugar is my go-to because of that wonderful molasses warmth it brings to the final product. If you prefer honey, go for it! Just keep in mind that honey is sweeter than sugar, so maybe cut back just a tiny bit. Alternatively, pure maple syrup works wonderfully well, but you might bake them for an extra minute or two since the syrup adds a touch more liquid to the coating.
Nutritional Estimate for Simple Baked Apple Rings
So, let’s chat about the numbers for a second. Because these are such a light and simple fruit dessert, the nutrition facts are pretty easy on the waistline! We’re keeping things straightforward like the recipe itself. Remember, these figures are estimates, and you know how baking goes—it all depends on how sweet your apples naturally were or which brand of butter sneaks its way into the mix.
I always run the figures for my own peace of mind, and these baked **Apple Rings** come out looking great for a quick, light treat:
- Serving Size: 4 rings
- Calories: About 95 per serving
- Sugar: Roughly 14 grams (mostly natural fruit sugar plus the added brown sugar)
- Fat: Only about 4 grams total
- Fiber: You get a good boost with 2 grams of fiber!
Because we aren’t deep-frying these or dousing them in heavy cream, the numbers stay low, which I love. Just keep in mind that if you pile on extra caramel sauce or serve them with a giant scoop of ice cream, all those tasty additions will obviously change the nutrition profile!
This is just a guideline, so take it with a grain of salt—or maybe a pinch of cinnamon!
Share Your Baked Apple Rings Success
Now you know my secrets for making the absolute easiest, most satisfying baked **Apple Rings**! I always feel a little giddy when I pull that first tray out of the oven, and I really hope you get that same happy feeling.
I’d be so thrilled if you gave this simple recipe a try! Seriously, don’t be shy, they are nearly foolproof. Once you’ve made your first batch—maybe you stuck with the classic cinnamon, or maybe you tried that fancy cardamom trick I mentioned—I want to know how it went!
Drop a comment down below and let me know what you thought. Were your apples firm enough? Did you add any wild spice twists I haven’t even thought of yet? Even better, if you snapped a picture of your beautifully caramelized apple rings, tag me on social media! Seeing your kitchen creations makes my day every single time. Happy baking, friends!
Print
Simple Baked Apple Rings
- Total Time: 30 min
- Yield: 4 servings 1x
- Diet: Vegetarian
Description
A straightforward recipe for baked apple rings, lightly sweetened and spiced.
Ingredients
- 2 large apples (such as Fuji or Honeycrisp)
- 1 tablespoon unsalted butter, melted
- 1 tablespoon brown sugar
- 1/2 teaspoon ground cinnamon
- Pinch of ground nutmeg
Instructions
- Preheat your oven to 375°F (190°C). Lightly grease a baking sheet.
- Wash the apples. Core the apples, leaving the skin on.
- Slice the apples horizontally into rings about 1/4 inch thick.
- In a small bowl, mix the melted butter, brown sugar, cinnamon, and nutmeg.
- Place the apple rings on the prepared baking sheet in a single layer.
- Brush the sugar-spice mixture evenly over both sides of the apple rings.
- Bake for 15 to 20 minutes, flipping the rings halfway through, until tender but not mushy.
- Remove from the oven and serve warm.
Notes
- Use firm apples for the best texture after baking.
- If you prefer a softer texture, bake for an additional 5 minutes.
- Prep Time: 10 min
- Cook Time: 20 min
- Category: Dessert
- Method: Baking
- Cuisine: American
Nutrition
- Serving Size: 4 rings
- Calories: 95
- Sugar: 14
- Sodium: 2
- Fat: 4
- Saturated Fat: 2
- Unsaturated Fat: 2
- Trans Fat: 0
- Carbohydrates: 16
- Fiber: 2
- Protein: 0
- Cholesterol: 5
Keywords: apple rings, baked apples, cinnamon apples, simple dessert, baked fruit