
Oh, that craving hits you, doesn’t it? That sudden, urgent need for something rich, silky, and just a little bit garlicky. Forget the tubs from the grocery store that taste suspiciously pale! This recipe for The Best Classic Hummus is my absolute gold standard. I spent months tweaking ratios—too much tahini and it’s oily, not enough lemon and it’s flat. But through trial and error (and a whole lot of pita bread!), I cracked the code. It’s shockingly simple, relying on pure technique rather than a massive ingredient list, and trust me, once you nail this simple method, you won’t look back. It’s authentic, it’s fast, and it’s mine!
Why You Will Make The Best Classic Hummus Every Time
Why mess with perfection, right? This isn’t some complicated weekend project; this is your new weeknight dip hero. I keep coming back to this specific preparation because it delivers gourmet results in no time flat. Honestly, it’s addictive!
Quick Prep Time for The Best Classic Hummus
Seriously, we are talking 10 minutes total. That’s less time than it takes to find a decent parking spot at the grocery store! You can whip this up while the kettle is boiling for tea. It’s totally game-changing for last-minute snack emergencies.
Incredibly Smooth Texture
This is the big payoff. We aren’t going for that grainy stuff. By using the right chilling technique (which I’ll show you in a minute!), the food processor turns simple chickpeas into velvet. It’s so creamy you’ll swear I used some secret, fancy Middle Eastern machine, but nope—just standard kitchen gear!
Essential Ingredients for The Best Classic Hummus
When you’re aiming for traditional flavor, you don’t need a huge shopping list. You just need the *right* ingredients handled correctly. I’ve listed exactly what you need below, and believe me, every item plays a crucial role in getting that restaurant-quality texture. Don’t be tempted to cut corners here, especially on the tahini—it makes all the difference!
Ingredient Clarity and Preparation Notes
Let’s talk about getting things ready before they hit the processor. First up, the chickpeas! You must thoroughly drain and rinse that 15-ounce can. We are getting rid of that starchy liquid that can make your final dip taste dull. For the garlic, two cloves, minced nice and fine—you want the flavor, not big chunks you have to chew around. The ice water is our secret weapon for texture, so keep those few tablespoons handy and super cold!
- 1 (15-ounce) can chickpeas, drained and rinsed
- 1/2 cup tahini
- 1/4 cup fresh lemon juice (fresh is non-negotiable, trust me!)
- 2 cloves garlic, minced
- 2 tablespoons olive oil, plus extra for serving
- 1/2 teaspoon ground cumin
- 1/4 teaspoon salt
- 2-4 tablespoons ice water
Expert Tips for Achieving The Best Classic Hummus Texture
People ask me all the time, “How does yours get so smooth? Mine always seems a bit… gritty.” That’s the difference between following instructions and understanding the food! We’re aiming for cloud-like perfection here, and that takes a couple of little tricks that separate the good hummus from The Best Classic Hummus.
The Secret to Ultra-Smooth The Best Classic Hummus: Skinning Chickpeas
If you remember one thing from this whole recipe, let it be this: if you want true, restaurant-level silkiness, you need to peel your chickpeas. I know, I know! It sounds tedious. You dump the canned ones in a bowl of water, gently rub them between your hands, and the skins float away. It’s a little messy, but those thin papery skins are what create that slight graininess. Trust me, taking five extra minutes to slip those skins off makes the resulting chickpea dip unbelievably creamy.
Using Ice Water for Creaminess
When you’re blending, the mixture heats up. Heat breaks down whatever structure we are trying to build! Adding ice water—and I mean *ice* cold—keeps the whole paddle cool and helps the fat and water emulsify perfectly while the motor is running. If you’re fresh out of ice, just use the coldest tap water possible. This cold shock is what gives you that gorgeous volume and lightness you’re looking for in your dip.
If you prefer a crunchier snack later, you can always roast the leftovers! Check out my recipe for the best roasted chickpeas—they make an amazing topping for this hummus!
Step-by-Step Instructions for The Best Classic Hummus
Okay, here is where the real magic starts! Because this recipe is so simple, the technique really matters. Don’t get distracted multitasking while the processor is running, or you might miss the perfect moment where the mixture transforms. Remember, this is just like making my famous guacamole—timing is everything!
Initial Blending of The Best Classic Hummus Base
First things first, get everything into your food processor bowl except the ice water. That means the chickpeas, your tahini, the bright lemon juice, the minced garlic, the olive oil, the cumin, and the salt. Put the lid on tight! You want this mixture to churn away until everything is completely uniform. It’s going to look thick, almost like a coarse paste at this point. Stop and scrape down those sides once or twice to make sure absolutely nothing is hiding up there.
Achieving the Perfect Creamy Consistency
This is the crucial moment for achieving The Best Classic Hummus! With the motor running—you hear that steady whir?—start slowly drizzling in that super cold ice water. Pour it in one tablespoon at a time. You will literally see the hummus change right before your eyes, thickening up and lightening in color as the air incorporates. Don’t rush this! Keep adding water until it hits that pourable, super-creamy texture you’re dreaming about.

Final Seasoning and Presentation
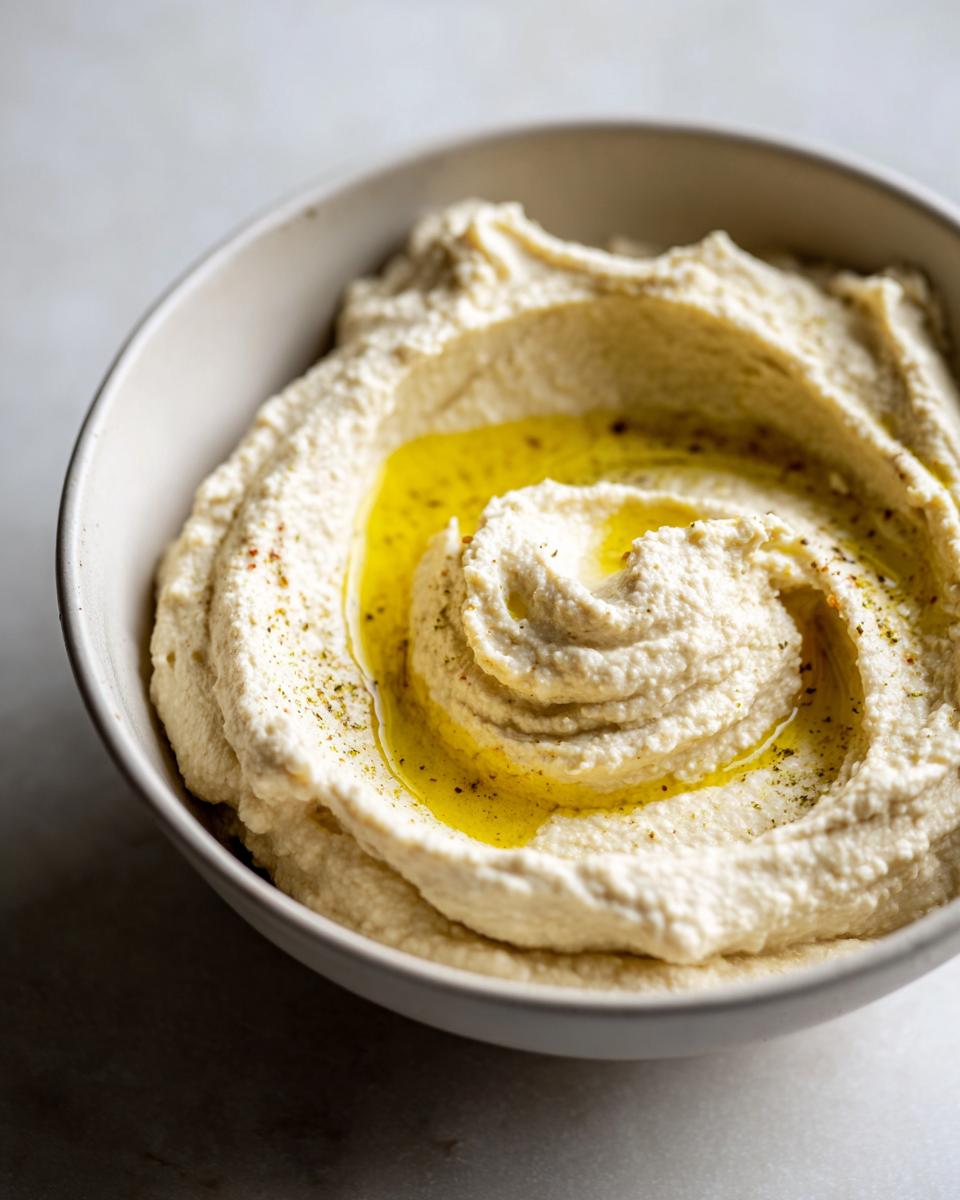
Once you have the right consistency, stop the machine immediately. Now is taste-test central! Dip a little spoon in—is it zesty enough? Does it need just a pinch more salt to make those flavors pop? Adjust as needed. Then, transfer the whole glorious batch into your serving bowl. Make a little swirl on top with the spoon, drizzle generously with good olive oil, and watch it disappear!
Serving Suggestions for The Best Classic Hummus
Okay, you’ve made the creamiest dip on the planet—now what do you serve it with? Honestly, I love just eating it straight with a spoon, but that’s not very polite when company comes over! The classic pairing, of course, is warm pita bread, but don’t stop there. This vibrant homemade hummus is fantastic scooped up with crunchy cucumber slices or colorful bell pepper sticks if you need something lighter. Maybe you need a base for roasted veggies or even grilled chicken? Think of it as a savory canvas!
For a real flavor elevation, I sometimes swirl in a little bit of homemade pesto—you can see how I make mine right here—just before serving. It changes the whole game for The Best Classic Hummus!
Storage and Make-Ahead Tips for Your Hummus
Since this amazing batch of The Best Classic Hummus comes together in mere minutes, you might think it’s just for immediate enjoyment. Wrong! This holds up beautifully, which is a lifesaver for my weekly meal prepping. I often make a double batch on a Sunday just so I have healthy snacks ready to go for the rest of the week.
The key to keeping it fresh is airtight storage. Transfer your finished hummus into a sealed container—a glass jar works best, honestly. You don’t want to drizzle that final garnish of olive oil until you are ready to serve it from that container, though. If you drizzle it before sealing it up, it can sometimes get a little weirdly separated after a few days in the cold.
In the refrigerator, this creamy dip stays fantastic for a solid four to five days. If you notice it seems a little stiff when you pull it out after a few days, don’t panic! Just stir in a tiny splash—maybe half a teaspoon—of fresh lemon juice or cold water. That helps loosen it up and brings the bright flavors right back to the front. But seriously, my batch rarely makes it past day three because we devour it!
Frequently Asked Questions About Making The Best Classic Hummus
I get so many messages about people trying this recipe for the first time, which is wonderful! Most questions revolve around texture or flavor adjustments. It’s all part of the fun of learning to make amazing The Best Classic Hummus at home. Here are the things I hear most often when folks are experimenting with their own batch of this delicious chickpea dip.
Can I make this hummus without a food processor?
It’s tricky, but possible! A food processor is truly the best tool because of how it crushes and whips simultaneously. Your next best bet is a high-speed blender, like a Vitamix. You’ll need to add those liquid ingredients, especially the ice water, very carefully because blenders tend to grab onto solids more fiercely. Just be prepared that the texture might lean a little smoother—less light and fluffy—compared to the whipped perfection we get from the wide bowl of a standard processor.
Why is my chickpea dip bitter?
That’s usually one of two culprits, honey. First, raw garlic can be harsh; if your cloves were huge, that might be it. I recommend pulsing the garlic with the lemon juice alone for a quick 10 seconds before adding anything else—it softens the bite a bit. Second, check your tahini! Poor quality tahini, or tahini that’s been sitting around too long, easily turns bitter when processed. Always taste your tahini first before using it in The Best Classic Hummus; if it tastes off on its own, your dip will too.
How long does The Best Classic Hummus last in the fridge?
If you managed not to eat it all in one sitting, this recipe keeps wonderfully! Because we use fresh lemon juice, which acts as a natural preservative, it performs really well. I find that it tastes best within the first three days, but it stays perfectly good for about five days refrigerated in an airtight container. If you’re interested in making things like nut milks ahead of time, check out my guide on how to make almond milk without soaking—it’s great for other make-ahead kitchen prep!
Estimated Nutritional Information for The Best Classic Hummus
Now, while I really believe in cooking based on taste, not just by the numbers, I also know some of you like to keep track of what you’re eating. So, here is the breakdown for The Best Classic Hummus based on the standard serving size of 1/4 cup. Remember, this is an estimate, right? The brand of tahini you use or how much olive oil you ultimately drizzle on top can change these numbers slightly, so take it as a helpful guide!
This recipe is naturally vegetarian and vegan-friendly, which is just another reason I keep this chickpea dip in heavy rotation at my house. It’s packed with fiber and healthy fats, making it a satisfying appetizer that won’t weigh you down before the main course!
- Serving Size: 1/4 cup
- Calories: 180
- Fat: 12g (with 10.5g being unsaturated—hello, heart health!)
- Sodium: 250mg
- Carbohydrates: 14g
- Protein: 6g
- Fiber: 4g
- Cholesterol: 0mg
See? It’s a powerhouse snack! I always tell folks that as long as you stick to using real ingredients like fresh lemon juice and good tahini, you’re golden. It’s certainly better for you than grabbing something processed off the shelf!
Share Your Experience Making The Best Classic Hummus
Now that you have whipped up your very own batch of this heavenly, creamy The Best Classic Hummus, I truly want to hear all about it! Don’t be shy! Did you remember to peel those chickpeas? Did the ice water trick work its magic on your texture? Head down to the comments section below and leave a rating—even just a quick star rating helps other home cooks know this recipe is worth their time.
And please, if you took a picture of your beautiful, perfectly swirled dip topped with that rich olive oil, tag me on social media! I absolutely live for seeing your kitchen successes. Sharing your results keeps the inspiration flowing for me, and it shows everyone else how easy it is to make authentic Middle Eastern food right at home. Happy dipping!
Print
The Best Classic Hummus
- Total Time: 10 min
- Yield: About 1.5 cups 1x
- Diet: Vegan
Description
A simple recipe for making smooth, traditional hummus.
Ingredients
- 1 (15-ounce) can chickpeas, drained and rinsed
- 1/2 cup tahini
- 1/4 cup fresh lemon juice
- 2 cloves garlic, minced
- 2 tablespoons olive oil, plus more for serving
- 1/2 teaspoon ground cumin
- 1/4 teaspoon salt
- 2–4 tablespoons ice water
Instructions
- Combine chickpeas, tahini, lemon juice, garlic, olive oil, cumin, and salt in a food processor.
- Process until the mixture is smooth, scraping down the sides as needed.
- With the motor running, slowly add ice water, one tablespoon at a time, until the hummus reaches your desired creamy consistency.
- Taste and adjust salt or lemon juice if necessary.
- Transfer hummus to a serving bowl, drizzle with olive oil, and serve.
Notes
- For extra smooth hummus, remove the skins from the chickpeas before processing.
- If you do not have ice water, use cold tap water.
- Prep Time: 10 min
- Cook Time: 0 min
- Category: Appetizer
- Method: Food Processing
- Cuisine: Middle Eastern
Nutrition
- Serving Size: 1/4 cup
- Calories: 180
- Sugar: 2
- Sodium: 250
- Fat: 12
- Saturated Fat: 1.5
- Unsaturated Fat: 10.5
- Trans Fat: 0
- Carbohydrates: 14
- Fiber: 4
- Protein: 6
- Cholesterol: 0
Keywords: hummus, chickpea dip, tahini, Middle Eastern dip, vegetarian appetizer