
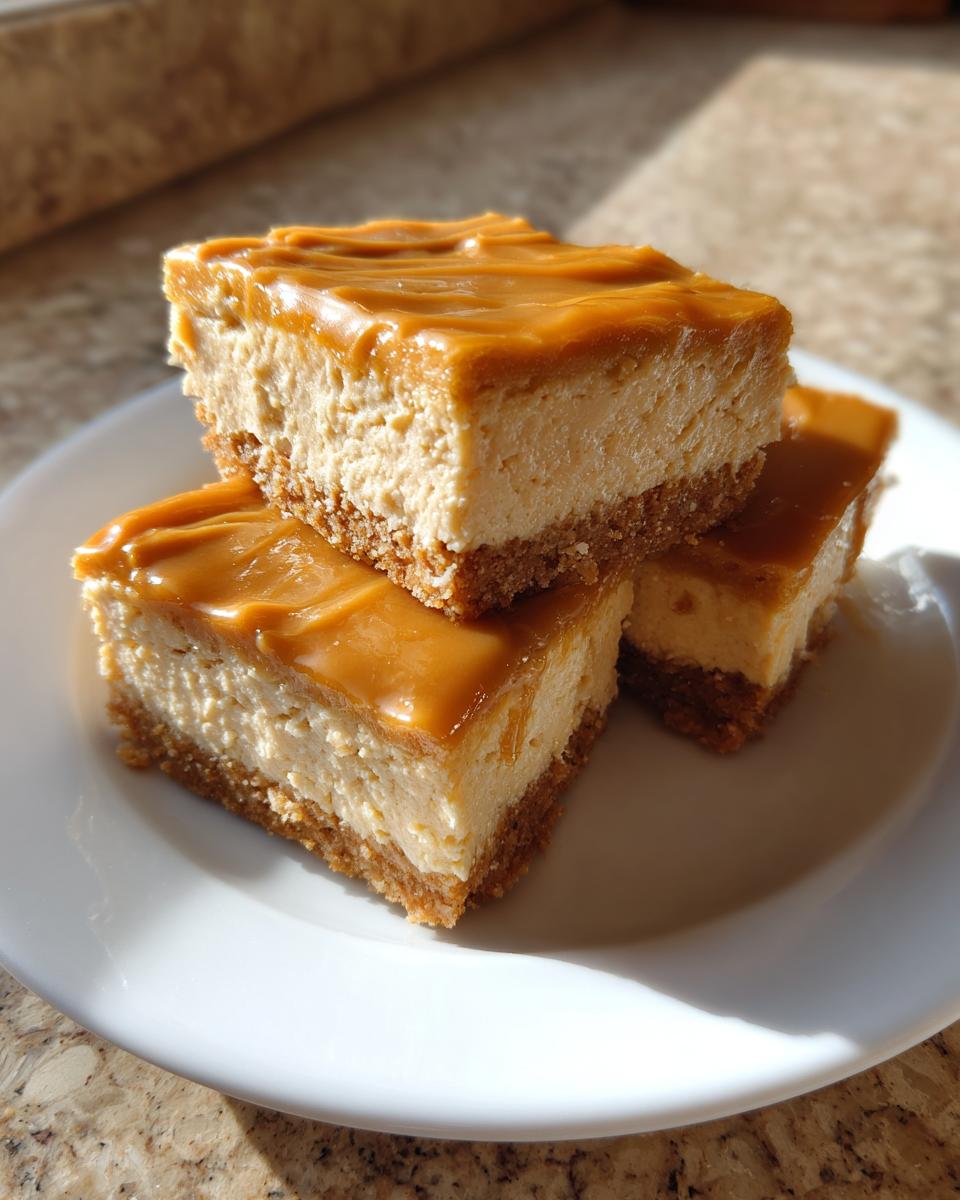
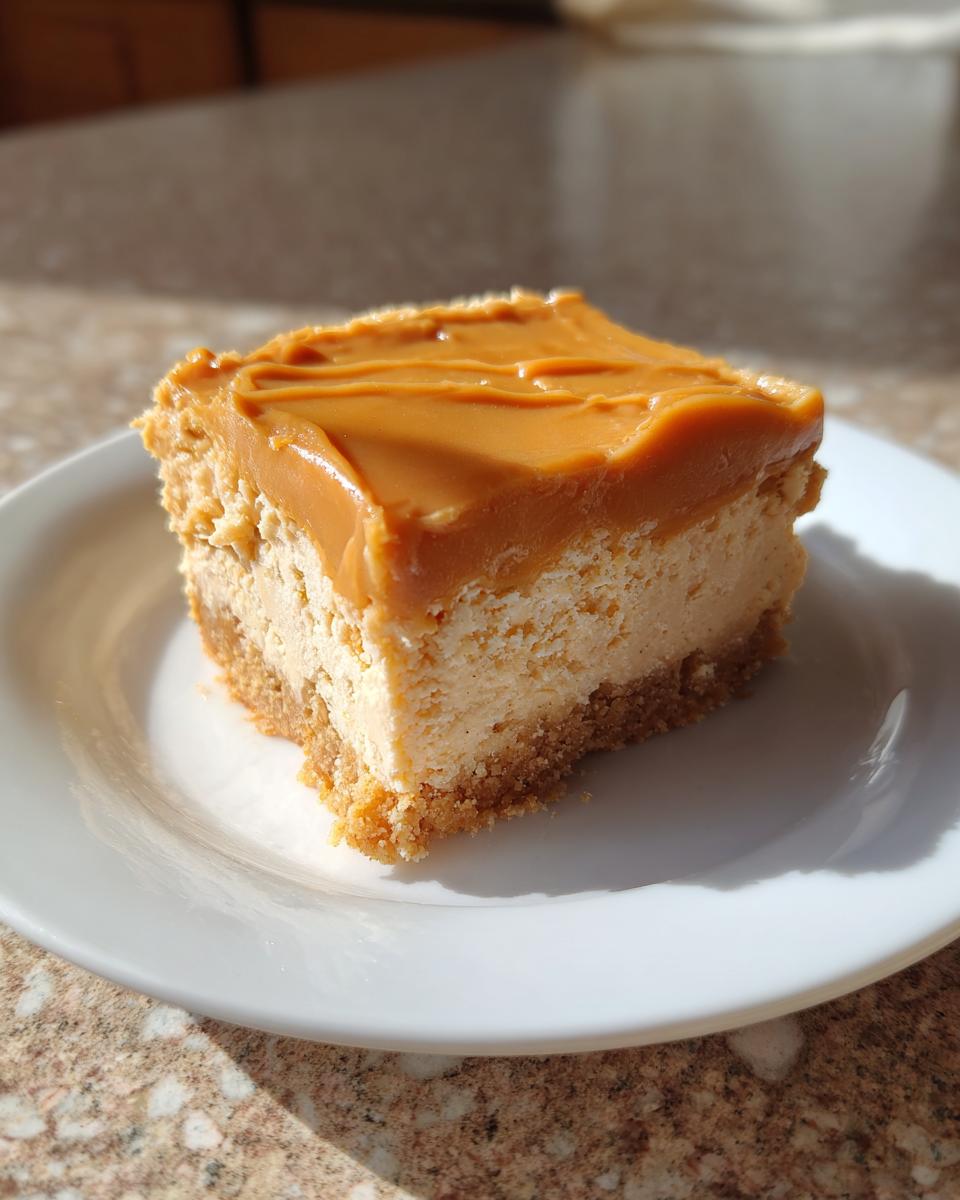
Oh my goodness, if you love peanut butter, you know there’s nothing quite as satisfying as that salty, smooth flavor hitting the creamy tang of cheesecake. I figured out how to combine those two things into pure magic, and trust me, these Peanut Butter Cheesecake Squares are my absolute go-to when I need dessert fast. We’re talking about a super sturdy, buttery graham cracker crust, that rich, slightly sweet cheesecake filling, and it all gets topped with a dreamy layer of peanut butter spread! This isn’t one of those fussy, spring-form pan recipes either; we’re baking these right in an 8×8 pan, which is why this recipe is such a staple at every single family gathering I host. It just works every single time!

Why You Will Love These Peanut Butter Cheesecake Squares
I’m telling you, once you try this recipe, you’ll understand why I make it constantly. It’s one of those desserts that seems complicated because it’s so incredibly delicious, but honestly, it barely takes any time at all! It’s just pure, glorious payoff for very little effort. If you need a fail-safe dessert, bookmark this immediately!
- The flavor payoff is huge—rich peanut butter mixed seamlessly with classic cheesecake tang. You just can’t beat that combination.
- It’s fantastic made ahead of time! You actually *have* to chill these squares, so you can bake them the day before your party and forget about dessert stress. So lovely!
- The texture is just spot on. Every bite offers that satisfying little crunch from the crust followed by the melt-in-your-mouth creamy filling.
Quick Prep Time for Peanut Butter Cheesecake Squares
Seriously, grab your stuff and get ready because we are in and out of the kitchen in about 20 minutes of active time. That’s barely enough time to find a good podcast! Because the crust only needs that quick ten-minute blast in the oven before we pour the filling over it, the whole process moves along really smoothly. It’s instant gratification baking, truly.
Perfect Texture Contrast in Every Bite
This is where the magic happens, my friend. You start with that buttery, firm graham cracker crust—it doesn’t crumble away on you, it stands up tall! Then you hit that decadent, smooth cheesecake layer which is so light, yet perfectly dense. And don’t forget the top layer! That final spread of peanut butter and powdered sugar sets up just slightly firm when chilled, giving you a gentle resistance before you sink into the creamy center. It’s textural heaven!
Essential Ingredients for Perfect Peanut Butter Cheesecake Squares
Okay, let’s talk supplies! Unlike some ridiculously complicated desserts that require you to hunt down obscure powders, this recipe uses things you probably already have lurking in your pantry, which is just another reason I adore these squares. You want to make sure everything is ready to go before you start mixing, because once you start on the crust, we move fast!
For the crust, you need 1 1/2 cups of graham cracker crumbs, just 1/4 cup of granulated sugar, and six tablespoons of unsalted butter, all melted together. Simple, right?
Now for the star of the show, the filling! We start with a full 16 ounces of cream cheese—and this is where we get serious—followed by 1 cup of granulated sugar. Then comes that essential 1/2 cup of creamy peanut butter, two large eggs, and just one teaspoon of vanilla extract. That’s it for the filling!
Finally, for that amazing topping, you only need an additional 1/2 cup of creamy peanut butter mixed with 1/4 cup of powdered sugar. Remember, if you grab natural peanut butter, you might need to drain off a bit of the oil first, or it can get a little messy, so stick to the standard kind for the best texture here!
Ingredient Notes and Substitutions for Peanut Butter Cheesecake Squares
Listen to me on this one tip, because it’s the difference between a flawless top and a slightly lumpy texture surprise: you absolutely *must* use room temperature cream cheese. If you try to beat cold cream cheese, you’ll end up with little chunky bits no matter how long you run your mixer. Let that block sit out on the counter for at least an hour until you can easily press a finger into it.
I always use creamy style peanut butter for both the filling and the topping. If you use crunchy, you lose that velvety smoothness in the filling, and that’s just a tragedy when you’re aiming for cheesecake perfection. If you like your toppings a little sweeter, a tiny drizzle of simple syrup mixed into the topping glaze can make those final squares shine, but usually, the powdered sugar does the trick just fine!
Step-by-Step Instructions for Baking Peanut Butter Cheesecake Squares
Okay, now that we have all our gorgeous ingredients ready (remember that soft cream cheese!), it’s time to put this dessert together. It’s pretty straightforward, but speed matters a little bit once we start pouring everything. Make sure your oven is warmed up and ready to go—we need it at 350 degrees F (175 degrees C).
First things first, grab that 8×8 pan. I always line mine with parchment paper now, letting a good overhang hang over two sides. This simple thing saves your life later when you have to lift the whole thing out in one piece! It’s a trick I learned the hard way, believe me.
Preparing the Graham Cracker Crust for Peanut Butter Cheesecake Squares
In a bowl, just toss together your graham cracker crumbs, that 1/4 cup of granulated sugar, and the six tablespoons of melted butter. Mix it up until it looks like wet sand; you know the texture I mean! Then, press that mixture down *really* firmly into the bottom of your prepared pan. Don’t be shy here; use the flat bottom of a glass or just your knuckles to pack it tightly. Pop that pan into the 350-degree oven for a quick 10 minutes just to set it up before we keep going. Once that time is up, pull it out and let it cool just a touch while you whip up the filling.
Mixing the Creamy Cheesecake Filling
Time for the main event! In a large bowl, beat that softened cream cheese with the full 1 cup of granulated sugar until it’s perfectly smooth—no lumps allowed here! This is important. Once it’s creamy, beat in that first 1/2 cup of peanut butter, the two eggs, and the vanilla. You only want to mix this until it’s *just* combined. Seriously, stop mixing the second the flour streaks disappear. Overmixing the eggs incorporates too much air, and that’s exactly how you get those dreaded cracks, which no one wants on their beautiful cheesecake squares.
Baking and Cooling Peanut Butter Cheesecake Squares
Gently pour that luscious filling right over your slightly cooled crust. Smooth the top, and send it back into the oven for about 30 to 35 minutes. You’re looking for the edges to look set and firm, but the very center should still have the tiniest little wobble, like Jell-O. If you bake it until the center is rock solid, it’s going to dry out! When it looks right, take it out and let it cool completely on a wire rack. Patience is key now! It needs to reach room temperature before we even think about the topping.
Creating and Applying the Peanut Butter Topping
While that’s cooling, whisk together the final 1/2 cup of peanut butter with the 1/4 cup of powdered sugar until you have a smooth, spreadable glaze. Taste it—it’s amazing! Spread this topping evenly over the completely cooled cheesecake layer. The cooling step is non-negotiable here, or the topping will just melt right into the filling. Once it’s spread nicely, cover the whole thing and pop it into the refrigerator for at least two hours. Chilling is what sets the cheesecake for cutting, so don’t skip those two hours!
Tips for Success When Making Peanut Butter Cheesecake Squares
I’ve made this recipe enough times now that I know a few little tricks that take these squares straight from great to absolutely flawless. The baking is easy, but the finishing touches are what seal the deal, especially when it comes to getting those perfect, clean-cut squares we all want for serving. By the way, if you happen to have leftover graham crackers, you should absolutely try making homemade croutons—they are surprisingly amazing!
First off, avoid cutting the squares while the dessert is still totally chilled and rigid. If you try to slice it straight from the cold fridge, it often results in jagged edges. Let it sit on the counter for just about fifteen minutes before you slice it. This allows the topping and the filling to warm up microscopically, giving your knife a much cleaner path.
The Parchment Paper Trick for Easy Peanut Butter Cheesecake Squares
This is my absolute favorite part of the whole process, and it saves you from scraping sticky cheesecake bits off the pan! Remember how I told you to line that 8×8 pan with parchment paper, leaving overhang on two opposite sides? Well, when the cheesecake is completely chilled and set—after those two hours in the fridge—you just grab those two paper ‘handles’ and lift the entire block right out of the pan onto a cutting board!
It lifts out in one beautiful, intact slab. Then, you can use a warm, sharp knife—run it under hot water and wipe it dry between cuts—to slice perfectly neat squares. It makes transport and serving unbelievably easy. You get beautiful bars every single time without any mess!
Storage and Make-Ahead Tips for Peanut Butter Cheesecake Squares
I always recommend making these a day ahead, honestly! Chilling is essential for the topping to truly set up, and letting them sit overnight just deepens those peanut butter and cream cheese flavors—it’s fantastic. Keep your glorious Peanut Butter Cheesecake Squares stored tightly covered in the refrigerator. They stay fantastic for about four or five days, and that’s usually when I run out!
If you just can’t stop yourself from making a double batch, good news: these freeze beautifully. Wrap individual squares tightly in plastic wrap, then tuck them into a freezer-safe zip-top bag. They’ll be perfect lurking in the freezer for up to two months. Just let them thaw overnight in the fridge before you’re ready to enjoy that creamy slice!
Serving Suggestions for Your Peanut Butter Cheesecake Squares
These Peanut Butter Cheesecake Squares are so rich, they really don’t need much fuss, but a little accompaniment never hurts, right? They pair perfectly with something slightly bitter or cooling to cut through all that sweetness. A strong pot of hot black coffee is always my first choice, or maybe I’ll put together some classy cold coffee drinks if it’s a hot afternoon.

If you want to get fancy, try a tiny drizzle of high-quality semi-sweet chocolate sauce right over the top before serving. A little sprinkle of coarse sea salt on that peanut butter layer also really wakes up the flavor, giving you that amazing sweet-and-salty punch!
Variations on Classic Peanut Butter Cheesecake Squares
While I truly think this recipe, as written, is the pinnacle of peanut butter cheesecake bliss, I know everyone loves a little customization opportunity! Don’t worry, we aren’t messing with that essential crust or the smooth filling too much, but you can totally tweak things up to match your craving of the moment. These are simple little changes that add a big flavor boost!
My absolute favorite little addition is tossing some mini semi-sweet chocolate chips right into the **Peanut Butter Cheesecake Squares** filling mixture just before pouring it over the crust. I usually aim for about half a cup. They melt just a little bit during baking, giving you these lovely pockets of melted chocolate throughout the creamy layer. Just fold them in gently with a rubber spatula!
Another idea that I love, especially for grown-up gatherings, is upgrading the crust. Instead of just standard graham crackers, try crushing up some Nutter Butter cookies or even pretzels along with the crumbs! If you use pretzels, maybe skip adding the extra salt on top later. It gives the base an extra layer of flavor that plays so nicely off the peanut butter topping.
And finally, you have to try finishing these squares with a little dusting of flakey sea salt—I mean, *flakey* salt, not that fine table stuff! Sprinkle just a few crystals over the peanut butter topping while it’s still soft from the fridge. It’s just a tiny touch, but that salty/sweet punch elevates the whole dessert instantly. It makes them look professional, too!
Frequently Asked Questions About Peanut Butter Cheesecake Squares
Oh, I get so many questions about these—and that’s just proof that everyone wants a slice! Dealing with cheesecake, even when it’s in simple square form, can sometimes be tricky, so I figured I’d answer the stuff I hear most often right here so you can bake these with total confidence. We bake this recipe because it’s fast, but knowing *why* you do certain steps makes all the difference.
Can I make Peanut Butter Cheesecake Squares without baking the crust?
You absolutely *can* make a no-bake crust, but I strongly recommend against skipping that initial 10-minute bake time for this specific recipe. When you bake the graham cracker crust for just a little bit, the butter truly sets up and fuses those crumbs together perfectly. If you skip that, your crust might end up a little sandy or crumbly when you go to cut the final squares. For the firmest base possible to hold that rich filling, give it those ten minutes—it’s worth the tiny wait!
Why did my Peanut Butter Cheesecake Squares crack?
Ugh, cracks! They are the nemesis of every cheesecake baker, right? When my Peanut Butter Cheesecake Squares crack, it always comes down to one of two things, and I’ve made both mistakes myself. The number one reason is always overmixing the filling after the eggs go in. Remember how I said mix until *just* combined? If you keep beating it, you introduce tons of air bubbles, and when those bubbles try to escape during baking, they rip little valleys in your smooth top. The second reason is overbaking! If you bake until the center is completely rigid, it tightens up too much as it cools and cracks.
If cracking really bothers you, leave them for the full two hours of chilling time—the chill helps redistribute the moisture and keeps everything stable. If you’re feeling adventurous and want to read more about making sure your topping doesn’t shrink, check out my post on easy no-bake cheesecake recipes; those techniques crossover really well!
Nutritional Estimates for Peanut Butter Cheesecake Squares
Now, I know we aren’t baking these squares because we are counting calories—why would you do that when they taste this fabulous?—but I always like to give you guys a general idea of what you’re diving into! We’re looking at rich ingredients, so they pack a satisfying punch, which is why one square is usually totally enough to cure any sweet tooth!
Here is the general nutritional breakdown for one 16th slice of these glorious treats:
- Calories: Around 300
- Fat: 18g (Broken down into 8g Saturated Fat)
- Carbohydrates: 30g
- Protein: 7g
- Sugar: 25g
Please know these numbers are just estimates, you know? They really depend wildly on the specific brand of peanut butter you use, or if you went heavy on the butter in the crust while packing it down! If you swap out ingredients—say, using a low-sugar peanut butter—those numbers will shift. So treat this info like a fun suggestion rather than exact science. The taste? That’s guaranteed!
Print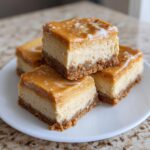
Peanut Butter Cheesecake Squares
- Total Time: 130 min
- Yield: 16 squares 1x
- Diet: Vegetarian
Description
Simple recipe for baked peanut butter cheesecake squares with a graham cracker crust.
Ingredients
- 1 1/2 cups graham cracker crumbs
- 1/4 cup granulated sugar
- 6 tablespoons unsalted butter, melted
- 16 ounces cream cheese, softened
- 1 cup granulated sugar
- 1/2 cup creamy peanut butter
- 2 large eggs
- 1 teaspoon vanilla extract
- 1/2 cup creamy peanut butter, for topping
- 1/4 cup powdered sugar, for topping
Instructions
- Preheat your oven to 350 degrees F (175 degrees C). Line an 8×8 inch baking pan with parchment paper, leaving an overhang on two sides.
- Combine graham cracker crumbs, 1/4 cup sugar, and melted butter in a bowl. Press the mixture firmly into the bottom of the prepared pan.
- Bake the crust for 10 minutes. Remove from the oven and set aside.
- In a large bowl, beat the softened cream cheese and 1 cup sugar until smooth.
- Beat in 1/2 cup peanut butter, eggs, and vanilla extract until just combined. Do not overmix.
- Pour the cream cheese mixture over the baked crust.
- Bake for 30 to 35 minutes, or until the edges are set and the center has a slight jiggle.
- Let the cheesecake cool completely on a wire rack.
- For the topping, mix 1/2 cup peanut butter and powdered sugar until smooth. Spread this mixture evenly over the cooled cheesecake.
- Chill the squares in the refrigerator for at least 2 hours before cutting into squares.
Notes
- Use room temperature cream cheese for the smoothest filling.
- For easier removal, lift the cheesecake out of the pan using the parchment paper overhang before cutting.
- Prep Time: 20 min
- Cook Time: 45 min
- Category: Dessert
- Method: Baking
- Cuisine: American
Nutrition
- Serving Size: 1 square
- Calories: 300
- Sugar: 25g
- Sodium: 150mg
- Fat: 18g
- Saturated Fat: 8g
- Unsaturated Fat: 10g
- Trans Fat: 0g
- Carbohydrates: 30g
- Fiber: 1g
- Protein: 7g
- Cholesterol: 40mg
Keywords: peanut butter, cheesecake, squares, graham cracker crust, dessert, baked