
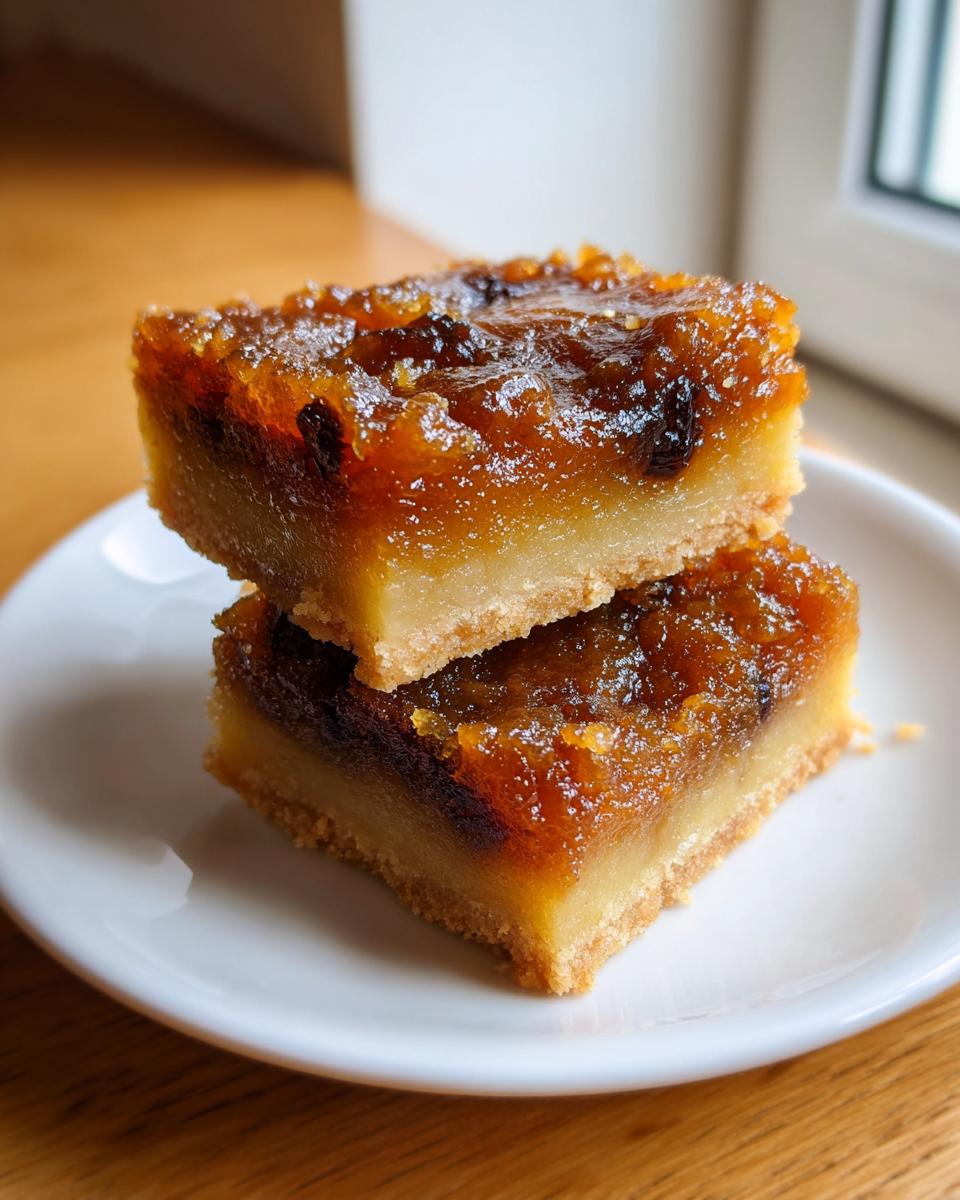
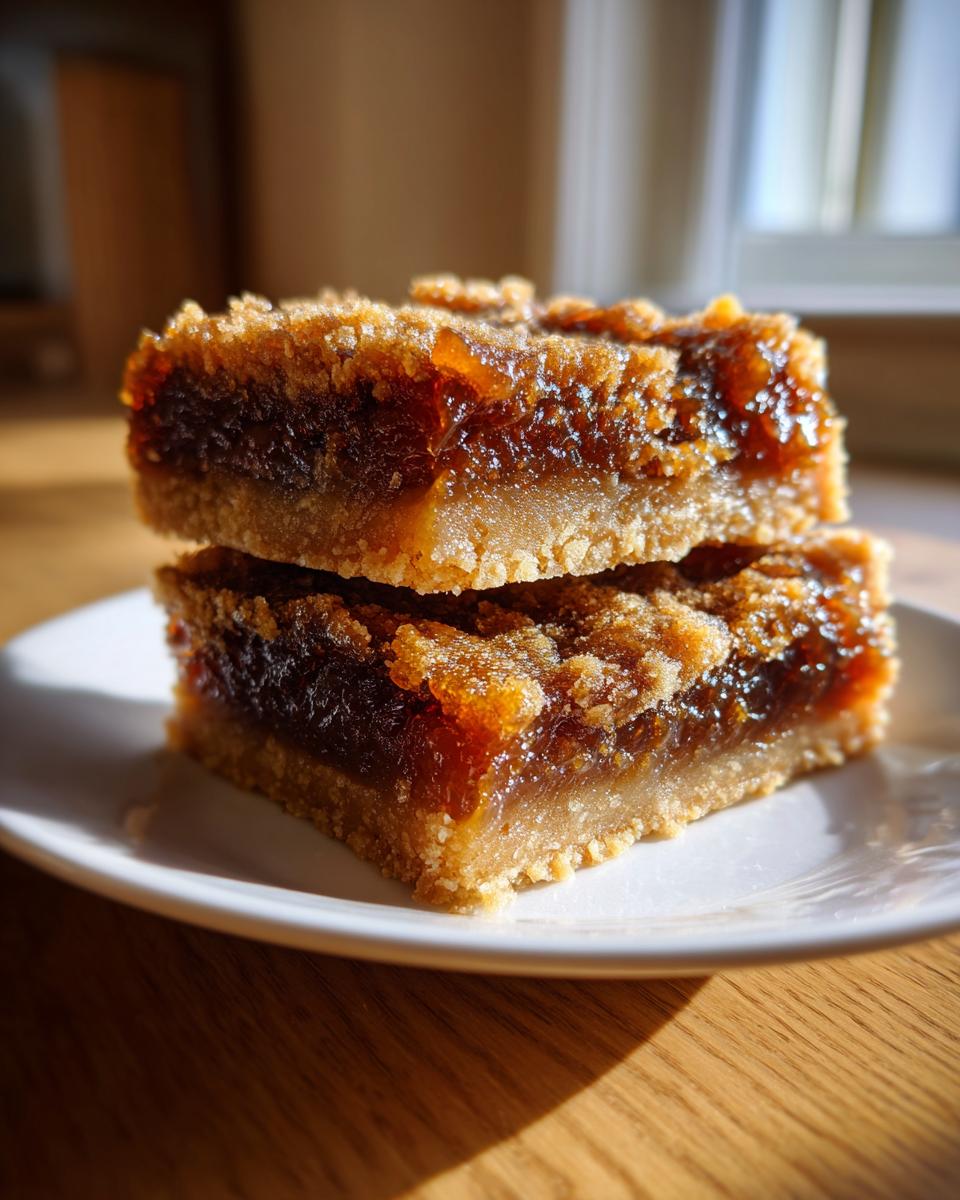
Sometimes you just need a dessert that tastes like pure, unapologetic comfort, right? I’m talking about that rich, buttery shortbread base topped with a filling so perfectly gooey it practically begs to be made immediately. Forget fussy crusts and uneven fillings; this recipe for classic Butter Tart Squares is the one that finally made me stop testing others. My favorite memory is sneaking one straight from the cooling rack when I was supposed to wait—that warm, caramel-like center was heavenly!
I spent way too much time messing around with different ratios, but I finally landed on a process that delivers that signature sweet, sticky texture every single time. Trust me, we’ve refined this recipe through countless baking sessions so yours comes out consistently perfect. It’s quick, it’s unbelievably satisfying, and honestly, they disappear frighteningly fast at any party I bring them to.
Why You Will Love These Butter Tart Squares
Honestly, there are a dozen ways to make a tart bar, but this specific recipe for Butter Tart Squares just hits different. I’m sticking with this one because it’s simple and guarantees that incredible texture. Check out why this batch beats all the others:
- The shortbread base comes together in minutes—no fancy rolling required!
- That filling sets up perfectly gooey, never hard or grainy.
- They are the ultimate nostalgic, comforting North American treat.
- You only need about 40 minutes of actual baking time.
It is seriously this easy, and the payoff in rich, buttery flavor is unbelievable.

Essential Ingredients for Perfect Butter Tart Squares
You don’t need a pantry full of weird specialty items to make these incredible Butter Tart Squares. Most of this is stuff you probably have right now! But listen to me: the state of the butter is everything for the base. Don’t skip using really cold, cubed butter—it’s the secret to that perfect sandy crumble!
I’ve broken down what you need exactly for both layers. Precision here definitely pays off in that beautiful contrast between the crisp base and the sticky top!
For the Shortbread Base
This is where we build the foundation, so keep everything cool. That one cup of flour has to go a long way!
- 1 cup all-purpose flour
- 1/2 cup **cold unsalted butter, cubed** (Seriously, cube it and make sure it’s cold!)
- 1/4 cup granulated sugar
- 1/4 teaspoon salt
For the Gooey Butter Tart Filling
This is the liquid gold layer that makes these squares famous. Make sure your eggs are only lightly beaten—we are whisking them into heat, so we don’t want them foamy!
- 1 cup packed brown sugar
- 1/2 cup corn syrup (This is what gives you that classic chew!)
- 1/4 cup heavy cream
- 2 large eggs, **lightly beaten**
- 1 teaspoon vanilla extract
- 1/2 cup raisins or pecans (optional—I love the pecans myself!)
Baking the Ultimate Butter Tart Squares: Step-by-Step Instructions
Okay, now for the fun part! Don’t stress about this; it’s actually a really fast recipe once the oven is hot. We are baking the base first, which gives us time to whip up the filling while we wait. This two-step baking process is key to getting that wonderful distinction between the crumbly shortbread and the sticky top!
Preparing the Pan and Pre-Baking the Butter Tart Squares Base
First things first: get that oven humming at 350 degrees F (175 degrees C)! You need an 8×8 inch pan, and listen closely—line it with parchment paper but make sure you let the paper hang over two sides. This overhang is your homemade lifting handle later, so plan for it!
Next, attack the base ingredients. Toss the flour, sugar, and salt together, and then drop in your cold butter cubes. You have to work quickly here. Use your fingers—I find pastry blenders make too much mess—and rub that cold butter into the dry goods until it looks like coarse, wet sand. Don’t overwork it, we want those little pockets of butter that melt beautifully.
Press that mixture down firmly and evenly into your prepared pan. Bake the base for exactly 15 minutes until it looks just kissed golden. Don’t wander off; we need it hot for the next step!
Creating the Signature Gooey Butter Tart Filling
While that base is getting happy in the oven, make the filling. Grab a saucepan over medium heat and mix your brown sugar, corn syrup, and heavy cream. You just need to stir this until the sugar dissolves completely and it looks like smooth, warm caramel. Take it off the heat immediately once it’s smooth! If you needed a very thin syrup base for something else later, you could check out how to make a simple syrup recipe, but here we need the thickness!
In a separate bowl, quickly whisk your lightly beaten eggs with the vanilla extract. Now for the careful part: you need to temper those eggs. Slowly, slowly drizzle that warm sugar syrup into the eggs while whisking constantly. If you dump it, you get scrambled eggs, and nobody wants that surprise in their Butter Tart Squares! Once it’s all combined and silky smooth, stir in your optional raisins or pecans if you’re using them.
Final Bake and Cooling for Perfect Butter Tart Squares
The pre-baked base should be ready. Carelessly pour that gorgeous, gooey filling right over the hot crust. It will spread mostly evenly, but you can nudge it gently. Pop the whole thing back into the oven for another 20 to 25 minutes.
How do you know it’s done? The edges should look set, and a toothpick inserted near the center should come out mostly clean, maybe with a few moist crumbs clinging—that’s your indicator for ultimate gooeyness! If it comes out totally dry, you’ve gone too far, oops! The most crucial step follows: let these cool down completely, ideally for a couple of hours, before you even think about cutting them. If you cut them warm, the filling oozes everywhere, and the squares fall apart!

Tips for Success with Your Butter Tart Squares
You’re so close to amazing Butter Tart Squares! But I have a few secrets that keep my filling perfectly sticky and prevent that dreaded hard, dry center. If you follow these little rules, you’ll nail the texture every time. Honestly, preventing over-baking is the number one challenge here.
First, remember that the filling is still cooking slightly after it leaves the oven. Pull them out when a toothpick is *mostly* clean—that slight wetness guarantees chewiness later on. If you wait until it’s totally dry, it’ll set up hard as rock when it cools, which is not the texture we want! Also, make sure you press that shortbread base down firmly before the first bake; if it’s too loose, the boiling hot filling will bubble right up and make the crust soggy.
And speaking of baking, you can’t just walk away and forget them! While I’m not usually one to tell people to skip chilling their desserts—though sometimes chilling makes things taste better, like when I talk about avoiding the fatal mistake in making tea, you have to chill these bars before cutting. If you try to slice warm Butter Tart Squares, they just liquify everywhere. A good hour in the fridge ensures you get those clean, beautiful squares.
Ingredient Notes and Substitutions for Butter Tart Squares
Let’s talk swaps for a second, because I know not everyone keeps corn syrup just lying around! Corn syrup is the secret weapon for that gooey texture—it helps prevent the sugars from crystallizing too hard, so it gives you that perfect, stretchy chew. But if you must swap, maple syrup works beautifully! You get a slightly different, richer flavor profile, which is great.
For the base, don’t try to use softened butter; we learned that the hard way when making standard shortbread. Stick to that nice, firm, cold butter cubed up. It creates the crumbly pockets we need so the filling doesn’t soak right through the bottom layer!
Storage and Reheating Butter Tart Squares
So you’ve made a huge batch of these magnificent Butter Tart Squares and you can’t eat them all in one day (which is a serious challenge, by the way). Good news: they hold up really well!
The key to storage is keeping the filling happy. If the weather isn’t too humid, you can absolutely keep these covered tightly at room temperature for about three days. In fact, I prefer them served at room temperature because the filling is slightly softer and gooier that way.
If you need them to last longer, go ahead and pop them in the fridge, but bring them out about 30 minutes before serving. Cold makes the filling firm up a bit, almost like a really dense caramel chew, which some people actually prefer!
Now, about reheating—please don’t! Seriously, stick to room temperature. Microwaving these will just turn that beautiful, luscious filling into hot, runny sugar soup, and it never quite sets right again when it cools. Just let them sit on the counter for a little bit, and you’ll have that perfect texture back. They reheat perfectly just by sitting out!
Variations on Classic Butter Tart Squares
While this original recipe for Butter Tart Squares is classic for a reason—it’s that perfect balance of sweet and rich—sometimes you just need to shake things up a little bit, right? I love adding small twists that totally change the flavor profile without wrecking that incredible shortbread crust or the gooey center.
The beauty of this bar is how sturdy the base is, acting like a great little platform for whatever flavors you want to play with. Here are a couple of my favorite ways to dress these up when I’m feeling slightly mischievous in the kitchen:
Adding Zest or Extra Extract
This is the easiest refresh you can give the filling. A little brightness cuts through the deep brown sugar flavor so nicely! Before you pour the filling over the crust, try whisking in the zest of one orange. The citrus note is amazing with the cooked sugar.
If orange isn’t your thing, swap the vanilla extract for almond extract. You only need about half the amount of almond extract because it’s much stronger, but that nutty flavor turns the whole experience into something super sophisticated. Just be careful not to add too much; you want a background note, not a takeover!
The Chocolate Chip Swirl
This variation is perfect for the chocolate lovers in your family. Once you’ve poured the liquid filling over that hot, pre-baked base, don’t put it back in the oven yet. Sprinkle about half a cup of semi-sweet chocolate chips right over the top.
Now, grab a butter knife, and very gently swirl the chips into the top layer of the filling—you don’t want to drag them all the way down to the crust or you risk disrupting the structure. When they bake, you get pockets of molten chocolate mixed right in with that caramel chew. When you cut them later, you get that gorgeous chocolatey ripple throughout!
Serving Suggestions for Your Butter Tart Squares
You’ve done the hard work, and now these perfect Butter Tart Squares are cooled and ready to serve! Because they are so rich and intensely sweet, you don’t need much to go along with them, but a few simple pairings can really take them from a great snack to an amazing dessert experience.
Honestly, eating one plain while standing over the counter might be my favorite way, but if company is over, I like to serve them slightly chilled alongside something cold and creamy. That contrast between the warm, rich sugar flavor and cold cream is just divine.
If you’re having them after dinner, they pair perfectly with something simple, like a hot cup of coffee. The bitterness of good coffee is the perfect foil to all that sweetness. It cleanses the palate beautifully!
For a proper dessert, you absolutely must try them with good quality vanilla ice cream. The creamy melt mixing with the still-slightly-firm filling is unbeatable. If you happen to have a craving for a big, fun dessert, sometimes I’ll switch things up completely and turn a simple scoop into a fun root beer float using my favorite vanilla root beer float recipe, but that’s only if I’m feeling extra wild!
If you want something lighter, a scattering of fresh, tart raspberries or strawberries on the side cuts through the richness wonderfully. They add a little splash of color and acidity that makes you feel slightly less guilty about eating three squares in one sitting!
Frequently Asked Questions About Butter Tart Squares
It happens to the best of us! When you’re dealing with a gooey sugar filling, there are always a few things that can throw you off. Don’t panic if your first batch isn’t textbook perfect. We all run into snags, even when making something as seemingly simple as these delicious Butter Tart Squares. Here are the things readers ask me about most often!
If you’re looking for other baking ideas that don’t require an oven, check out some of these easy no-bake cheesecake recipes, but for the real deal, keep reading!
Why did my Butter Tart Squares filling turn out too firm?
Oh, that’s the classic overbake warning sign, my friend. The minute you pull these out, the filling seems wobbly, but it’s still carrying a ton of residual heat that keeps cooking it slowly. If your filling comes out rock solid, it means you let it sit in the oven just a few minutes too long.
Remember what I said about the toothpick test? You want moist crumbs clinging softly to it, not a bone-dry withdrawal. If the toothpick comes out totally clean, you’ve already gone past the gooey sweet spot. Next time, pull them a minute or two sooner than you think you should!
Can I make these Butter Tart Squares ahead of time?
Absolutely! In fact, I kind of prefer making them the day before because it makes clean slicing a million times easier. Remember how I stressed that you *must* let them cool completely on the rack? Well, after they are fully cooled to room temperature, cover the whole pan lightly with plastic wrap and pop them into the fridge for at least an hour.
Chilling them firms up that sugary filling just enough so those edges don’t pull and tear when you use your sharp knife. You can keep them stored like this for up to four days. Just pull them out about half an hour before you want to eat them so the filling softens up just a touch again!
Why is my shortbread base soggy on the bottom?
If it’s soggy, it means the liquid filling seeped too deeply before the crust could set. This comes down to two things: either press that shortbread base down way too lightly before that first 15-minute bake, or you didn’t bake the base long enough initially. That base needs to be golden brown and sturdy before that melted sugar hits it!
Make sure you press it firmly and evenly across that parchment paper. If you notice you have a really heavy hand with the filling, try baking the base for maybe 17 minutes instead of 15 next time, just to be safe. A solidly baked base is your defense against a mushy bottom layer!
Can I use regular butter instead of cold, cubed butter for the base?
No, trust me on this one! You really, really need that butter to be cold and cut into little cubes. The whole point of the shortbread base is that those little hardened chunks of butter melt slowly in the oven, creating steam and little pockets in the dough. That’s what makes it crumbly and tender, not flat and hard like a cracker.
If you use room temperature butter, you mix it too easily with the sugar and flour, and you end up with a hard, dense dough that absorbs the liquid filling like a sponge. Cold and quick is the mantra for that base!
How do I make sure I get really clean cuts on my Butter Tart Squares?
Clean cuts are entirely dependent on patience, my friend! If you cut them while they are even slightly warm, the filling pulls, the crust crumbles, and you end up with a sugary mess instead of neat squares. The secret is definitely chilling them thoroughly after they’ve cooled down from the oven.
Once they are chilled, take a big, sharp knife—a chef’s knife works great—and wipe the blade clean with a damp, warm paper towel between every single cut. Heat helps the blade glide cleanly right through that sticky filling without dragging it up. It takes an extra minute, but you get perfect presentation!
Share Your Delicious Butter Tart Squares Creations
Whew! I hope you’re not just reading this, but you’ve actually run off to the kitchen to whip up a batch! Making these sweet, sticky Butter Tart Squares is one thing, but sharing the joy they bring is the best part, right?
I absolutely thrive on hearing how things turn out in all your different ovens, so please, don’t be shy. Tell me what you thought! Did you stick to the basic recipe? Did you try the pecans or the maple syrup swap? Were they gone in five minutes flat?
If you made these, I’d be thrilled if you could leave a quick rating right down below—even just five stars helps other bakers feel confident trying the recipe. And if you took a gorgeous photo of your golden-edged, gooey squares, PLEASE tag me on social media! Every time I see someone enjoying a recipe that’s been such a treasure in my own family, it just makes my day. Happy baking, everyone!
Print
Butter Tart Squares
- Total Time: 55 min
- Yield: 16 squares 1x
- Diet: Vegetarian
Description
Simple recipe for classic butter tart squares with a shortbread base and sweet, gooey filling.
Ingredients
- 1 cup all-purpose flour
- 1/2 cup cold unsalted butter, cubed
- 1/4 cup granulated sugar
- 1/4 teaspoon salt
- 1 cup packed brown sugar
- 1/2 cup corn syrup
- 1/4 cup heavy cream
- 2 large eggs, lightly beaten
- 1 teaspoon vanilla extract
- 1/2 cup raisins or pecans (optional)
Instructions
- Preheat your oven to 350 degrees F (175 degrees C). Line an 8×8 inch baking pan with parchment paper, leaving an overhang on two sides for easy removal.
- Prepare the base: In a medium bowl, combine the flour, cold butter, granulated sugar, and salt. Use your fingers or a pastry blender to cut the butter into the dry ingredients until the mixture resembles coarse crumbs.
- Press the crumb mixture evenly into the bottom of the prepared baking pan. Bake the base for 15 minutes until lightly golden.
- While the base bakes, prepare the filling: In a saucepan over medium heat, combine the brown sugar, corn syrup, and heavy cream. Stir until the sugar dissolves and the mixture is smooth. Remove from heat.
- In a separate bowl, whisk the lightly beaten eggs and vanilla extract. Slowly whisk the warm sugar mixture into the egg mixture. If using, stir in raisins or pecans.
- Pour the filling evenly over the hot, pre-baked crust.
- Return the pan to the oven and bake for an additional 20 to 25 minutes, or until the filling is set and a toothpick inserted near the center comes out mostly clean.
- Let the squares cool completely in the pan on a wire rack before lifting them out using the parchment paper overhang. Cut into squares.
Notes
- For easier cutting, chill the cooled squares for at least one hour before slicing.
- You can substitute maple syrup for corn syrup for a different flavor profile.
- Do not overbake, as the filling will become too firm.
- Prep Time: 15 min
- Cook Time: 40 min
- Category: Dessert
- Method: Baking
- Cuisine: North American
Nutrition
- Serving Size: 1 square
- Calories: 250
- Sugar: 25
- Sodium: 80
- Fat: 13
- Saturated Fat: 8
- Unsaturated Fat: 5
- Trans Fat: 0
- Carbohydrates: 32
- Fiber: 1
- Protein: 3
- Cholesterol: 45
Keywords: butter tart squares, shortbread crust, Canadian dessert, sweet bars, caramel filling