
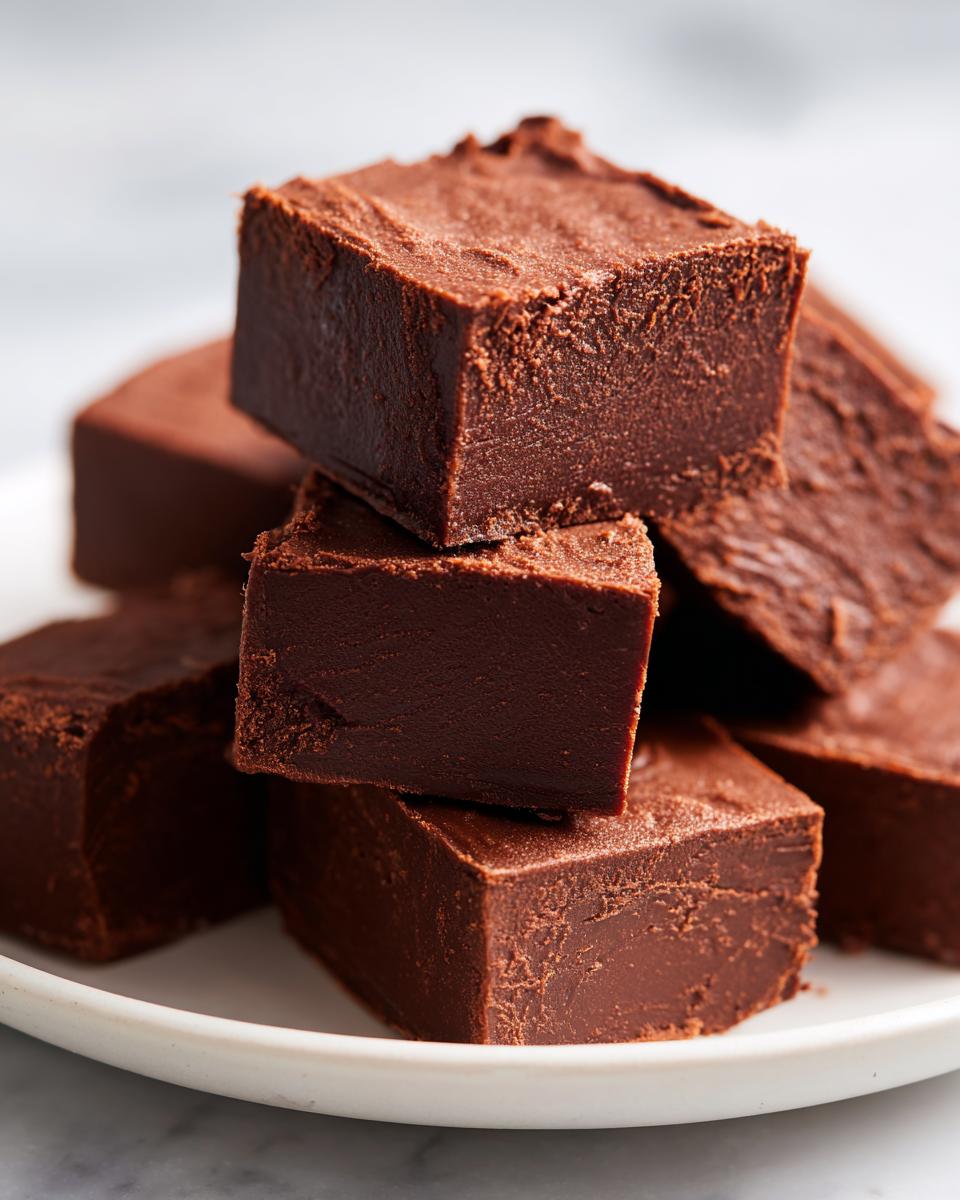
Listen, sometimes you just need candy, and you need it *now*. We all know those baking projects that require a half-day commitment, but honestly, who has that time when a craving hits? That’s why I live and breathe by this ridiculously simple recipe for **Fantasy Fudge**. It is, without a doubt, my favorite secret weapon for last-minute gifts or just surviving a tough Tuesday.
We’re talking rich, melt-in-your-mouth chocolate goodness that comes together faster than ordering takeout. I promise you, once you see how easy it is to turn a can of condensed milk into pure magic, you won’t look at store-bought candy the same way again. Seriously, set a timer—this fudge is done before my coffee even cools!
Why This Easy Fantasy Fudge Recipe Works So Well
I’ve made complicated chocolates that needed temperamental stirring, but this recipe is the absolute opposite. It’s pure joy because it’s reliable. You don’t need a whisking marathon or a degree in sugar science to get this right. When people ask me how I make my chocolate treats look so perfect when I’m in a rush, I just point them to this method!
It’s a lifesaver, honestly. I’ve had neighbors stop by needing a fast teacher appreciation gift, and bam! Ten minutes later, the fudge is on the stove, and I’m already wrapping supplies. It’s one of the few recipes where I don’t even stress about oven temperatures or humidity because the structure is already locked in.

- It’s almost instant gratification! You need less than 15 minutes of active cooking time before it hits the fridge.
- It requires virtually no special equipment. You probably already have everything you need right now.
- It’s practically foolproof—no worrying about scorching sugar or crystallization.
If you are looking for other ridiculously easy desserts that don’t require turning on your oven, you should check out the tips I shared on easy no-bake cheesecake recipes too!
Speed and Minimal Effort for Perfect Fantasy Fudge
Did I mention the time? Active work is only about five minutes on the stove and maybe five minutes stirring in the extras. That’s the real magic here. Forget the scary candy thermometer; you just melt everything gently. I love throwing ingredients into a saucepan—low heat is your best friend, trust me. If you rush it, you’ll get scorched chocolate, and nobody wants that sad, gritty texture.
The Secret to Creamy Fantasy Fudge Texture
The entire reason this works so well and never gets grainy or crumbly is that little can of sweetened condensed milk. That stuff is wizardry! It’s loaded with sugar and milk solids that stabilize everything perfectly. It ensures that when the chocolate melts, it suspends evenly, giving you that incredibly smooth, melt-in-your-mouth texture we all crave in good fudge. It just does the heavy lifting for you!
Gathering Your Ingredients for Rich Fantasy Fudge
Okay, so stocking up for this fudge is almost embarrassingly simple. That’s another reason I love pulling this out when I need a quick treat. You don’t need a long shopping list or exotic supplies. It relies heavily on pantry staples, which is always a bonus for emergency chocolate situations!
When you gather your items, pay attention to the details—that’s where the difference between okay fudge and amazing fudge happens. Make sure your condensed milk is the sweetened kind; the regular kind won’t set up remotely right! It’s all about that sugar content working its magic with the chocolate.
Essential Components for Fantasy Fudge
You only need three core items for the structure of this dense, rich dessert. Make sure you have these exact amounts ready to go before you even turn the burner on:
- One (14 ounce) can of sweetened condensed milk—don’t substitute this!
- Two cups of semi-sweet chocolate chips. Yes, chips work perfectly here.
- One teaspoon of pure vanilla extract. Don’t skimp on the vanilla; it really helps deepen the chocolate flavor.
Optional Add-ins and Flavor Swaps
This is where your personality gets to sneak into the recipe! I usually go for the nuts because I love that little textural crunch against the smooth chocolate, so grab one cup of chopped nuts if that calls to you.
If nuts aren’t your thing, or maybe they’re just not on hand, you can skip them without hurting the final product. Also, remember that the chips are totally swappable! If you want something sweeter and creamier, try swapping those semi-sweet chips out for white chocolate chips. Wow, that makes a completely different kind of treat!
Step-by-Step Instructions to Make Fantasy Fudge
Getting this gorgeous fudge from the stovetop to the fridge is surprisingly fast. Seriously, you won’t believe how little time this takes. The most important thing I need you to remember—and I mean it—is temperature control when you’re melting things down. If you treat the saucepan too harshly, you’ll ruin that silky texture we’ve worked so hard to achieve!
Before you even think about turning on the burner, get your pan ready to go. This fudge sets fast once it comes off the heat! If you’re making this for a party and need a real pro setup, check out my thoughts on making simple syrup; the prep mindset is the same!
Preparation and Melting the Chocolate Base for Fantasy Fudge
First things first: grab an 8×8 inch pan. I never skip lining this with foil; you’ll thank me later when you lift the whole slab out without fuss. Make sure that foil hangs over the sides, like little handles—that’s your lifesaver for getting it done later.
Now, combine your whole can of sweetened condensed milk right into that pan with the two cups of chocolate chips. Put it on the stove over low heat. This next part is crucial: you have to stir constantly! We are only aiming to melt the chips until the whole mixture is smooth and glossy. Do not, under any circumstances, let this boil, okay? A gentle bubble or two turns this into hard candy, and we want smooth fudge!
Finishing, Setting, and Cutting Your Fantasy Fudge
Once it’s totally smooth and you take that pan off the heat, that’s when you stir in your teaspoon of vanilla extract and any nuts you decided to use. Give it a gentle fold to make sure everything is distributed evenly.
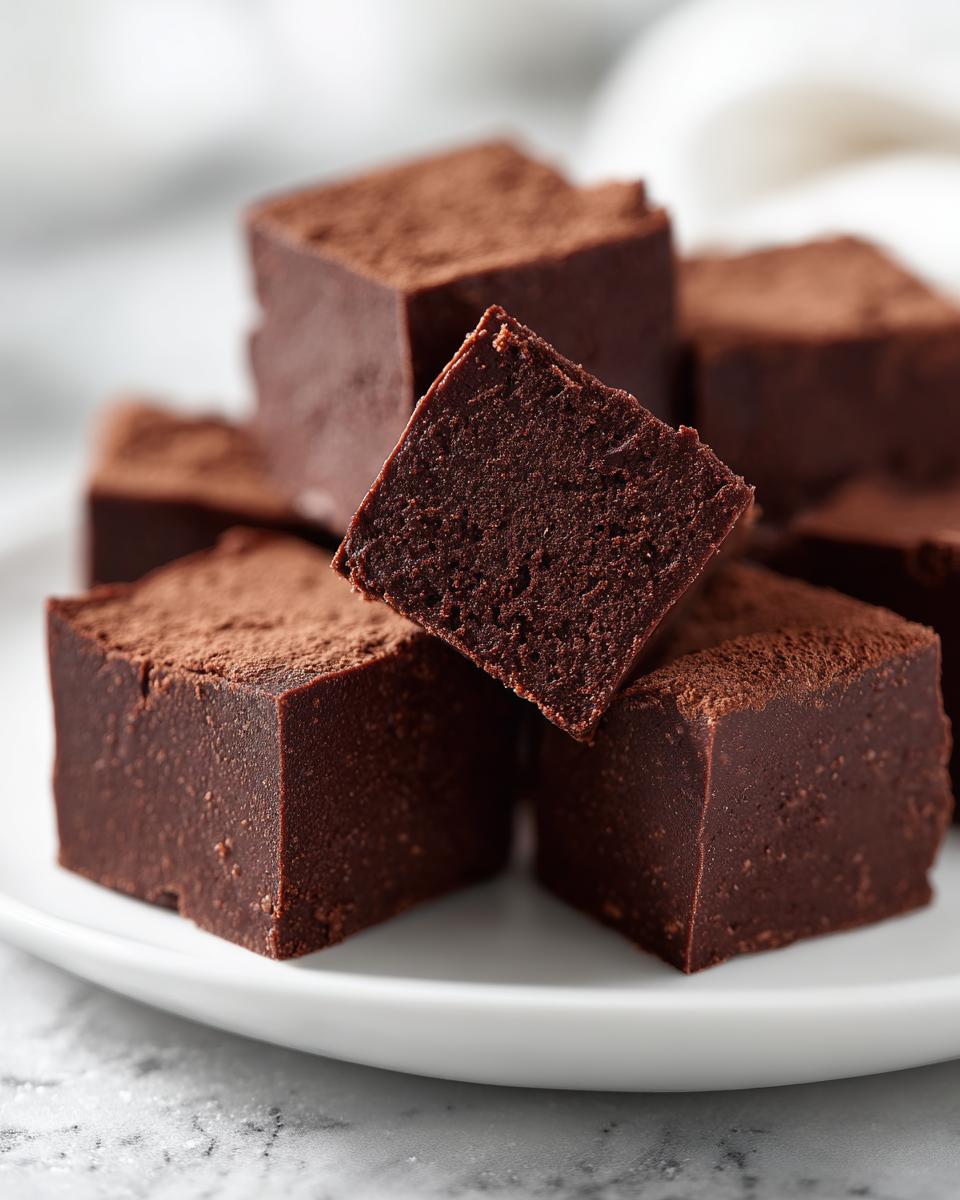
Pour that beautiful mixture right into your prepared pan and spread it out so it’s even. Now it needs cold! Pop this into the refrigerator for a minimum of two hours. It needs to chill thoroughly so it doesn’t crumble when you cut it. When it’s rock hard, use those foil handles to lift the entire block out onto your cutting board. Then, just slice it into small squares before serving. Trust me, you don’t need big pieces; this stuff is rich!
Tips for Achieving the Best Fantasy Fudge Every Time
I’ve totally messed this up before, I’ll admit it! When I first started making this quick dessert, I got impatient and cranked the heat up hoping to speed things along. Big mistake! That’s why I emphasize gentle heat so much. A minute too hot and you risk seizing the chocolate, and then you get sad lumps instead of smooth candy.
I learned that using good quality chocolate chips really does make a difference here. Since there are so few ingredients, each one needs to pull its weight. I actually swapped out brands once because I ran out of my favorite semi-sweets, and the resulting fudge was just… fine. Stick to what you know works for a truly rich experience!
Avoiding Common Fantasy Fudge Mistakes
The number one thing to watch out for is rushing the melting process. Keep that heat on low—seriously, low. You want the milk to get warm enough to coax the chocolate into melting beautifully, not forcing it to boil violently. Keep stirring right until those last little bits of chip disappear. Once it looks totally smooth, yank that pan off the burner immediately! Residual heat will keep it cooking in the bowl. If you are looking for other reliable recipes that require minimal fuss, you might enjoy learning how to make a good cocktail sauce—it’s all about timing!
Storage and Keeping Your Fantasy Fudge Fresh
I rarely have leftovers, you know, because it disappears so fast! But when I do manage to stash some away, storage is really simple. This fudge is quite sturdy, but we still need to protect that creamy texture.
Once you’ve cut your beautiful squares, keep them in an airtight container. I usually layer them between pieces of wax paper so they don’t stick together, which is a lifesaver if you’re stacking them up high. If your kitchen is cool, storing them on the counter is fine for a few days. But honestly, I prefer the fridge if I’m saving them for longer than three days. It keeps them firm and fresh, and they are even better when they are nice and chilled!
Flavor Variations for Your Homemade Fantasy Fudge
While the classic semi-sweet chocolate with optional nuts is divine, this recipe is just begging for you to experiment! Since the base is so simple—chocolate and milk—it pairs well with almost anything you think up. I love swapping out the vanilla for something a little more exciting when I’m making a fudge batch that isn’t meant for the purists in my family.
White chocolate is a huge winner, as I mentioned. It makes such a sweet, creamy version of the Fantasy Fudge that almost tastes like vanilla confection. If you love that flavor profile, you’ve got to try it next time. For a completely different vibe, though, you can go the extract route!
Try swapping that teaspoon of vanilla for peppermint extract. Oh my goodness, instant holiday candy! It’s so easy, and the mint really cuts through the richness perfectly. If you love that fruity sweetness, you can look into adding dried cherries or even swapping the chocolate chips entirely for butterscotch chips. If you want another beginner-friendly fun recipe that uses fun mix-ins, check out this fruit cocktail cake recipe!
Serving Suggestions for This Quick Dessert
Because this **Fantasy Fudge** is so intensely rich, a little piece goes a long way! I rarely serve it alone, though, because it deserves a good partner. It’s amazing cut into tiny squares and placed on a festive platter with some shortbread cookies. That texture contrast is just divine.

However, my favorite way to enjoy it is right after dinner, maybe two small squares alongside a really strong cup of coffee. The bitterness of the coffee is the perfect foil for all that sweetness. If you need something even more refreshing to go with it, I’ve got some great ideas over at my guide on cold coffee drinks recipes!
Frequently Asked Questions About Fantasy Fudge
I get so many questions just flooding my comments whenever I post a picture of this quick dessert! It’s a simple recipe, but candy-making always seems to give people pause. Don’t worry, though; we can troubleshoot anything that comes up. Most confusion comes from folks trying to guess what might happen if they don’t follow those simple melting rules.
If you’re worried about technique or substitutions, chances are I—or someone else—has already tried it! We all want perfect, no-fail chocolate candy, right? If you’re learning how to mix up quick things in the kitchen, remember that even simple recipes benefit from a little foresight. For more tips on quick, successful mixing, peek at my ideas for easy cocktail recipes!
Can I use dark chocolate chips instead of semi-sweet in this Fantasy Fudge?
Absolutely, you can! If you love a richer, less sweet chocolate flavor, go right ahead and swap in dark chocolate chips. Just be prepared that the overall flavor will be stronger and slightly more bitter. Since this fudge relies so heavily on the sugar in the condensed milk for its sweetness, using dark chocolate means the final product won’t be quite as sugary sweet as the original version. Your taste buds will tell you if you need to adjust anything else!
How long does Fantasy Fudge need to set?
The recipe calls for a minimum of two hours in the refrigerator, and you should stick to that, especially if you plan on cutting it into those 36 small squares. That’s the bare minimum time needed for the condensed milk mixture to firm up properly against the cold temperature.
But here’s my personal advice: If you can manage it, leave it for three or even four hours. When the fudge is colder and firmer, it cuts so much cleaner, and the squares hold their shape beautifully on a platter. If you try to cut it at the two-hour mark, you might get a little squishiness; nobody likes a squishy square!
What happens if my melted mixture starts to look grainy or thick on the stove?
Oh, that dread! That almost always means one thing: you heated it too fast or too high, and the chocolate is seizing up. If you see it start to look dull or gritty instead of smooth and glossy, take the pan off the heat immediately! Give it a quick stir, and try adding just a teaspoon of warm water or milk—seriously, just a tiny splash. Sometimes that extra liquid helps smooth things out. If not, unfortunately, you might have to toss that batch and start over, making sure to keep that heat super low next time.
Estimated Nutritional Snapshot for Fantasy Fudge
I always feel a little guilty looking at the numbers for this, but hey, it’s a treat, right? Since this **Fantasy Fudge** is so incredibly easy and packed with chocolate goodness, we know it’s not exactly a health food, but knowing the general breakdown is helpful for planning your treats!
Keep in mind that these numbers are just estimates based on standard ingredients that the recipe calls for, like semi-sweet chips and condensed milk. If you substitute white chocolate or go heavy on the nuts, things will shift a little bit. Always treat these values as a good general guideline rather than exact science!
- Calories: About 120 per small square
- Sugar: Around 15 grams
- Total Fat: Roughly 6 grams
- Protein: About 2 grams
- Carbohydrates: Roughly 16 grams
We are looking at a rich dessert, so that fat and sugar content is expected! It makes about 36 little squares, so if you cut them bigger, obviously, you’ll need to multiply those numbers up. The best part is that it’s vegetarian, so it fits in well with most dessert platters!
Print
Simple Fantasy Fudge
- Total Time: 135 min
- Yield: 36 small squares 1x
- Diet: Vegetarian
Description
A quick recipe for rich, sweet fudge using condensed milk.
Ingredients
- 1 (14 ounce) can sweetened condensed milk
- 2 cups semi-sweet chocolate chips
- 1 cup chopped nuts (optional)
- 1 teaspoon vanilla extract
Instructions
- Line an 8×8 inch pan with foil, letting the foil overhang the sides for easy removal.
- Combine the sweetened condensed milk and chocolate chips in a medium saucepan.
- Heat over low heat, stirring constantly until the chocolate is completely melted and the mixture is smooth. Do not let it boil.
- Remove the pan from the heat. Stir in the vanilla extract and chopped nuts, if using.
- Pour the mixture into the prepared pan. Spread evenly.
- Refrigerate for at least 2 hours, or until firm.
- Lift the fudge out of the pan using the foil overhang. Cut into small squares before serving.
Notes
- For a different flavor, substitute white chocolate chips for the semi-sweet chips.
- You can add 1/2 teaspoon of peppermint extract instead of vanilla for a mint flavor.
- Prep Time: 10 min
- Cook Time: 5 min
- Category: Dessert
- Method: Stovetop
- Cuisine: American
Nutrition
- Serving Size: 1 square
- Calories: 120
- Sugar: 15
- Sodium: 25
- Fat: 6
- Saturated Fat: 4
- Unsaturated Fat: 2
- Trans Fat: 0
- Carbohydrates: 16
- Fiber: 0
- Protein: 2
- Cholesterol: 5
Keywords: fudge, chocolate, condensed milk, quick dessert, candy