
Oh, I just love when the air gets that crisp, spicy smell, you know? It means we can officially put away the ice cream churns and bring out the warm spices again! If you’re anything like me, you want comforting, delicious fall treats, but sometimes you just don’t have the time for fussy pies or complicated layer cakes.
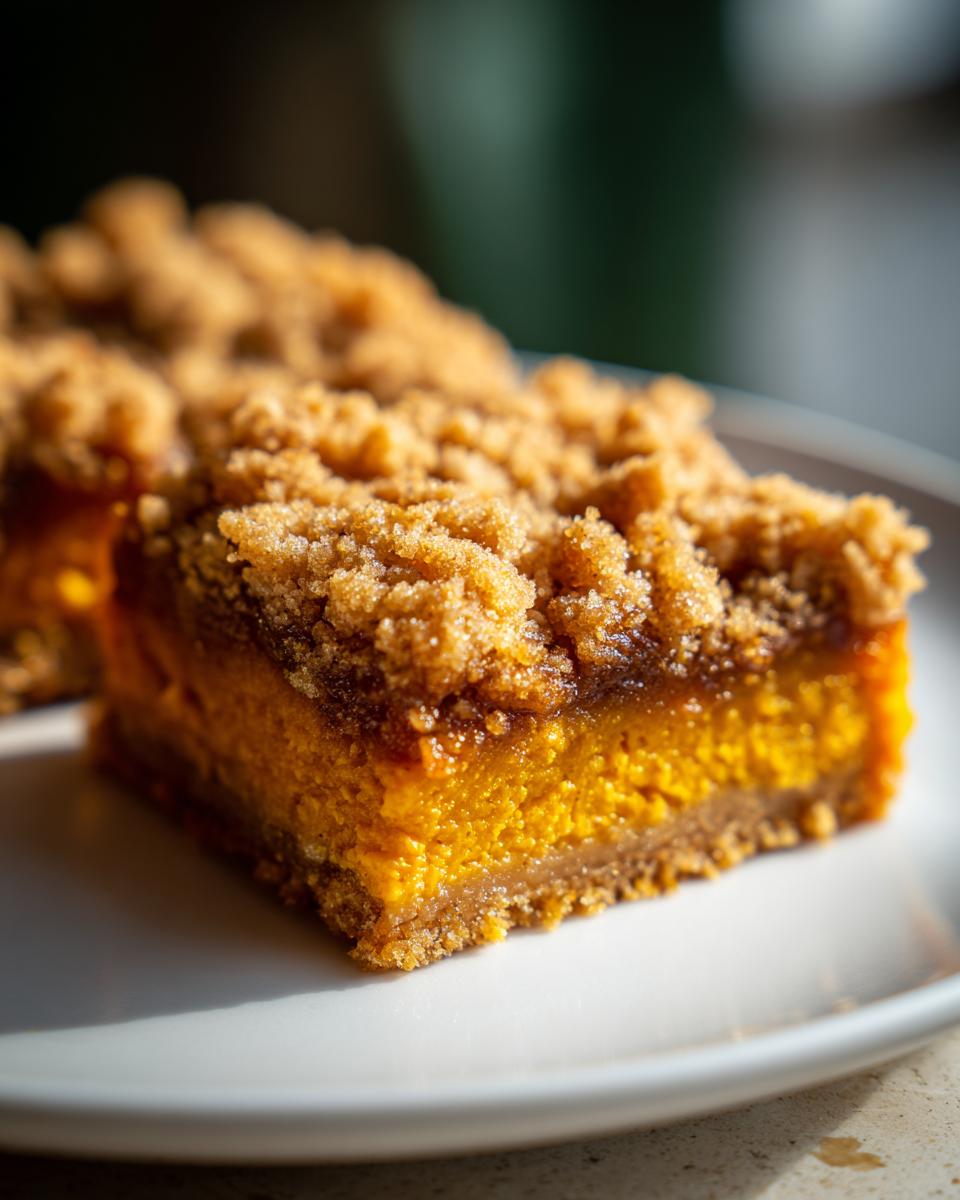
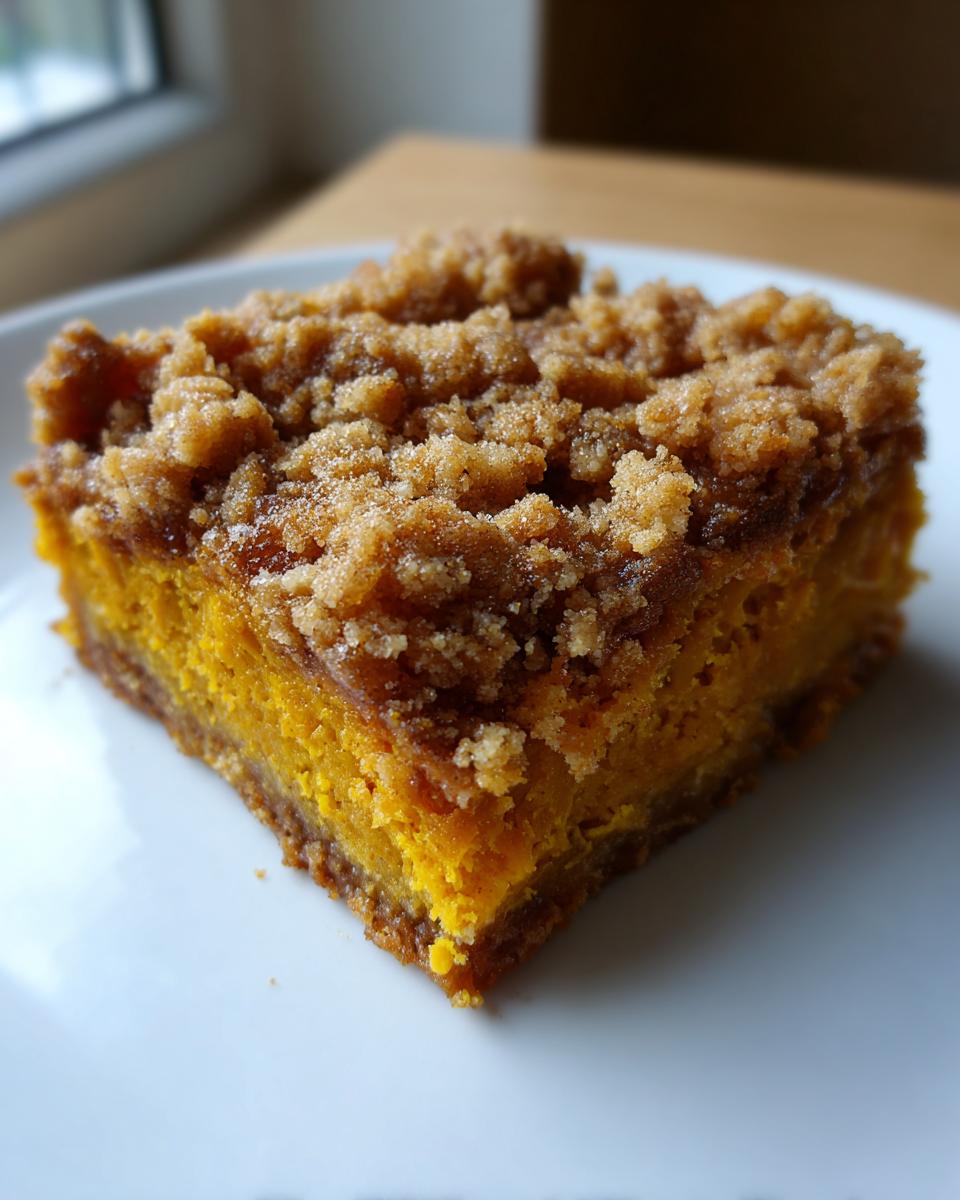
That’s why I’m so excited to share what became my absolute go-to holiday staple: the **Pumpkin Streusel Bars**! Trust me, I’ve tested dozens of square-pan recipes over the years trying to find one that bakes up perfectly every single time, and this one is the winner. It’s got that incredibly moist, pure pumpkin filling you dream about, topped with a buttery, crumbly layer that just melts in your mouth. Making these bars has become my shorthand for easy, reliable autumn baking for neighbors and family alike!
Why You Will Love These Pumpkin Streusel Bars (EEAT Focus)
Look, I’m not going to waste your time with recipes that take three hours when you just want a taste of fall right now. My goal is always to deliver maximum flavor with minimum fuss. That’s what these squares are all about. You get that unbelievably soft, spice-infused base, and then, BAM! A satisfyingly crunchy, buttery streusel topping. After years of perfecting holiday baking, I can promise you that this combination never fails to impress.

- The texture contrast is just spectacular—moist meets crumbles!
- They hold up beautifully for potlucks and lunch boxes.
- They smell incredible while baking—pure autumn comfort radiating from your oven.
I even shared a recipe variation for a lovely spiced drink if you want to pair these bars perfectly. Head over and check out my Pumpkin Pie Smoothie idea!
Quick Prep Time for Your Pumpkin Streusel Bars
Seriously, this is my biggest selling point: the prep time is lightning fast. We’re talking 15 minutes, tops! You mix the crumb topping first while the oven preheats, then whip up the easy pumpkin filling. Before you know it, these are sliding into the oven. It’s snack time efficiency at its finest!
Perfect Fall Dessert Flavor Profile
You cannot have a fall treat without the right spices, and here we nail it. The streusel is perfectly balanced with warm cinnamon and that earthy hit of nutmeg. It complements the sweet, smooth pumpkin underneath without being overly sweet or tasting artificial. It’s the authentic spice blend that screams November!
Essential Ingredients for Perfect Pumpkin Streusel Bars
Getting the right ingredients set out first is half the battle, isn’t it? I always think of this recipe as two distinct teams: the crumbly, spiced streusel team and the smooth, creamy pumpkin filling team. Every ingredient needs to be ready to go before we start mixing, especially that butter! You’ll notice I call for light brown sugar in the topping, which really adds depth that white sugar just can’t touch.
For the streusel, you need 1 cup of flour, 1/2 cup of packed light brown sugar, 1/4 cup of granulated sugar, and all those delicious spices: cinnamon, nutmeg, and ginger, plus a little salt. Don’t forget the star binder—1/2 cup of cold unsalted butter, which I always make sure is cut into teensy, pea-sized pieces. That coldness is crucial!
The filling is pure comfort: a full 15-ounce can of pumpkin puree, one large egg to bind it, 1/4 cup of milk, and a splash of vanilla extract. Make sure your pumpkin is pure pumpkin puree, not pumpkin pie filling—that’s a rookie mistake we definitely want to avoid here!
Ingredient Notes and Substitutions for Pumpkin Streusel Bars
Now, let’s talk shortcuts because we all need them sometimes. If you’re staring at your spice rack and feeling overwhelmed, you can absolutely use pre-mixed pumpkin pie spice instead of measuring out the cinnamon, nutmeg, and ginger individually. If you use the pre-made blend, just use about 2 teaspoons total for the streusel portion. It saves time and tastes just as authentic!
Another good tip is with the pumpkin itself. If you happen to have extra homemade pumpkin puree instead of canned, go for it! But if you use homemade, you might need slightly less milk in the filling because homemade puree can sometimes be wetter than the standardized canned variety. Always check the thickness before adding all the milk.
Step-by-Step Instructions for Making Pumpkin Streusel Bars
Okay, now for the actual fun part! Making these bars is so satisfying because you see the layers build up right in front of you. Before we even think about mixing, we have to get the foundation ready. Grab that 8×8 inch pan—I use a metal one for the best browning—and get it greased and floured. And make sure your oven is humming along at 350 degrees Fahrenheit so it’s nice and hot when the batter is ready to go in.
We tackle the streusel first because those dry ingredients can hang out while we deal with the wet ones. I usually use my sturdy pastry blender for this step. Why? Because my hands sometimes melt the cold butter too fast, and we absolutely need that cold butter for the right texture! Don’t overthink it, just work that butter into the dry mix until you get coarse crumbs—kind of like wet sand or tiny pebbles. Set that bowl aside; we aren’t touching it again until the very end!
Next up is the gloriously orange layer. In a separate bowl—no need to wash the first one—we whisk together the remaining granulated sugar, that smooth can of pumpkin puree, your egg, milk, and vanilla until it’s totally smooth. You don’t need a mixer here, just elbow grease! If you’re looking for tips on keeping cool drinks handy while you work, check out this great advice on avoiding fatal mistakes with iced tea while you wait for things to cool!
Preparing the Streusel Topping for Your Pumpkin Streusel Bars
This is the make-or-break step for the texture, so pay attention but don’t stress! In your medium bowl, combine your flour, the light brown sugar (that’s the flavor bomb!), the tiny bit of white sugar, and all your lovely spices and salt. Now, take the cold butter pieces and start cutting them in. You’re trying to break those chunks down until the whole mixture looks beautifully uniform, like sweet, spiced gravel. If you see large, flat pieces of butter, keep going! We want those small, crumbly bits that create the classic streusel texture once baked.
Assembling and Baking the Pumpkin Streusel Bars
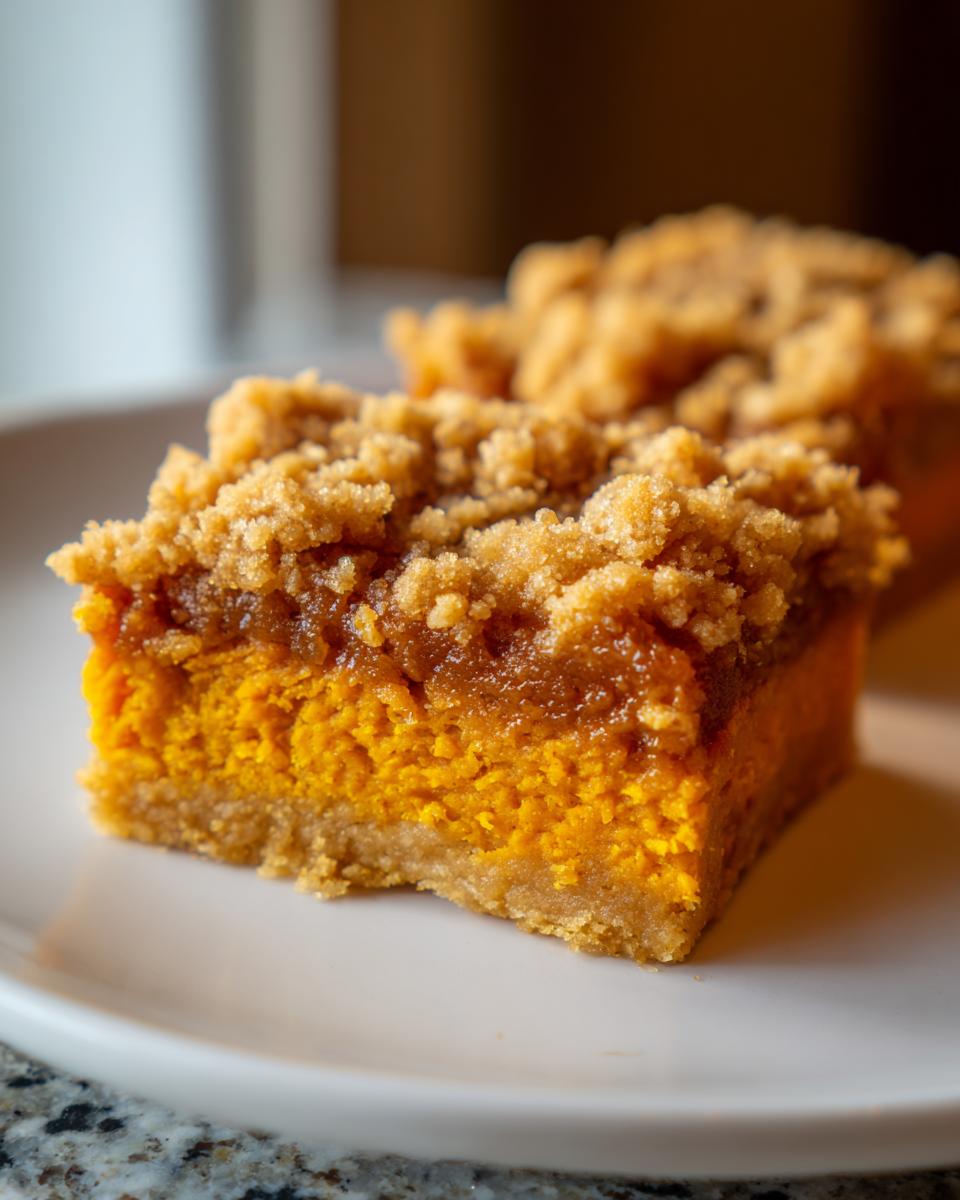
Time to layer up! Pour that smooth, gorgeous pumpkin filling right into your prepared pan and spread it into an even layer—it should look like thick, spiced pudding. Now, take your reserved streusel and sprinkle it evenly all over the top. Don’t press it down! We want it loose so it gets toasty.
Slide that pan into your 350°F oven. I bake mine for exactly 35 minutes, but I start checking at 35 and push it to 40 if the center seems too jiggly. The key test? Insert a toothpick right into the center where you think it’s thickest. If it comes out clean, they are ready! But here is the most important part, and I mean it: You MUST let these cool completely in the pan before you try cutting them. If you try to cut them warm, the filling will tear and run everywhere. Patience, my friend! They firm up beautifully as they cool down.
Tips for Achieving the Best Pumpkin Streusel Bars
After making a few batches that were a little too runny or a little too hard, I figured out a few tricks that keep my **Pumpkin Streusel Bars** bakery-quality every single time. Honestly, it’s all about temperature control and how gently you handle that topping!
First, and I can’t stress this enough: chill that butter for the streusel layer! If your butter is soft when you start mixing it with the flour and sugar, you end up with a paste, not those wonderful sandy crumbs we need for texture. Keep it in the fridge until the absolute last second.
Second, when mixing the pumpkin filling—after you combine the pumpkin, egg, and milk—give it just one good whisk until smooth. Overmixing the filling activates the pumpkin starches too much and can make the base gummy instead of soft. You want smooth, not whipped!
Finally, if you’re using cinnamon, make sure it’s fresh! Old spices can taste flat. If you’re looking for a completely different, yet equally autumnal treat, you should definitely check out my recipe for Irresistible Caramel Apple Pie for the weekend!
The Secret to a Crumbly Streusel Topping on Pumpkin Streusel Bars
If you love that crunchy, buttery layer, you have to treat the cold butter like it’s spun glass. Use your fingertips or a pastry cutter, and work quickly and lightly. We are only trying to break those butter pieces down until they are about the size of small peas or coarse cornmeal. If you start kneading the mixture with your palm, your body heat will melt that butter right into the sugar, and guess what you get? A hard, flat crust instead of lovely, light crumbs that toast up beautifully in the oven.
Serving Suggestions for Your Delicious Pumpkin Streusel Bars
These **Pumpkin Streusel Bars** are amazing straight out of the pan once they’ve cooled, but sometimes you want to dress them up a touch for company, right? After all that hard work, they deserve a little fanfare!
My favorite way to serve them is actually super simple: just lightly dust the cooled squares with a little powdered sugar. It makes them look so pretty and festive without hiding that gorgeous streusel topping we worked so hard to create. If you want to go big, though, you absolutely have to try them with a scoop of plain vanilla bean ice cream. The contrast between the cold, creamy ice cream and the warm spice of the bar is heaven.
Or, if you’re really leaning into the dessert factor, try making a float! I’ve got a fun little recipe for a Vanilla Root Beer Float that would taste unexpectedly delicious alongside these spiced bars. Give it a try next time you have guests over!
Storage and Reheating Instructions for Pumpkin Streusel Bars
The best part about these bars is that they are fantastic the next day! Once they are completely cool—and I mean, stone cold—you want to get them tucked away. Store your **Pumpkin Streusel Bars** in an airtight container. I find that leaving them on the counter at room temperature is perfectly fine for about three days.
If you somehow manage to have leftovers past that, you can pop them into the fridge, but give them about 15 minutes on the counter before serving, just to let that buttery streusel soften up a touch. If you really want to warm them up later, skip the microwave if you can—it can make that pumpkin layer a little soft. Stick them in a low oven, maybe 300 degrees, for just five minutes. It wakes up the spices beautifully!
Frequently Asked Questions About Pumpkin Streusel Bars
When I first developed this recipe, I was constantly texting my sister questions, so I figured you might have some similar thoughts! It’s always good to chat through the common worries before you fire up the oven. These little squares are pretty straightforward, but sometimes the texture or spice level needs a tweak based on what you have on hand.
Can I make these Pumpkin Streusel Bars ahead of time?
Oh, yes, please do! These are one of those fantastic bakes that actually taste *better* the next day. When you make them ahead, the spices in the pumpkin layer really have time to settle in and deepen their flavor. I often bake them on a Wednesday night for a weekend gathering. Just store them covered tightly at room temperature—no need for the fridge unless your kitchen is unusually warm. Perfect for holiday meal prep, honestly!
Can I use a different size baking pan for these pumpkin bars?
This is a good question because everybody’s kitchen drawer is different! The recipe is perfectly calibrated for that 8×8 inch pan because it helps the bars bake up to a nice, thick layer that stays wonderfully moist. If you use a larger pan, say a 9×13, you will end up with a very thin layer, and they will bake way too fast, probably in like 20 minutes. You risk drying them out! If you absolutely must use a larger pan, you’ll need to cut the flour and pumpkin quantities down drastically, or you’ll have wafer-thin bars. For thicker **pumpkin bars**, stick to a 9×8 inch or even a 7×7 inch pan, but you’ll need to check them 10 minutes sooner than the recipe states.
If you’re looking for other ways to use up that can of pumpkin puree, have you checked out my recipe for a Spice Pumpkin Protein Shake? It’s great for a quick morning boost!
Estimated Nutritional Information for Pumpkin Streusel Bars
Now, let’s talk numbers! I know some of you bakers out there keep a close eye on the nutritional breakdown of your favorite treats, and I totally respect that. When I bake these **Pumpkin Streusel Bars** for my family, I’m really focused on the fall flavor winning out over counting calories, but I still want to give you the best information I can!
Because we all use different brands of butter, slightly different measurements of pumpkin, and maybe use a different brand of flour, the actual numbers can shift a little bit from batch to batch. So, please treat this information as a really helpful estimate, okay? It gives you a fantastic general idea of what you’re looking at per square, but it’s not a hard-and-fast scientific guarantee!
I am always tweaking my ingredients based on what I have on hand, so I always suggest referencing reliable nutrition tracking software if you need exact figures for specific dietary needs. What matters most to me is the taste, but I wanted to give you this heads-up so you know exactly what you’re enjoying!
Share Your Experience Making These Pumpkin Streusel Bars
Whew! You made it through the baking process, and now all that’s left is the best part—enjoying them! But don’t disappear on me just yet. I absolutely live for hearing how your **Pumpkin Streusel Bars** turned out. Did your streusel get extra golden? Did the kids approve?
Please take a moment down in the comments section to leave a star rating so other bakers know how much you loved this recipe. And if you made any little tweaks—maybe added some toasted pecans to the topping, or decided to chill the filling slightly before sprinkling the crumbs—definitely tell us about it! Sharing our kitchen victories makes everyone’s baking better.
If you snapped a photo of these gorgeous squares, tag me on social media! It always makes my day to see my recipes living on your tables. If you’re planning a fall gathering, you might also want to check out my recipe for a Spiced Pumpkin Pie Smoothie to go alongside these tasty bars!
Print
Pumpkin Streusel Bars
- Total Time: 55 min
- Yield: 16 squares 1x
- Diet: Vegetarian
Description
Simple recipe for moist pumpkin bars topped with a crumbly streusel topping.
Ingredients
- 1 cup all-purpose flour
- 1/2 cup packed light brown sugar
- 1/2 cup granulated sugar
- 1 teaspoon ground cinnamon
- 1/2 teaspoon ground nutmeg
- 1/4 teaspoon ground ginger
- 1/4 teaspoon salt
- 1/2 cup (1 stick) cold unsalted butter, cut into small pieces
- 1 (15 ounce) can pumpkin puree
- 1 large egg
- 1/4 cup milk
- 1 teaspoon vanilla extract
Instructions
- Preheat your oven to 350 degrees F. Grease and flour an 8×8 inch baking pan.
- For the streusel: In a medium bowl, combine the flour, brown sugar, 1/4 cup of the granulated sugar, cinnamon, nutmeg, ginger, and salt.
- Cut in the cold butter using a pastry blender or your fingers until the mixture resembles coarse crumbs. Set aside.
- For the filling: In a separate bowl, whisk together the remaining 1/4 cup granulated sugar, pumpkin puree, egg, milk, and vanilla extract until smooth.
- Pour the pumpkin mixture into the prepared baking pan.
- Sprinkle the reserved streusel mixture evenly over the pumpkin layer.
- Bake for 35 to 40 minutes, or until a toothpick inserted into the center comes out clean.
- Let the bars cool completely in the pan before cutting into squares.
Notes
- You can substitute pumpkin pie spice for the individual spices listed.
- Store cooled bars in an airtight container at room temperature for up to three days.
- Prep Time: 15 min
- Cook Time: 40 min
- Category: Dessert
- Method: Baking
- Cuisine: American
Nutrition
- Serving Size: 1 square
- Calories: 220
- Sugar: 18g
- Sodium: 110mg
- Fat: 12g
- Saturated Fat: 7g
- Unsaturated Fat: 5g
- Trans Fat: 0g
- Carbohydrates: 28g
- Fiber: 1g
- Protein: 3g
- Cholesterol: 30mg
Keywords: pumpkin bars, streusel topping, fall dessert, pumpkin spice, easy bars