
Oh, you know those days when you just *need* chocolate, but the thought of waiting for the oven to heat up fills you with dread? Believe me, I know those days well! That’s exactly when I turn to my absolute favorite no-bake treasure: the **Malteser Slice**. This isn’t some fancy, fussy bake; this is pure, crunchy, chocolate-coated magic that comes together in about 15 minutes of actual work.
I first made this years ago when I had a massive craving and only a handful of biscuits left in the cupboard. I just needed something quick. It set perfectly in the fridge, and the sound of that first crunch was just heavenly. If you are looking for satisfying texture and intense chocolate flavor without turning on the stove, you absolutely have to try this recipe. Seriously, this easy **Malteser Slice** is a winner every single time.

Why This No-Bake Malteser Slice Is Your New Favorite Dessert
Honestly, I don’t know why anyone bothers with a complicated dessert when this simple **Malteser Slice** exists. It hits all the right spots without any of the stress. If you need a fast treat for a party or just a serious chocolate fix, this is it. Check out what makes it such a staple in my kitchen:
- It’s so fast! You spend maybe 15 minutes actually working on it.
- It’s completely no-bake, which means zero oven drama on a hot day.
- That texture is addictive—the crunch factor is serious thanks to the Maltesers.
If you’re looking for more quick treats that don’t involve the oven, you might want to check out some of my speedy no-bake cheesecake recipes too!
Quick Preparation for the Malteser Slice
This is the best part, truly. If you can crush a biscuit and melt some chocolate, you can make this entire thing. With just 15 minutes of prep time, you barely even need to wash up much! Best of all, this **Malteser Slice** never has to see the inside of an oven. We’re mixing, pressing, and chilling our way to dessert heaven here, which is always a win in my book.
Unbeatable Crunch and Chocolate Layers
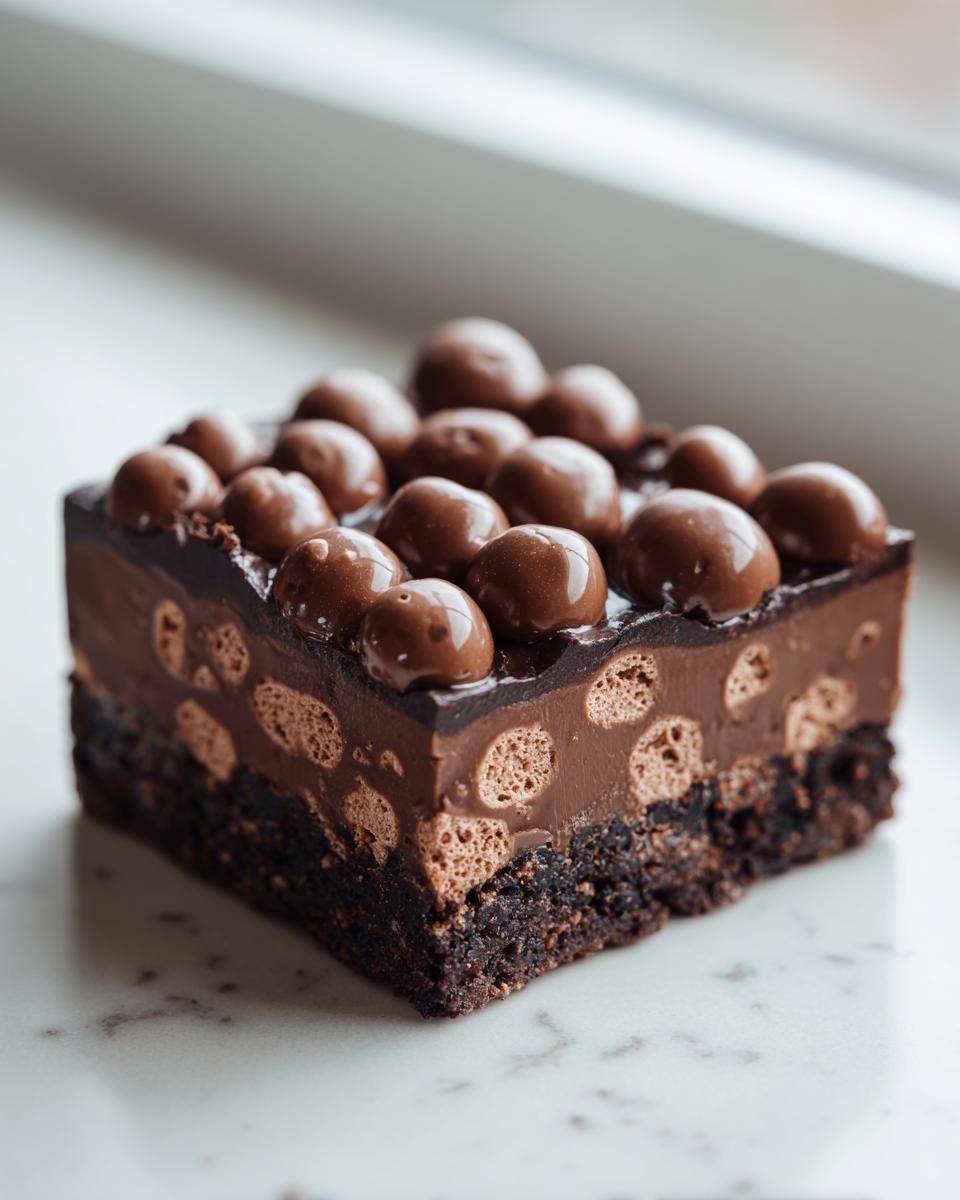
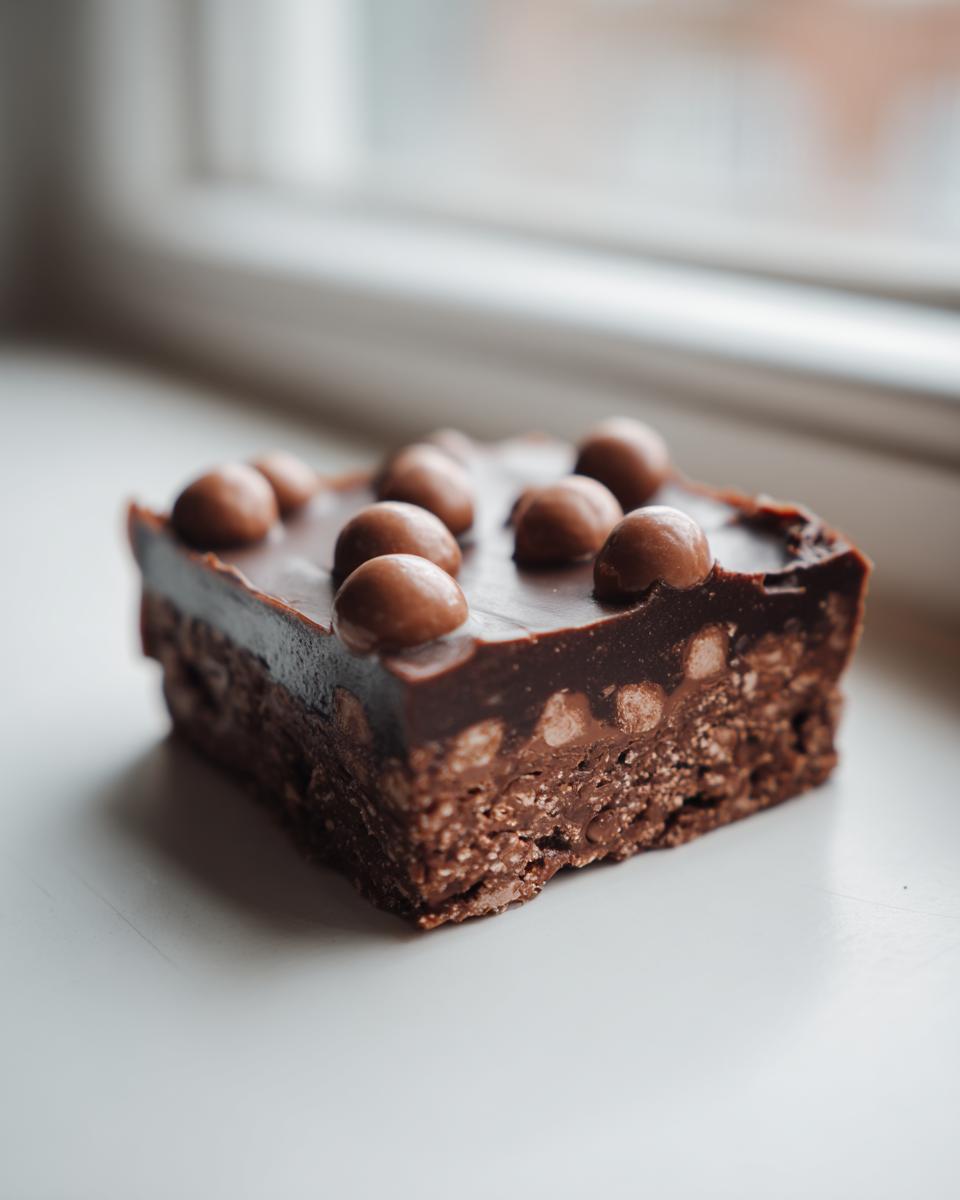
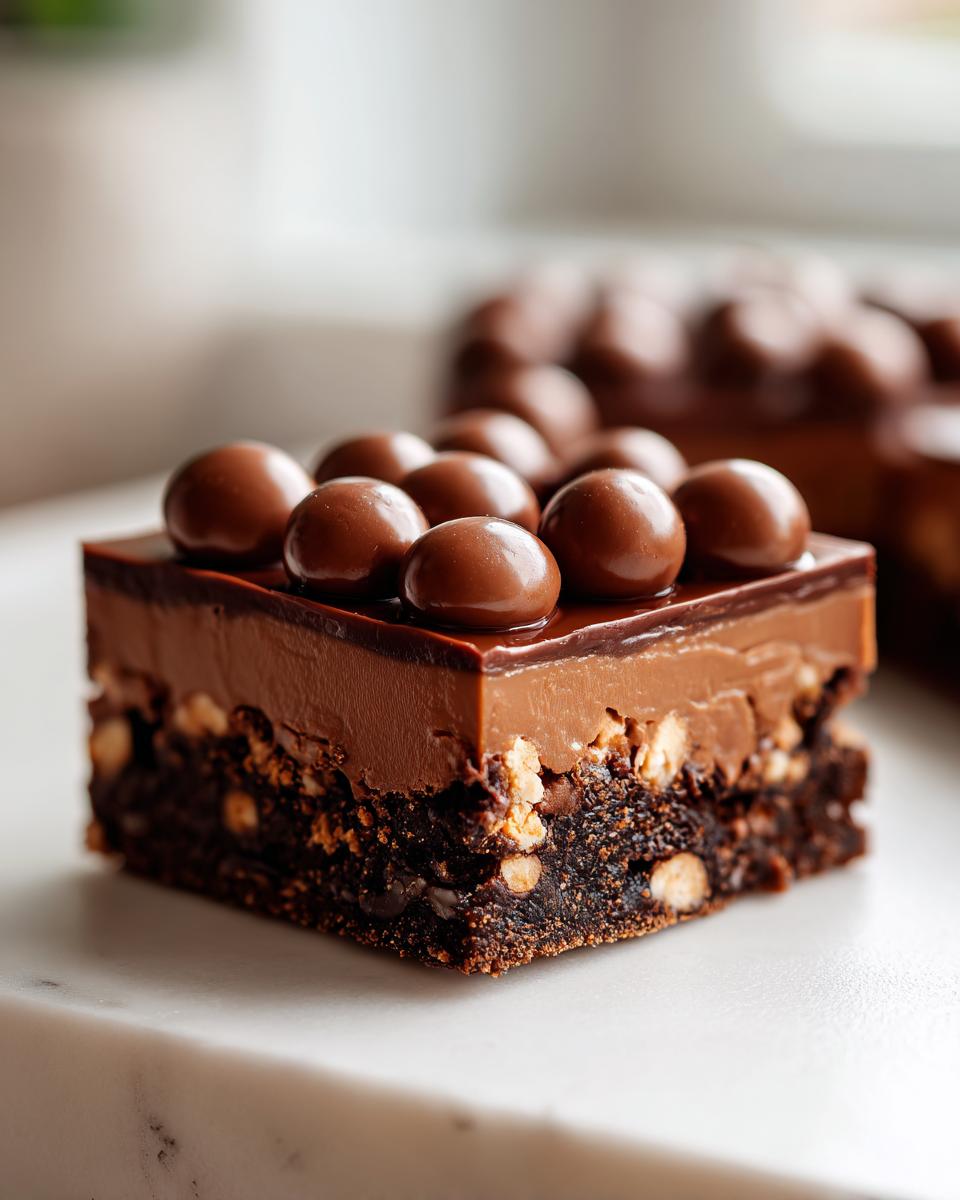
What elevates this slice from just a boring chocolate traybake is the texture, honestly. You get the crumbly, buttery base, which is lovely and firm. Then you have that smooth blanket of melted dark and milk chocolate setting on top. But then—BAM!—you hit those Maltersers. They stay wonderfully light and crunchy even after chilling. That combination of smooth and crisp is what makes everyone ask for the recipe.
Essential Ingredients for Your Malteser Slice
When we keep things simple like this **Malteser Slice**, the quality of the few ingredients we use really shines through. You don’t need a pantry full of odd things, just a few staples treated right. I always lay everything out before I start—my trusty mixing bowl, my tiny saucepan, everything ready to go. Precision matters here, even though it’s just a no-bake treat!
For the base, you absolutely need 200g of digestive biscuits. Make sure they are crushed really fine—we’re talking fine crumbs, not chunky bits! Then we bring in 100g of unsalted butter, which we’ll melt carefully, and 2 tablespoons of golden syrup to act as the sticky binder. Don’t skip the golden syrup; that’s what gives the base its lovely chew!
For the chocolate topping, you’ll need a mix: 100g of dark chocolate (I like the slight bitterness) and 50g of milk chocolate to keep it sweet enough. The grand finale, of course, is 100g of crispy Maltesers sprinkled on top. They must be added last so they don’t get completely smashed into the hot chocolate mixture!
Ingredient Substitutions and Notes
Listen, I know sometimes you might be missing one thing, so let’s talk swaps. If you don’t have digestive biscuits on hand, don’t panic! Rich Tea biscuits work beautifully, almost identically, as do graham crackers if you’re using US measurements. They just melt into the butter and syrup perfectly.
When it comes to the chocolate, feel free to mess with the ratios if you prefer milkier or darker results. You can use all dark chocolate if you’re feeling brave, but remember the Maltesers are already quite sweet, so you might want to pull back on the golden syrup slightly if you do that. I find using three different textures—crisp biscuit, soft chocolate, airy Malteser—is the key to making this **Malteser Slice** unforgettable!
Step-by-Step Instructions to Make the Perfect Malteser Slice
Okay, let’s get down to the real business of making this stunning **Malteser Slice**! Although it’s no-bake, you still need to follow a few specific steps to ensure that base sets rock hard and that chocolate topping is glossy and perfect. Don’t try to rush the chilling time, that’s where most people go wrong and end up with a chocolatey mess!
Creating the Biscuit Base for the Malteser Slice
First thing’s first: we tackle the foundation. Take your 200g of digestive biscuits and crush them up really, really fine. I usually put them in a sturdy bag and bash them with a rolling pin, but a food processor works if you’re feeling fancy. Once they are powdery bits, melt your 100g of butter in a small saucepan over the absolute lowest heat you can manage—we want melted, not sizzling butter!
Take that pan off the heat right away, and stir in your crushed biscuits and those 2 tablespoons of golden syrup. Mix vigorously until everything looks like wet sand. Then, grab your 8-inch square tin—make sure you’ve lined it with baking paper first, leaving some overhang so you can lift the whole slice out later! Press that biscuit mixture down into the tin. Use the bottom of a glass or a flat measuring cup to really compact it down. We want this base strong enough to hold up to all that chocolate!
Melting Chocolate and Assembling the Malteser Slice
Now for the good stuff! You need to melt your 100g dark chocolate and 50g milk chocolate together until they are perfectly smooth. If you have a double boiler setup (a heatproof bowl resting over a simmering saucepan of water), that’s the safest way to do it. Just stir slowly and be patient—scorched chocolate is the saddest thing in the world!
If you’re using the microwave (which I totally do when I’m in a rush), do it in 20-second bursts and stir well between each burst. Don’t get tempted to blast it all at once! Once it’s lovely and glossy, gently pour that beautiful melted chocolate over your firmly pressed biscuit base. Try to spread it nice and evenly, but don’t panic if it’s not dead flat.
Finally, the Maltesers! Scatter those 100g of crispy honeycomb spheres all over the top. Just sprinkle them around until the chocolate is covered. They look so fun scattered unevenly. If you wanted a richer syrup for another recipe, you could check out how to make a simple simple syrup, but for this slice, the golden syrup really adds that specific sticky note!
Chilling and Serving Your Finished Malteser Slice
This is the hardest part because you want to eat it instantly, but you absolutely cannot. Place the tin into the refrigerator and let it chill for a good two hours. Sometimes, if my fridge is too full, I leave it closer to three, just to be absolutely sure that chocolate has seized up properly.
Once it’s firm, grab the overhanging paper and gently lift the whole **Malteser Slice** out onto a cutting board. Here’s a trick from my mum: if you slightly warm a long, sharp knife under hot tap water and then dry it quickly, you get the cleanest, sharpest squares possible. Wipe the blade between cuts if you need to. You should get about 16 lovely squares!
Tips for the Ultimate Crunchy Malteser Slice
Even though this **Malteser Slice** is super simple, a couple of little nudges along the way can take it from good to absolutely legendary. These are the things I learned after my first few wobbly batches—you want stability and maximum crunch, right?
First off, don’t just “sprinkle” the Maltesers on top; press them in *very gently* after pouring the chocolate layer. You don’t want them to sink right down to the biscuit base, but a light press ensures they stick fast and don’t just roll off when you try to cut the slice!
And remember that little secret I mentioned earlier about cutting? It’s a game-changer. You must run your knife under hot water, wipe it totally dry, and then slice. This technique heats the blade just enough to glide through the set chocolate without cracking it or squishing the buttery base. It makes those squares look perfect! Trust me, that simple step makes all the difference when serving up this beautiful, crunchy treat.
Storage and Make-Ahead Guide for Your Malteser Slice
So, you made the perfect **Malteser Slice**, now what? Well, good news! This slice is actually even better the next day once everything has really settled down in the fridge. You absolutely must let it chill for those minimum two hours to set properly, but honestly, leaving it overnight is the best thing you can do for the texture.
Keep your leftovers stored in an airtight container. If you stack them, try putting a little piece of parchment paper between the layers so the chocolate doesn’t stick to the next piece. It stays wonderfully fresh and crunchy in the refrigerator for about four or five days. If you manage to have any left that long, that is!
Variations on the Classic Malteser Slice Recipe
While I swear by the classic dark and milk chocolate combo, sometimes you just need to jazz things up a bit! Don’t worry; adapting this **Malteser Slice** is super easy because the base is so forgiving. It’s amazing how a small change can make it feel like a totally new dessert.
If you find dark chocolate too intense with the Malteser’s sweetness, try substituting half of the dark chocolate with white chocolate chips. That gives you a beautiful marble effect when you pour it over the base. Or, for a real decadent treat, swap out some of the milk chocolate for caramel-filled chips. Wow, those melt beautifully!
If you have nuts lying around, toast up a handful of pecans or walnuts and mix them in with the biscuits before pressing them down. That adds another layer of texture that competes nicely with the Maltesers up top. It’s all about customizing your crunch! If you’ve ever made a fruit-based dessert, you know how swapping one main ingredient can change everything, and this holds true here too—though maybe stick to berries instead of trying to mix in things like my favorite fruit cocktail recipe additions!
Serving Suggestions for Malteser Slice
Since this **Malteser Slice** is so incredibly rich and satisfying on its own, you don’t need much fuss alongside it. For me, the perfect pairing is a strong, bitter contrast. A hot mug of black coffee is just unbeatable after a piece of that sweet chocolate base. If you need a little refresher, though, a scoop of really simple, good-quality vanilla ice cream melts beautifully over a chilled square. You can even make a quick espresso boost using some great espresso drink recipes to cut through all that sugary goodness!
Frequently Asked Questions About Malteser Slice
We all have those little niggles when we try a new recipe, especially a **no bake** one where you can’t tell what’s going on inside the fridge! Here are the questions I get asked most often about keeping this **Malteser Slice** perfectly firm and delightfully **crunchy**.
Can I use other biscuits instead of digestive biscuits in this Malteser Slice?
Yes, absolutely! Digestive biscuits are my go-to because they have a nice buttery consistency when mixed with butter, but Rich Tea biscuits work just as well. If you’re leaning towards something firmer, like graham crackers, make sure you crush them just as finely, or they might make your base a little too crumbly when you go to move it.
How long does the no bake Malteser Slice need to chill?
You need patience for this part, but it’s worth it! I insist that you let it chill for a bare minimum of two hours. If you try cutting it before that, you’ll end up with a gooey mess, and you won’t get those gorgeous, clean squares. If your kitchen is warm, give it a full three hours just to ensure that chocolate top is totally set and solid.
Why is my Malteser Slice not firming up?
Usually, this happens for one of two reasons! Either you didn’t chill it long enough (see above!), or you skimped on the golden syrup for the base. The syrup is sticky glue that holds the crushed biscuits together. If you reduced it, your base might be crumbling apart. If the topping is soft, it usually means you didn’t let the chocolate cool slightly before sprinkling the Maltesers on, or you didn’t chill it long enough for the proper set. If you need more ideas for fantastic treats, check out this huge list of cocktail recipes—maybe you can pair a drink with your slice!
Nutritional Estimate for Malteser Slice
Now, I have to be honest with you all. While this **Malteser Slice** is ridiculously easy and tastes like pure joy, it is definitely a treat, not an everyday health food! Who am I kidding, right?
Because we are dealing with butter, chocolate, golden syrup, and those glorious Maltesers, the final counts do change depending on which brand of biscuits you use or how thick you slice your squares. So, I’m not going to list specific numbers here for calories or fat content.
Just know that this is an estimate for one square, and these nutritional values will vary quite a bit based on your specific ingredient choices and exactly how generous you are when you cut them. Treat yourself wisely, my friends—this slice is meant to be enjoyed!
Print
Simple Malteser Slice
- Total Time: 140 min
- Yield: 16 squares 1x
- Diet: Vegetarian
Description
A quick, no-bake slice featuring crushed biscuits, chocolate, and crunchy Maltesers.
Ingredients
- 200g digestive biscuits
- 100g unsalted butter
- 100g dark chocolate
- 50g milk chocolate
- 2 tablespoons golden syrup
- 100g Maltesers
Instructions
- Crush the digestive biscuits finely.
- Melt the butter in a saucepan over low heat.
- Remove the pan from the heat and stir in the crushed biscuits and golden syrup until combined.
- Press the mixture firmly into a lined 8-inch square tin.
- Melt the dark and milk chocolate together in a heatproof bowl set over simmering water (or in short bursts in the microwave). Stir until smooth.
- Pour the melted chocolate over the biscuit base.
- Sprinkle the Maltesers evenly over the chocolate layer.
- Refrigerate for at least 2 hours, or until firm.
- Cut into squares before serving.
Notes
- For a cleaner cut, warm your knife slightly before slicing the chilled slice.
- Store leftovers in an airtight container in the refrigerator.
- Prep Time: 15 min
- Cook Time: 5 min
- Category: Dessert
- Method: No-Bake
- Cuisine: British
Nutrition
- Serving Size: 1 square
- Calories: 250
- Sugar: 20g
- Sodium: 50mg
- Fat: 15g
- Saturated Fat: 9g
- Unsaturated Fat: 6g
- Trans Fat: 0.1g
- Carbohydrates: 28g
- Fiber: 1g
- Protein: 3g
- Cholesterol: 20mg
Keywords: Malteser slice, no bake, chocolate biscuit, easy dessert, crunchy